42
To install PCI option boards:
1. Remove the blanking plate from an available PCI slot.
2. Install the PCI option board. Press firmly to ensure the board seats completely into the riser card
connector.
3. Mount the board to the chassis using the screw removed in step 1 above.
4. After closing the base unit, restart the system. The new PCI board is recognized and configured
automatically.
ISA Option Boards
ISA boards are not designed with internal registers that define the board’s configuration to the system
during startup. Therefore, you must run the System Configuration Utility (SCU) to define the board to
the system. Run the SCU before installing an ISA board to reserve system resources for the board and
to prevent conflicts with option boards already installed. Refer to “Using the System Configuration
Utility” later in this chapter.
To install an ISA board into a desktop system:
1. Remove the system hard disk drive (or its bracket if the disk drive is not installed).
NOTE
ISA Slot 1 can be used only if the hard disk drive is less than 1.6-inches high.
2. If installing the board onto side one of the riser card, remove the blanking plate from the
appropriate slot.
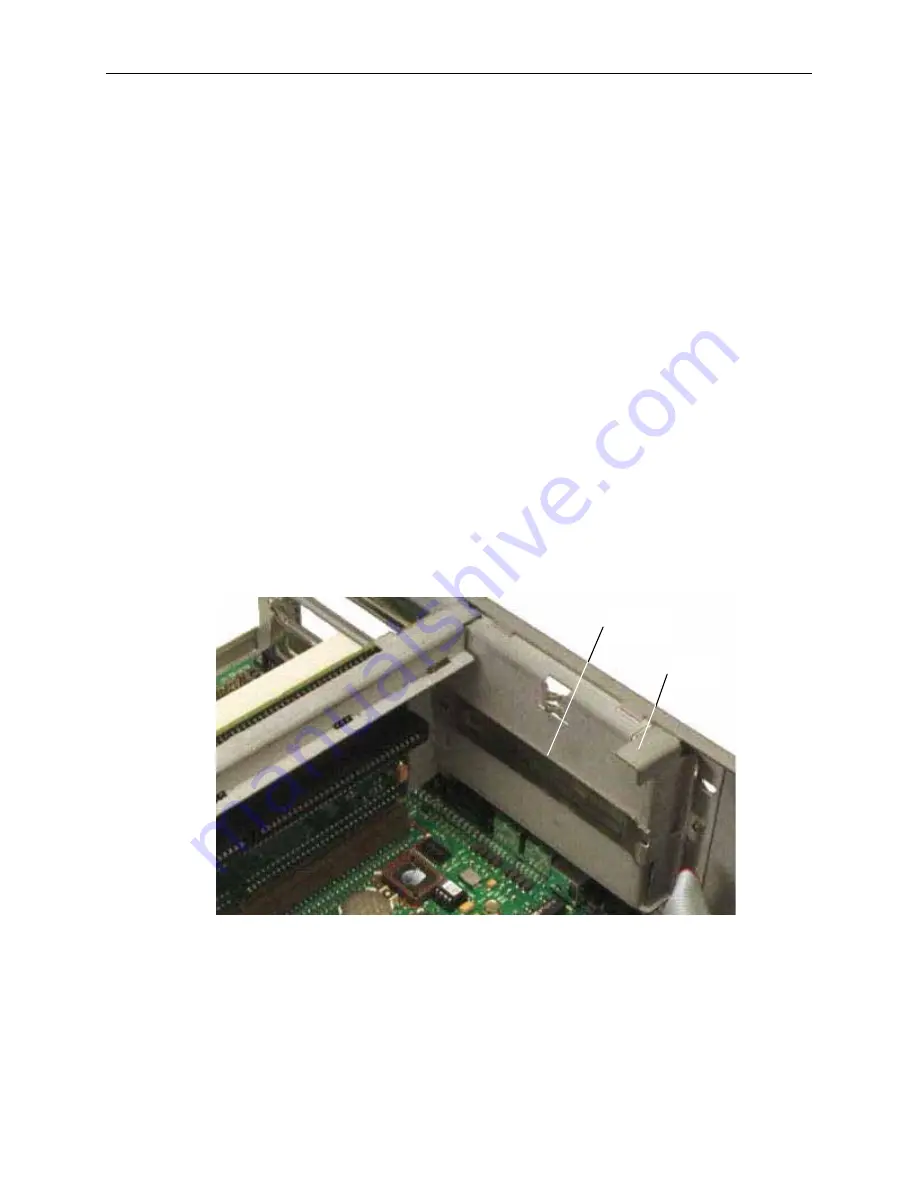
3. If installing the board to side two of the riser card, remove the I/O lock bracket and the blanking
plate from the destination slot, as shown in the following figure.
Blanking
Plate
I/O Lock
Bracket
4. Install the option board. Press firmly to ensure the board seats completely in the slot.
5. Replace the system hard disk drive (or its bracket if the disk drive is not installed).
Содержание TD-x10 Setup
Страница 1: ...TD TDZ x10 InterServe x05 Series System Reference September 1997 DHA018650...
Страница 4: ......
Страница 8: ...viii...
Страница 56: ...46...
Страница 76: ...66...
Страница 92: ...82...


