


74 |
Programming Examples
SceneStation Installation and Programming Guide
Example 7: Program a Button to Activate Multiple Presets
This example demonstrates how to create a button that activates the next preset from a list each
time it is pressed.
This example assumes you have several presets such as 10, 11, 12, 13 that you want the button to
activate, one at a time with each button press.
The following procedure will first create a loop with these presets by setting Preset 13 to loop back to
Preset 10. Then, a button will be assigned to this group with a button mode of “sequential”:
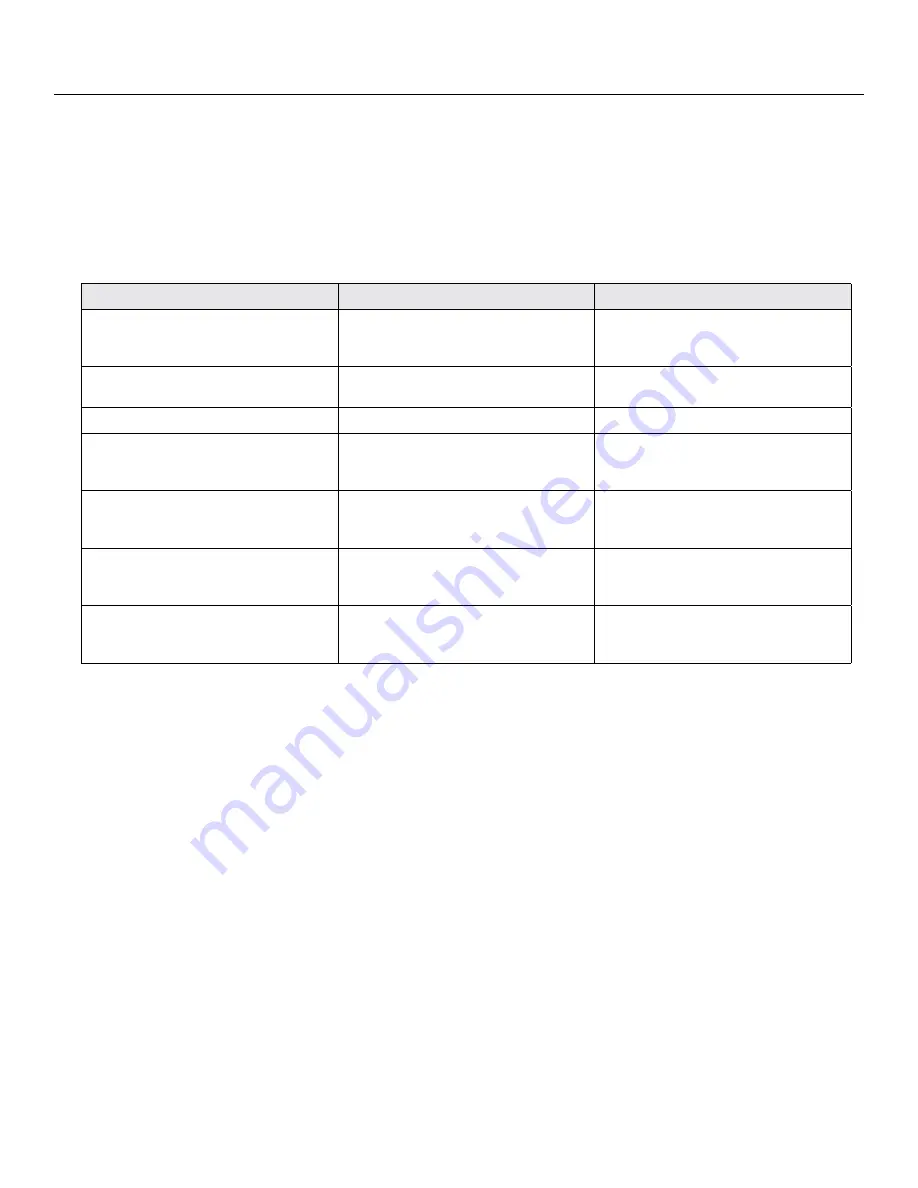
Action
Using SceneStation Studio
Using the Programmer’s Remote
Select the last Preset in the group. In this
example, we’ll edit Preset 13.
Open the station editor window and click
the Presets tab. Then, click on Preset 5
in the list.
Press
EDIT
, and enter two-digit Preset
number, “
13
”. Then, press
LOOP
.
Set the Loop to Preset 10.
Choose Preset 10 in the pop-up menu.
Press
LOOP
, then enter the preset to
loop to. In this example, enter “
10
”.
Store the changes to Preset 10.
N/A
Press
ENTER
to save the changes.
Select the Button to be programmed. In
this example, we’ll use Button 2.
Switch to the Buttons tab. Then, click on
Button 2 in the list.
Press
EDIT
, and then press the physical
button you want to program. The button
will quickly flash White.
Enter the preset number of the Preset you
want this button to activate (Preset 10 in
this example).
Choose “Preset 10” from the Preset
pop-up menu.
Enter the two-digit preset number, “
10
”.
Change the Button Function to
“Sequential”.
Choose “Sequential” from the Function
pop-up menu.
Press
EDIT
followed by the physical
button again. Next, press
OPTION
+
3
to
set the Function to “Sequential”.
Store the changes.
Click on the
Sync
button to send the
changes to the station, or use the
File >
Save
menu to save the changes to a file.
N/A
When this procedure is complete, the first time you press Button 2, the station will activate Preset
10. A second press of Button 2 will activate Preset 11. Then, Preset 12 and 13. A fifth press of the
button will activate Preset 10 again, because of the loop back to Preset 10 from Preset 13.
Содержание SceneStation
Страница 12: ...6 Introduction SceneStation Installation and Programming Guide...
Страница 16: ...10 Installation SceneStation Installation and Programming Guide...
Страница 20: ...14 Hardware Configuration SceneStation Installation and Programming Guide...
Страница 50: ...44 Using SceneStation Studio SceneStation Installation and Programming Guide...
Страница 54: ...48 Using the Front Panel Snapshot Feature SceneStation Installation and Programming Guide...
Страница 72: ...66 Using the Programmer s Remote SceneStation Installation and Programming Guide...
Страница 81: ...SceneStation Installation and Programming Guide Programming Examples 75...
Страница 82: ...76 Programming Examples SceneStation Installation and Programming Guide...
Страница 84: ...78 Appendix A Pairing The Programmer s Remote SceneStation Installation and Programming Guide...
Страница 88: ...82 Appendix B IR Code Specifications SceneStation Installation and Programming Guide...
Страница 94: ...88 Appendix D Self Test Mode SceneStation Installation and Programming Guide...
Страница 96: ...90 Appendix E Warranty Information SceneStation Installation and Programming Guide...


