17
Your Audio Network Server can make new recordings onto the hard
disk either by recording music directly from an audio CD placed in
the CD tray or by recording from another piece of equipment (such
as a vinyl record player) using the line-in connectors on the back
on the unit.
If you are recording directly from the CD tray your Audio Network
Server can access the internet, using either a broadband connection (via
the Ethernet port) or using the built-in modem, to automatically retrieve
information about the CD. This information includes the album name,
artist name, track names and music genre from the Gracenote CDDB
Music Recognition Service and an album cover illustration from the
XiVA on-line service.
If you do not provide an Internet connection you can label the CDs
you record manually.
Recording from a CD
• Press
the
OPEN/CLOSE
key on the front panel to open the CD
tray.
• Place a CD in the tray.
• Push
the
OPEN/CLOSE
key on the front panel.
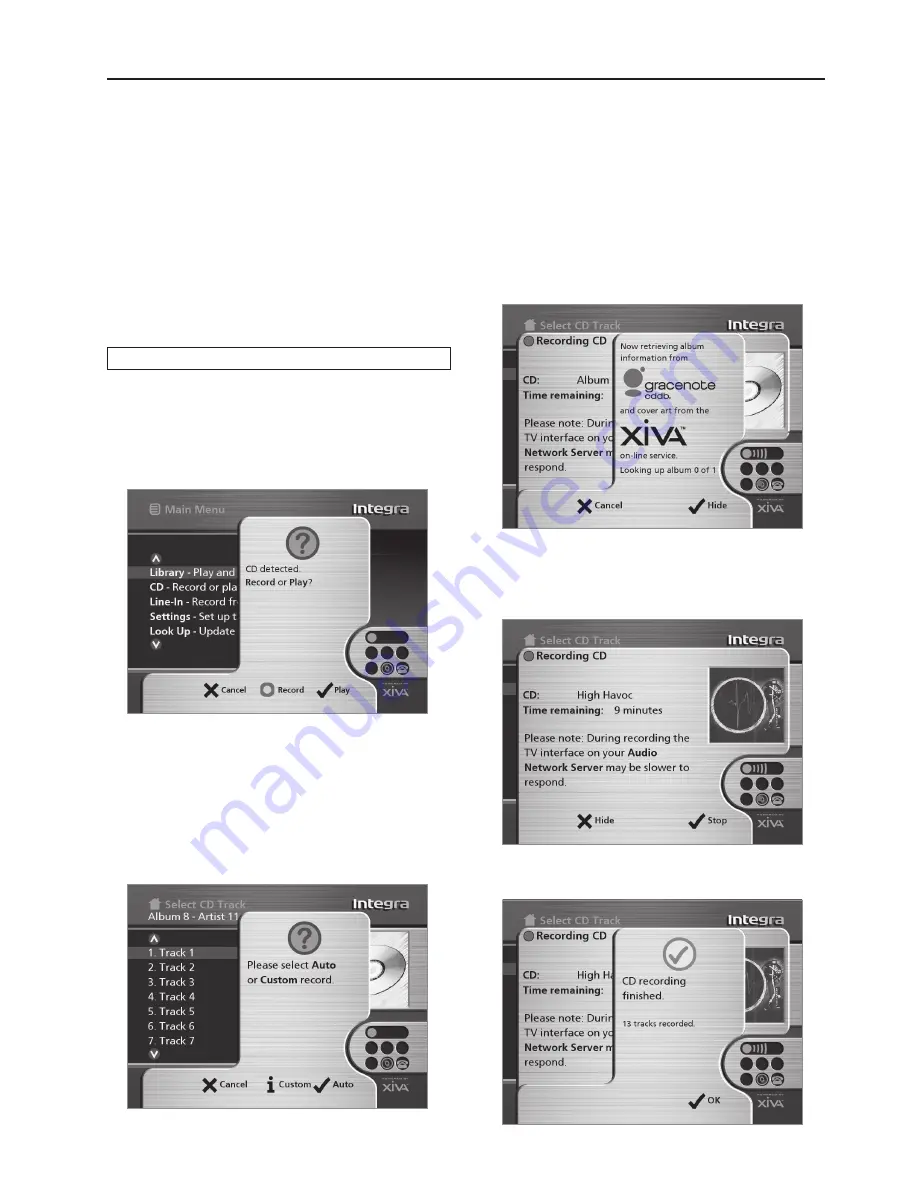
The following prompt is automatically displayed:
• Press
the
K
Record
action key to record the album onto the hard
disk.
Note:
If you already have a CD in the tray, select the
CD
option
from the
Main Menu
to display the contents of the disc; press the
K
Rec. CD
to begin the recording process.
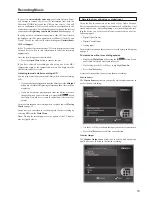
The following display then allows you to choose whether to do an auto
(one-touch) recording of the entire CD, or a custom recording which
allows you to select the tracks you want to record and the recording
quality:
To make an automatic (one-touch) CD recording
• Press
the
5
Auto
key.
An
Auto
recording will automatically look up the track and artist
information on the Gracenote CDDB Music Recognition Service and the
album cover illustration on the XiVA on-line service, and then record all
the tracks on the album.
The quality of the recording is specified in the
Settings
menu (under
Default Recording Quality
). For more information on the settings
menu see
Advanced Settings
on page 30.
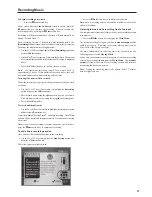
Once recording has begun your Audio Network Server will connect
to the Internet to retrieve the CD information:
Once the search has been completed you will receive a confirmation
to tell you if the CD has been found.
• Press
the
5
OK
key to continue.
The following display shows the approximate progress of the recording:
Once recording is complete the following screen confirms how many
tracks have been successfully recorded.
• Press
the
Open/Close
button to remove the disc.
Recording Music
Содержание NAS-2.3
Страница 40: ......


