


18
19
3.4 Changing Clinical Preferences
WalkAnalyst software allows the clinician to modify default preferences.
Clinical preferences:
The WalkAide unit default preset
values can be changed to individual
preferences. For example, a pediatric
center may decide to set the default
pulse width value to a lower, more
comfortable, level suitable for
pediatric patients.
Report preferences:
WalkAnalyst provides an option to
compare a patient’s gait performance
with the gait of the patient wearing a
brace (such as AFO) or no assisted
device. A preset distance suitable to
the clinical setting, as well as distance
measurement unit, can be changed.
Programming preferences:
You can change the programming option by checking or unchecking the Hide Heel
Programming checkbox. When checked, WalkAnalyst hides all heel programming or heel data
collection options.
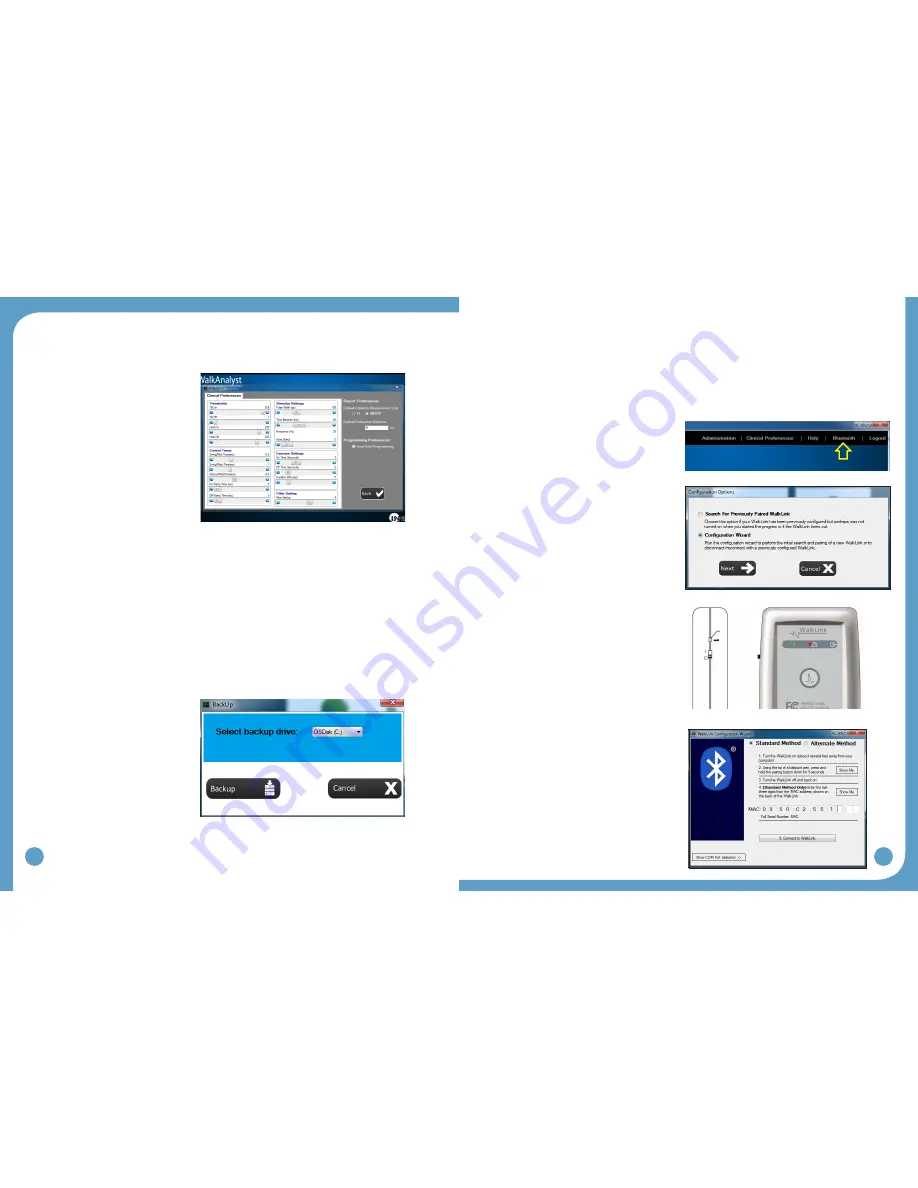
3.5 Backup
The WalkAnalyst software allows you to back up patient data in an external, internal or
network drive. The clinician must have adequate access to save data to the drive.
Steps:
Log on to WalkAnalyst
•
Select Backup Patient Data on the
•
WalkAnalyst home screen
Select the backup drive and press
•
the BACKUP button
Backed up patient files can
•
be located in the <drive>:\
WalkAideBackupYYYY_
Mon_DD folder. (example: e:\
WalkAideBackup2012_Nov_11).
4.0 WalkLink Configuration and Bluetooth Pairing
4.1 Configuring initial set-up process (Pairing)
A one-time link must be created from the computer to the WalkLink. This is called the “pairing
process”. Following the guidelines below to accomplish this process.
Plug in your USB Bluetooth adapter with
•
the computer powered ON.
Start the WalkAnalyst application and log
•
on.
Press the Bluetooth link on WalkAnalyst
•
home screen (see Figure 19).
Select ‘Configuration Wizard’ and press
•
the
Next
button (see Figure 20).
Turn ON the WalkLink: Green flashing
•
light on the face of the WalkLink indicates
the unit is ON. (see Figure 21)
Reset the WalkLink: Using the tip of a pen
•
or pencil, press and hold the unpair button
(see Figure 21) for 3 to 4 seconds. Turn
the WalkLink OFF, wait a few seconds
and turn the power back ON.
•
Standard method
will be applicable
with most computers with Microsoft
Bluetooth stack properly working. (See
the troubleshooting section for pairing a
WalkLink using the alternate method.)
Enter the MAC Address and Connect:
•
Read the last 3 digits of the MAC address
from the back of the WalkLink device and
enter them in the appropriate boxes on
the WalkLink Configuration Wizard screen
(Figure 22) and press the “Connect to
WalkLink” button. Press the “Connect to
WalkLink” button again if WalkAnalyst fails
to find the WalkLink. It may take about a
minute to establish a connection to the
WalkLink. When finished, a confirmation
message will appear. Press OK to
complete the initial configuration. The
WalkLink will show a blinking blue LED.
The blinking green LED and WalkAnalyst
WalkLink indicator will turn blue.
Figure 16: Preferences
Figure 17: Backup
Figure 19: Bluetooth
Figure 20: Select Configuration Wizard
Unpair button
Figure 21: WalkLink unpair button
Figure 22: Configuration Wizard


