EonStor DS B12/B24 Series
115
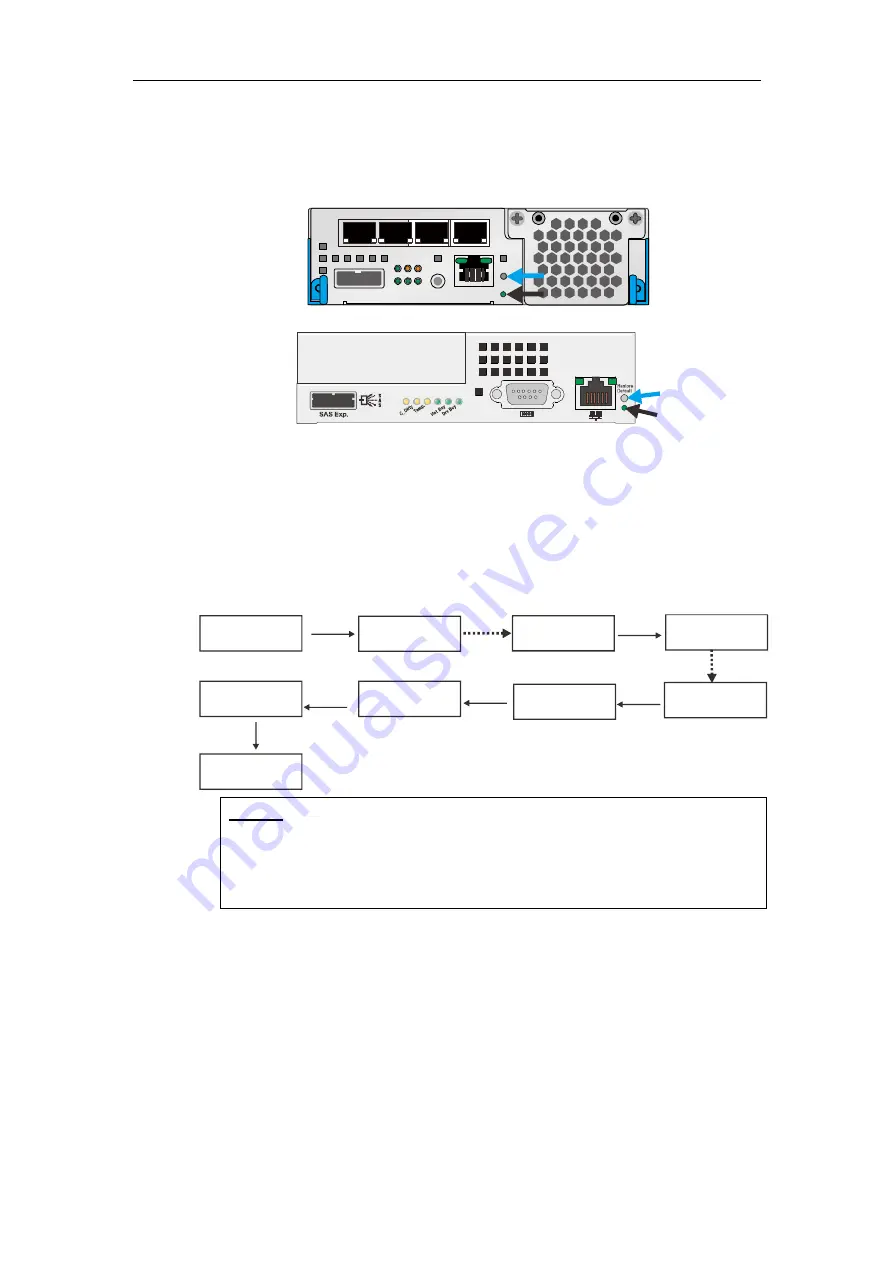
6. Press and hold the Restore Default button (indicated by the
blue arrow
) on
Controller A. You may use a straightened paper clip to press the button. While
pressing the Restore Default button down, power on the RAID system.
Ctr
l St
atu
s
CB
M S
tatu
s
7. When the “
Restore Def.
” LED (indicated by the
black arrow
) turns on and the
“
Default Restored
” firmware event message appear, you may release the
Restore Default button (the system default has been restored).
8. Restore previous settings using the “
Import NVRAM from reserve space
“ or
“
Restore NVRAM from Files
” in the firmware. ID/LUN mapping will be restored.
RAID model No.
Ready
Ent
Ent
Ent
Ent
Import NVRAM
include password?
except password?
Ent
Import NVRAM
in progress
View and Edit
Logical Drives
System
Functions
Import NVRAM from
reserve space
Export NVRAM to
reserve space
Mute Beeper
Controller
Maintenance
Legend
Ent: Press the Enter (Ent) button.
Ent
: Press and hold the Enter (Ent) button for 2 seconds.
---->
:
Press the up and down arrow to scroll to the menu you are after.
*The Single controller system’s restore default procedure is complete.
For
Dual Controller
systems, please continue with the following procedures.
9. Power off the system.
10. Replace Controller A with Controller B (Controller B will be inserted into
Controller A’s slot) While leaving Controller B slot empty with Controller B in slot
A, perform the above steps 1 to 8 to restore Controller B to default settings.
11. Put both Controller A and Controller B into their original positions and power up
the system.


