


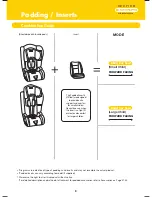


Determine whether your child requires the additional padding provided with this restraint, to
ensure a safe and snug fit in the restraint. Refer to page 6 for suggested padding combinations.
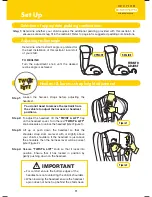
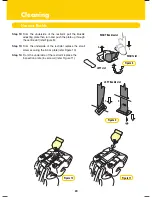
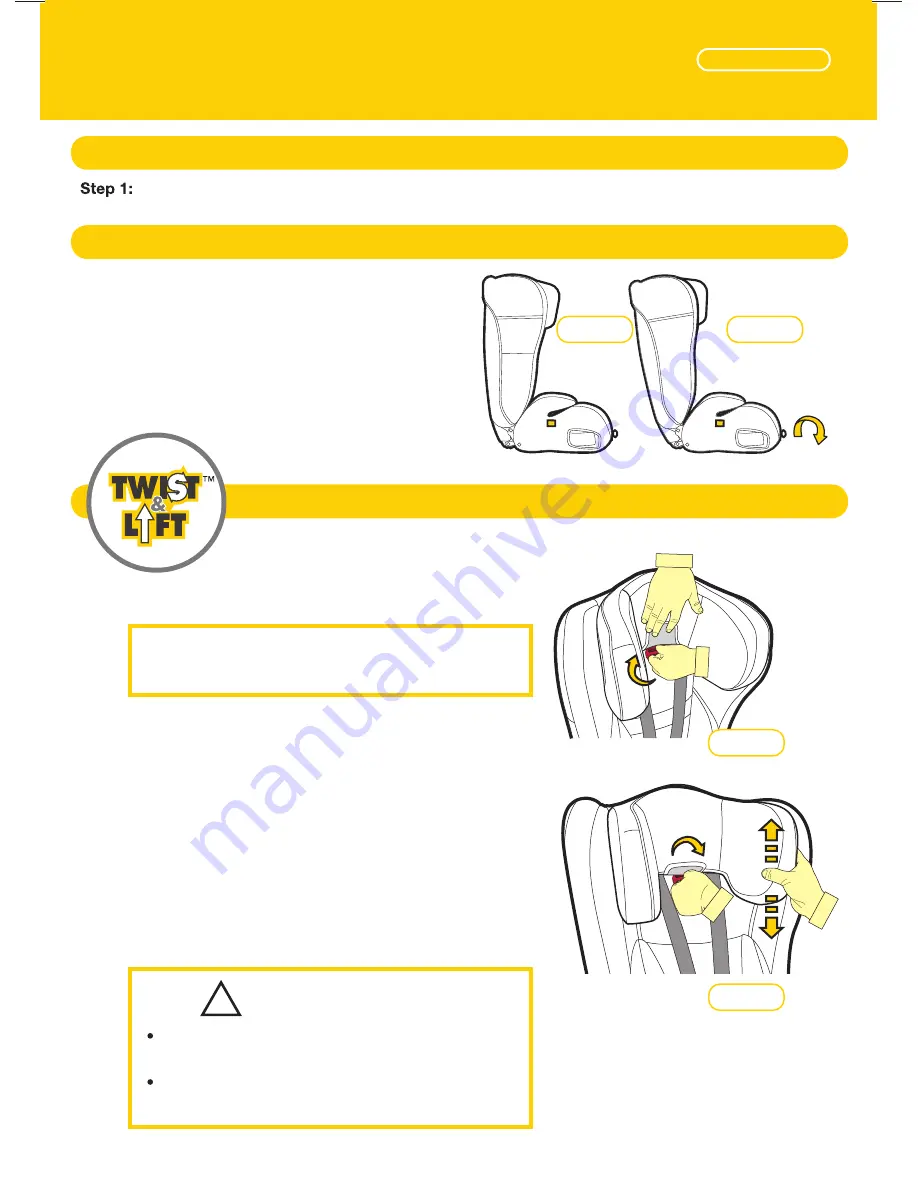
Determine what restraint angle is prefered for
the best installation of this restraint & comfort
of your child.
TO RECLINE
Turn the adjustment knob until the desired
recline angle is achieved.
RECLINE
UPRIGHT
TURN TO
ADJUST
Step 1:
Step 2:
Step 3:
Step 4:
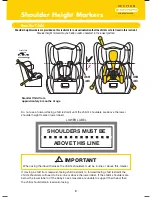
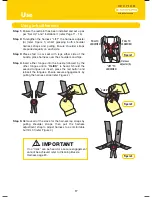
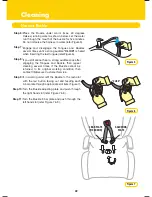
To adjust the headrest, lift the
“TWIST & LIFT”
flap
on the headrest cover. Turn the red
“TWIST & LIFT”
knob clockwise to unlock the headrest (refer Figure 1).
Lift up or push down the headrest so that the
shoulder strap slots are level with or slightly above
your child’s shoulders. If the headrest is just above
the shoulders then the harness level will be correct
(refer Figure 2).
Release
“TWIST & LIFT”
knob so that it locks into
position. Ensure that it has locked in position by
gently pushing down on the headrest.
Loosen the harness straps before adjusting the
headrest.
You do not need to remove the restraint from
the vehicle to adjust the harness or headrest
positions.
IMPORTANT
!
For comfort ensure the bottom edges of the
headrest are not contacting the child’s shoulders.
When lowering the headrest ensure the headrest
apron does not bunch up behind the childs neck.
Figure 1
Figure 2
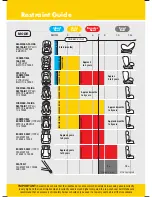
Set Up
Selection of appropriate padding combinations
Adjusting recline angle
Headrest & harness strap height adjustment
S E C T I O N
Child Car Seat
WITH INBUILT HARNESS
11


