

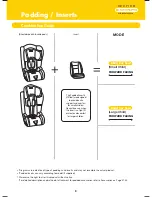


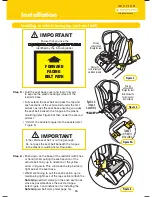
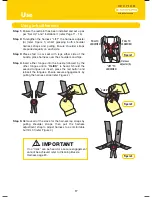

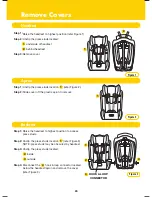

• Fold the seat base cover and foam forward,
to expose the plastic seating surface of the
restraint
base.
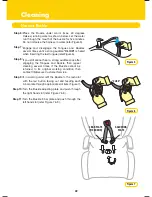
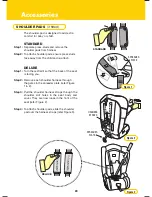
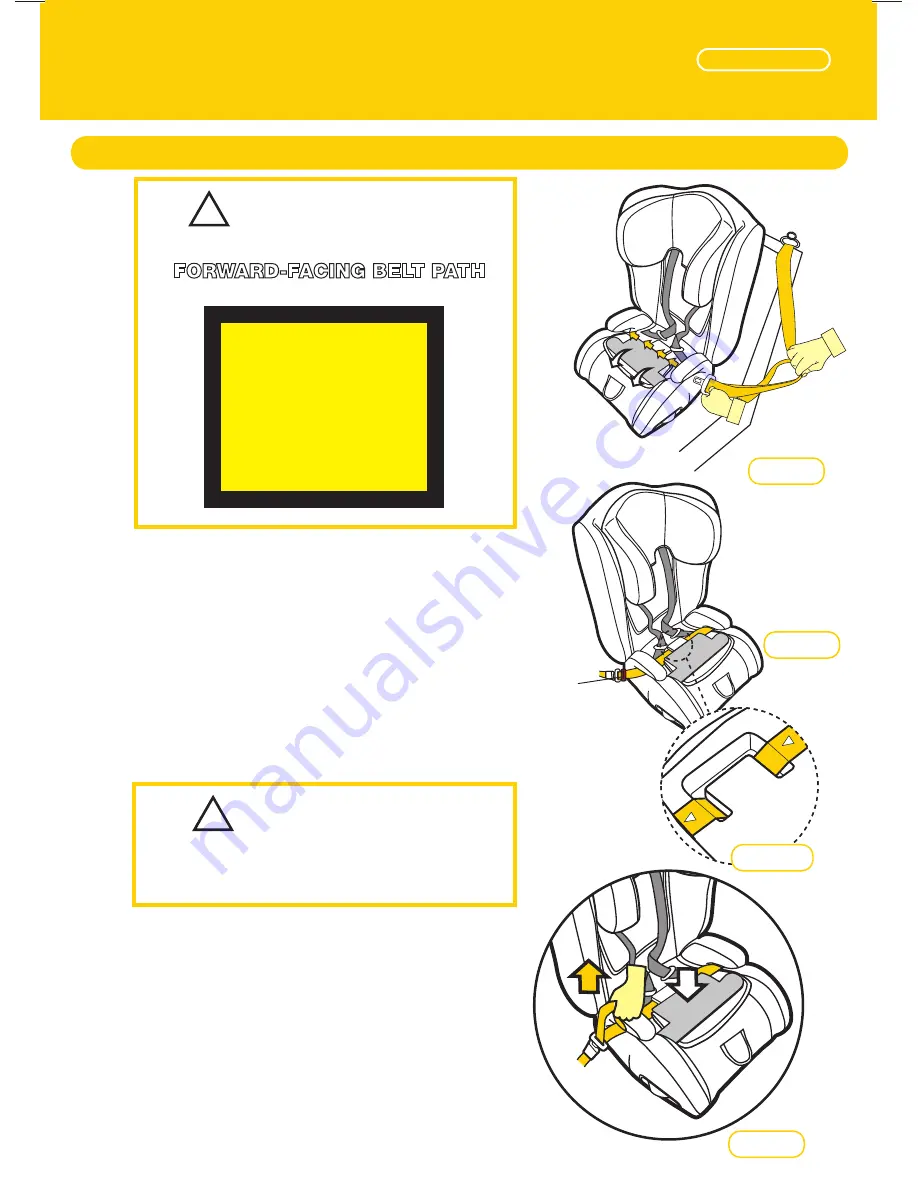
• Fully extend the seat belt and pass the lap and
sash sections of the vehicle belt under the first
armrest, across the seat base ensuring you pass
the seat belt beneath the tongue in the plastic
moulding (refer Figure 5A) then under the second
armrest.
• “CLICK” the buckle tongue into the buckle (refer
Figure 5).
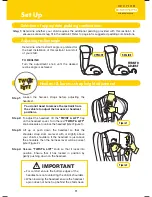
Step 5:
Pass lap
and sash belt
through the seat.
Ensure the
cover & foam pad
are folded forward.
Buckle &
Tongue
Assembly
“CLICK”
Pass lap
and sash belt
through the seat.
Note: Ensure the
belts are under
foam padding.
Figure 4
Figure 5
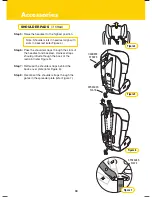
Figure 6
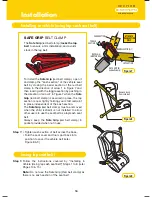
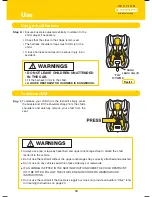
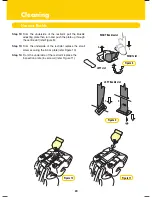
• Push down on the base of the restraint (with knee
or hand) whilst pulling the sash section of the
vehicle belt firmly up in direction of the yellow
arrow in Figure 6. This will make the lap belt very
tight across the seat base.
• Whilst continuing to pull the sash section up (i.e
maintaining tightness of the lap section) attach the
Safe Grip
(red belt clamp) on the sash section as
close as possible above the buckle tongue.
(refer Figure 7 and instruction for installing the
Safe Grip
red belt clamp refer page 16).
Step 6:
Installation
IMPORTANT
!
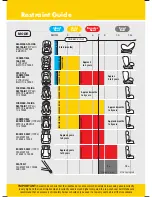
Ensure that you use the
FORWARD-FACING BELT PATH
identified by the following label.
FORWARD
FACING
BELT PATH
Installing in vehicle (using lap-sash seat belt)
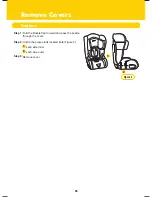
TONGUE
IN PLASTIC
MOULDING
Figure 5A
S E C T I O N
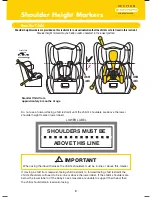
Child Car Seat
WITH INBUILT HARNESS
IMPORTANT
!
If the vehicle seat belt is not long enough.
Do not pass the seat belt beneath the tongue
in the plastic moulding (refer Figure 5A).
15