


16
IVEX Series Explosion Proof Camera Manual
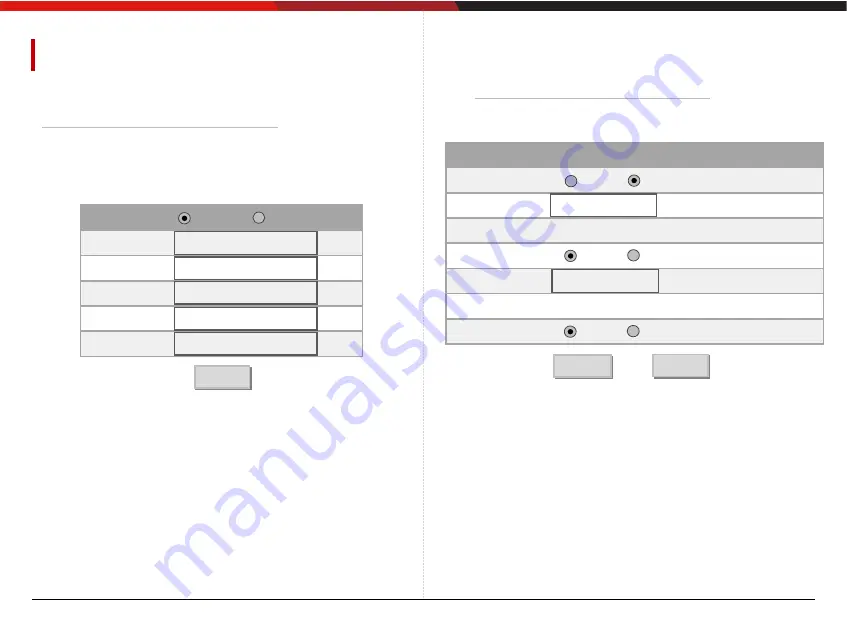
IP address change
•
When selecting Fixed IP in IP setting, all settings except
DNS must be entered in the setting window as shown in the
figure above.
•
At this time, the gateway of the PC to which the router
and web viewer are to be connected must match the camera.
•
The IP address must also match the camera with all numbers
except for the 4th digit address, such as 192.168.1.X.
•
It takes about 30-40 seconds for the settings to be applied.
If you do not want to apply the changed contents, you can
cancel the changed contents by clicking the Back button.
•
Dynamic IP (DHCP) setting does not require the above IP setting.
Change Web Port
•
Go to Basic Setting → IP Address.
Service
IP Address
192.168.1.20
Subnet Mask
255.255.255.0
Gateway
192.168.1.1
DNS 1
168.126.63.1
DNS 2
168.126.63.2
IPv4
Apply
Fixed IP
Dynamic IP
HTTP
HTTP Enable
HTTP Port
80 (Default: 80, 80 ~ 65535)
HTTPS
HTTPS Enable
HTTPS Port
443 (Default: 443, 443 ~ 65535)
SHA256
SHA256 Enable
Used
Used
Not Used
Not Used
Used
Not Used
•
Go to Basic Setting → Web Port.
Apply
Return
•
The default setting of Web Port is as shown in the figure.
•
The HTTP port is for web access, video streaming,
and playback.
•
The HTTP port is the network port that the PC uses to access
the product's web page, and can be used by specifying a port
in the range of 80 to 65535.
The default is 80
•
The above setting can be changed by the user,
but the port is a general setting, so the manufacturer is
not responsible for any problems caused by the change.
•
SHA256: Set whether to use SHA256 encryption.
•
Both HTTP Port and HTTPS Port cannot be set to Disable.
Either of them must be enabled.
NETWORK setting


