


16
Press the
button to enter the menu.
Press buttons
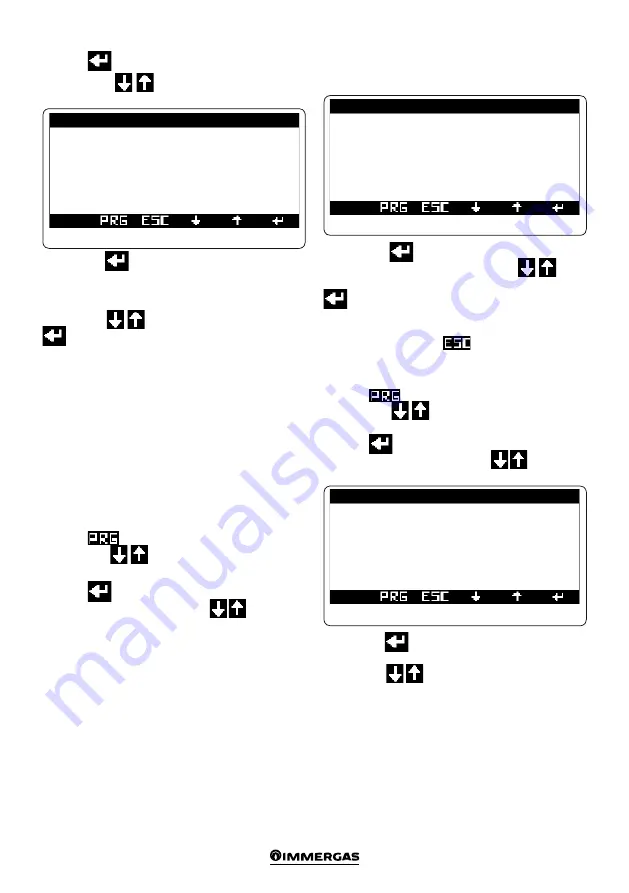
to access screen “Comfort T.
Ranges”.
T . c o m f o r t c l i p s
K 0 2
CALENDAR 1
F1: 00:00 - 00:00
F2: 00:00 - 00:00
F3: 00:00 - 00:00
F4: 00:00 - 00:00
Fig. 2-17
Press button
for the time of the first of the 4 time
ranges to start blinking, with which it is possible to
define the system's switch on and off time to maintain
Comfort temperature.
Press arrows
to change the time. Press button
to confirm the change and move to the next time
range.
Proceed in the same way to set the next time slots.
N.B.
: the clips can be changed with a minimum time
of 15 minutes.
In the event of not using all 4 time slots, set the unused
ones with switch on and off time set to “00:00”.
Proceed in the same way to program all days of the week.
In the event programming should be repeated it may be
copied from an already programmed day following the
instructions in
Paragraph “2.5.2
Weekly hourly program”.
2.5.2 Weekly hourly program
Press the
button to enter the navigation menu.
Press buttons
until selecting menu “03. TIME
SLOTS” (
Fig. 2-6
).
Press the
button to enter the menu.
Scroll through screens with buttons
until access-
ing the menu “Program for zone 1.” (
Fig. 2-18
).
Time slots (Calendars from 1 to 4) are assigned to Zones
and DHW in these menus.
Therefore each day may be personalised with 4 different
operating programs.
For convenient selection, the bottom part displays the
graphics of the relevant calendar being selected (
Fig.
2-18
).
Fig. 2-18
T . c o m f o r t c l i p s
K 0 6
Z1:
Mon: CAL1
|
Tue: CAL1
Wed: CAL1
|
Thu: CAL1
Fri: CAL1
|
Sat: CAL1
Sun: CAL1
Press button
for the calendar to be assigned to
Monday to start blinking. Press arrows
to set
the desired calendar for zone 1 on Monday. Press button
to confirm and go to the next day.
Proceed in the same way to set calendars of individual
days of the week for individual zones and /or DHW.
At the end press button
twice to go back to the
main screen.
2.5.3 Holiday program
Press the
button to enter the navigation menu.
Press buttons
until selecting menu “03. TIME
SLOTS” (
Fig. 2-16
).
Press the
button to enter the menu.
Scroll through screens with buttons
until access-
ing the menu “Time slots”.
T i m e s l o t s K 1 1
Holiday period:
30/06/11 - 30/06/11
Enable holiday: No
Fig. 2-19
Press button
for the figure indicating the start date
of the holiday to start blinking.
Press arrows
to set day/month/year.


