background image

35 

Recording Interval for Static Data 
Elevation Mask 
Check and Update Receiver Firmware 

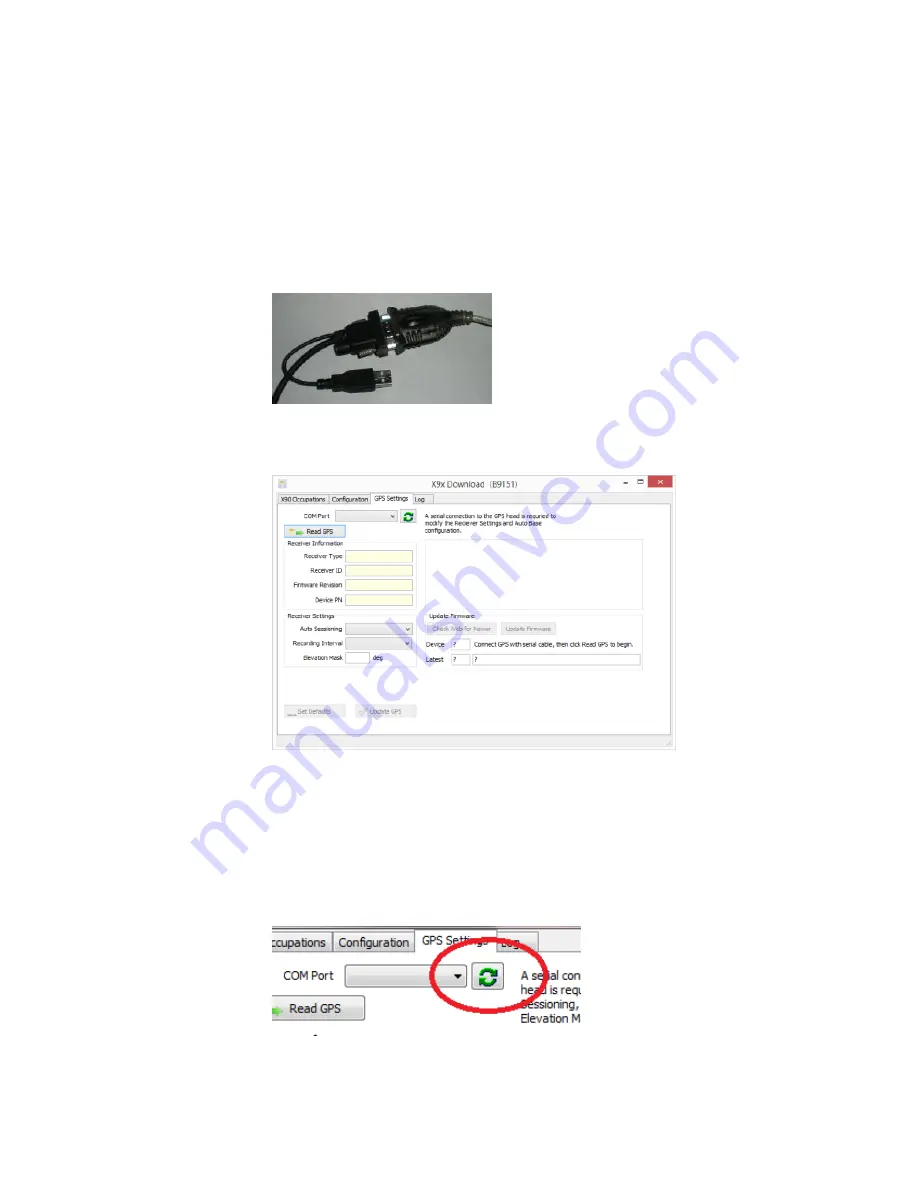
To configure the GPS settings, first connect the GPS receiver 
to your computer using the 'Serial Port' connector. If your 
computer does not have a built-in serial port, you will need 
to use a 'USB to Serial' converter. (Follow the installation 
instructions for your 'USB to Serial' converter.) 


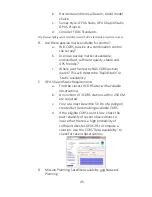
Turn on the GPS receiver, check the 'Show Advanced 
Settings' checkbox and select the 'GPS Settings' tab: 


The configuration tool should automatically detect the 
correct COM (Serial) port number. If you have more than 
one serial port, you may need to manually adjust the 'COM 
Port' setting to match the port that the GPS is connected to. 

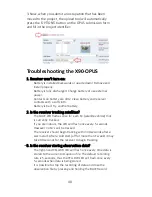
If you plug a USB-to-serial port adapter into your computer 
after starting the download tool, press the refresh button: 


Содержание X90-OPUS

Страница 1: ......

Страница 2: ...2 X90 OPUS Static GPS Receiver User Manual Revision I 2014 05 27D B9165...

Страница 3: ...t and brand names mentioned in this publication are trademarks of their respective holders FCC Notice CHC X90 OPUS GPS receivers comply with the limits for a Class B digital device pursuant to the Par...

Страница 4: ...OPUS and OPUS RS 16 Downloading Processing and Archiving Data 18 Installing the Download Tool 18 Downloading Data from X90 OPUS GPS 18 Starting the X9x Download Tool 20 Using the Download Tool 20 Subm...
Страница 5: ...s 43 Getting ready to use OPUS 44 Using OPUS Projects 47 Troubleshooting the X90 OPUS 48 1 Receiver won t turn on 48 2 Is the receiver tracking satellites 48 3 Is the receiver storing observation data...
Страница 6: ...ing price outstanding performance and easy to use features we know that the X90 OPUS will be a valuable tool that quickly pays for itself This guide is designed to help you familiarize yourself with y...

Страница 7: ...After 30 seconds the blue LED will flash once for every tracked Satellite 4 Verify that the yellow Files LED flashes once every 5 seconds as the receiver logs data 5 Let the receiver record data for...

Страница 8: ...ccupation set the Point ID the Description and the HI push the Submit to OPUS button 12 When prompted press OK then Control V to paste the file location and name then press the Enter key on your keybo...

Страница 9: ...eady to record OPUS compatible static raw data sets Each receiver kit includes these items Carrying Case This User Manual X90 OPUS GPS Head Two Lithium Ion Batteries GPS to PC Data Cable Serial USB an...

Страница 10: ...nted for 1 year Batteries are warranted for 90 days Please see the full warranty at the end of this manual for details Advanced replacement programs are available for mission critical applications Ser...

Страница 11: ...ife DO NOT leave the X90 OPUS or accessories inside a vehicle in the summer Temperatures higher than 160 F will permanently reduce battery capacity and battery life Battery Safety and Disposal The bat...

Страница 12: ...an water and seek medical attention Do not rub your eyes If battery fluid gets onto your skin or clothing immediately use clean water to wash off the battery fluid Batteries Two Lithium Ion batteries...

Страница 13: ...ower When the LED s stop blinking the batteries are fully charged It is okay to leave charged batteries in the charger for extended periods of time TOO COLD Do not leave charged or uncharged batteries...

Страница 14: ...ecting data to not collecting data The yellow Files LED will stop flashing when recording stops When the receiver is not recording pressing the record button again for one second will open a new obser...

Страница 15: ...times then after 1 second once more After the Blue SV s LED flashes three times the receiver will automatically begin searching for satellites When enough satellites are found to determine the receive...

Страница 16: ...upations longer than 4 hours you should provide external power to the receiver with the included battery clips or the power supply 1 Place a freshly charged battery into the receiver 2 Place the recei...

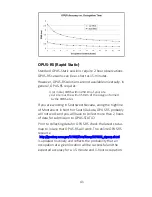
Страница 17: ...Minimum of 15 minutes Maximum of 2 hours OPUS STATIC Minimum of 2 hours Maximum 48 hours 4 hours suggested minimum Remember that the data is going to be decimated to 15 second intervals It is best to...

Страница 18: ...ve of your computer and the installation tool should automatically run Follow the on screen instructions to install the download tool and the X90 OPUS support tools on your computer You can always get...

Страница 19: ...oPlay dialog close it by clicking on the red X in the upper right corner The first time you attach an X90 OPUS receiver you may need to wait up to 2 minutes for standard device drivers to be downloade...

Страница 20: ...The program will automatically switch to the _New project and download every new file from your receiver As the HCN binary files are downloaded from the receiver they are automatically converted to R...

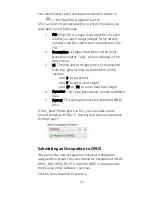
Страница 21: ...ch is the distance from the ground mark to the bottom of the receiver add F to enter feet add S to enter slant height add SF or FS to enter slant feet height 4 Operator This value gets placed in expor...

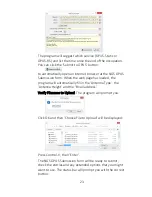
Страница 22: ...upload to OPUS 1 the file is decimated to 15 second epochs header information is stuffed 2 the file is run through TEQC to insure it will be acceptable to OPUS 3 an Observation file and a Navigation...

Страница 23: ...e web page has loaded the program will automatically fill in the Antenna Type the Antenna Height and the Email address Verify Filename to Upload The program will prompt you Click OK and then Choose Fi...

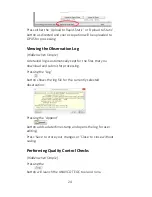
Страница 24: ...ally kept for the files that you download and submit for processing Pressing the Log button shows the log file for the currently selected observation Pressing the Append button adds a date time stamp...

Страница 25: ...n in a window You can press the TEQC Help button to download the User Guide for TEQC from the UNAVCO web site Advanced Download Settings Configuring the Download Tool Click on the Configuration At a m...

Страница 26: ...of the data is stored The default location is in your Documents folder in a folder named X90 OPUS The download tool will create a sub folder for each Project that you add In addition there are always...

Страница 27: ...he Windows operating system does include a tool to decompress them GPS Mounts on Drive This is the drive letter that the GPS receiver was last found on Don t worry if the drive letter changes the prog...

Страница 28: ...ccupation later this is just the default If you ALWAYS use a 2 meter range pole then this value will always be 2 000 and you won t have to worry about HI blunders FEET If you measure up in feet you ca...

Страница 29: ...re is placed into every RINEX file that is exported The correct default value for the X90 OPUS receiver is CHC X90D OPUS which is listed in the IGS table http igscb jpl nasa gov igscb station general...

Страница 30: ...imating the RINEX file before upload it is reduced to 1 6th the size This makes the upload process much faster while having no impact on the resulting solution Observations submitted to RTX are decima...

Страница 31: ...the GPS Settings and Log tabs Typically you will never need to use the Advanced functions PPP Service Hidden when Simple The X90 Download tool supports several PPP Precise Point Positioning services...

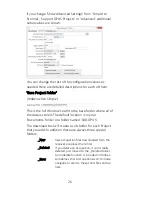
Страница 32: ...observation number 14 is the year and O indicates an observation file Format Extended Only shown when PPP Service OPUS The NGS returns three styles of reports Standard Single Page Report Extended Stan...

Страница 33: ...he HcRINEX tool in manual mode You can browse for HCN files and manually convert them to standard RINEX files Results are always placed in a subfolder named RINEX under the file to be converted 3 Mark...

Страница 34: ...Settings Advanced When Advanced is selected two additional tabs will be displayed The Log Tab The Log tab shows detailed results of the current program operation It may be useful to debug some aspect...

Страница 35: ...the installation instructions for your USB to Serial converter Turn on the GPS receiver check the Show Advanced Settings checkbox and select the GPS Settings tab The configuration tool should automat...

Страница 36: ...ange the settings as required for your application When you have made your selections click on the Update GPS button to send the changes to the GPS receiver Additional details for each of these settin...

Страница 37: ...than 10 degrees There is a benefit to having the receiver track satellites for as long as possible as they rise to 10 degrees We don t want to start tracking at the exact moment that OPUS begins to u...

Страница 38: ...firmware version is shown the Check Web for Newer will be enabled Click on The program will check the internet for a newer version of GPS control software If updated firmware is available the new fir...

Страница 39: ...be downloaded and a short instruction screen is shown Click on OK The firmware uploader tool will be displayed Click on the Update button Turn on the GPS receiver After 5 seconds the blue bar will sl...

Страница 40: ...nput and uses software which computes coordinates for NGS Continuously Operating Reference Station CORS network The resulting positions are accurate and consistent with other National Spatial Referenc...

Страница 41: ...Southwest Nevada along the highline of Montana or in North or South Dakota OPUS RS probably will not work and you will have to collect more than 2 hours of data for submission to OPUS STATIC Prior to...

Страница 42: ...ss your occupation yet In general the solution is nearly always the same Wait until more data becomes available and resubmit your job If you are processing OPUS RS jobs in an area with very few CORS s...

Страница 43: ...S 0 011 m REF FRAME NAD_83 2011 EPOCH 2010 0000 IGS08 EPOCH 2014 2452 X 2184137 494 m 0 003 m 2184138 362 m 0 003 m Y 3839941 381 m 0 001 m 3839940 177 m 0 001 m Z 4585410 516 m 0 005 m 4585410 529 m...

Страница 44: ...d Feet you can convert them however be careful to convert to International Feet or U S Survey Feet as required by your State and application US Survey Feet Meters 3937 1200 International Feet Meters 0...

Страница 45: ...y NGS CORS active marks This will determine Rapid Static or Static availability C OPUS Rapid Static Requirements a Find the closest 9 CORS sites with available observations b A minimum of 3 CORS stati...

Страница 46: ...ry available o Batteries fully charged plus battery to receiver cables with 12V external battery o Compass for orienting receiver to North current declination o Fixed Height Tripods Bubbles calibrated...

Страница 47: ...ol can assist you when uploading files 1 Turn ON OPUS Projects support On the Configuration tab set Show Advanced Settings to Support OPUS Projects 2 Add the NGS registered OPUS Projects Project Ident...

Страница 48: ...satellites The BLUE LED flashes once for each SV satellite vehicle that is currently tracked If you are indoors the LED will flash once every 5 seconds However no SV s will be tracked The receiver sh...

Страница 49: ...SB port D Use an external USB Hub this fixes intermittent disk mounts but we don t know why E Try other computers F Try turning off your PC wait a minute and then turn on again Reinsert the USB cable...

Страница 50: ...e GPS receiver PIN Signal Name Description 1 TXD Transmit Data PC receive data through this pin 2 RXD Receive Data PC transmit data through this pin 3 PWR External Power Input 9 15 V DC 4 PWR External...

Страница 51: ...face cable includes connections for GPS USB Serial and External Power Interface Cable External Power Battery Clips External power should be in the range 9 VDC to 18 VDC The supplied battery clip cable...

Страница 52: ...enna Calibration The NGS National Geodetic Survey calibration for the X90 OPUS is CHCX90D OPUS L1 Offset 089 3 mm L2 Offset 101 7 mm Radius 0 117 M 0 386 Ft Slant Measurement Point height above ARP 0...

Страница 53: ...I Meters 0 3048 2 0 14900 0 155 Where is the slant height in feet Example If Slant 4 500 Ft then HI 1 319 3 Meters 4 3284 Ft Metric HI Meters 2 0 013689 0 047 Where is the slant height in meters Examp...

Страница 54: ...F 30 C to 60 C Storage 40 F to 160 F 40 C to 70 C Waterproof and Dustproof IP67 protected from temporary immersion to depth of 1 meter receiver floats Shock and Vibration Survives 2 meter drop onto co...

Страница 55: ...warranty whichever is longer Software IMC warrants that software products included with hardware products will be free from media defects for a period of 30 days from the date of shipment and will sub...

Страница 56: ...y or any implied warranty even though caused by negligence or other fault of IMC or negligent usage of the product In no event will IMC be responsible for such damages even if IMC has been advised of...

Отзывы: