Mini Barcode Scanner
Instruction for BIM and USB Output Mode
17
⑩
Choose the symbol required, and
enable Prefix
, shown in “The 20th” picture, then click
“SUBMIT”, the setting is finished( the same method to set Suffix).
⑪
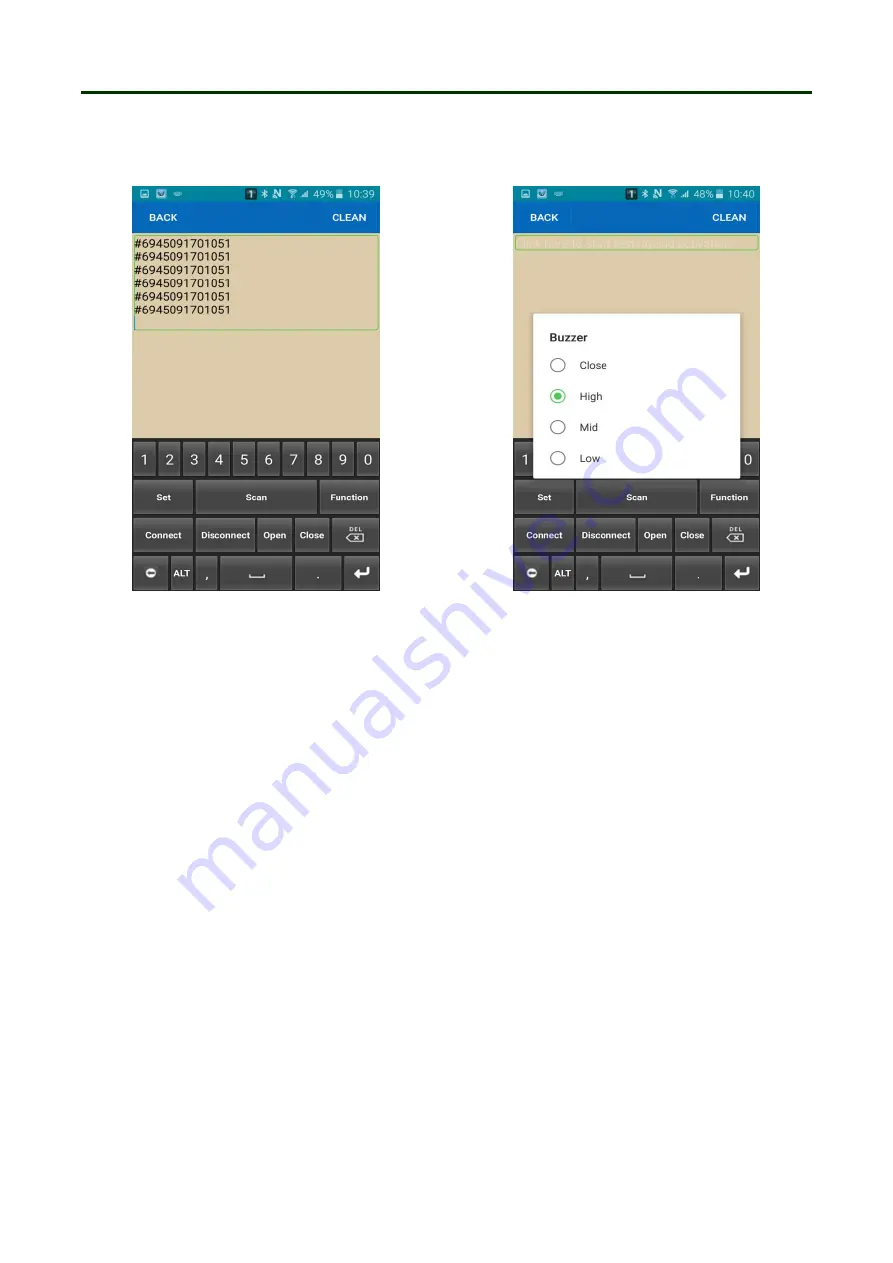
Now you can scan barcode, shown in “The 21th” picture.
The 21th
The 22th
Note: The default suffixes are CR and LF, please put your suffix in front of the default suffix.
⑫
Buzzer: Click “ Buzzer”, and choose the Volume required, shown in “The 22th” picture.
Note: When you configure the barcode reader, please keep the scanner is active mode, the method
is: click the scan button on the barcode reader every 2-3 seconds, but don’t read any
barcodes.
●
USB output mode
If you want to connect scanner via USB cable, you need to set scanner in USB mode. Please
follow the steps below
:
1. Turn on the barcode reader, and read the barcode “USB output mode”
2. Connect scanner with computer/Android device through the USB/OTG cable.
3. Buzzer beeps for three times, and yellow LED lights flash for three times, means the
connection is successful, now you can use it in Notes/office files or other cursor blinking
position.
Содержание M100
Страница 24: ...Mini Barcode Scanner Date and Time settings 24 Setting separative sign between Barcode data Date and Time ...
Страница 27: ...Mini Barcode Scanner Numeric barcode for setting 27 Numeric barcode for settings ...
Страница 28: ...Mini Barcode Scanner Other settings 28 2 Buzzer Volume setting 3 ID setting ...
Страница 29: ...Mini Barcode Scanner Other settings 29 4 Other settings ...


