SP310
User Manual
Rev.1.0
27
Chapter 7 Windows Driver Installation
7.1 Introduction
This chapter provides information on installation according to the PC operating system (OS).
This driver support for these following operating systems:
Microsoft Windows 10 (32 bit/64 bit)
Microsoft Windows 8 (32 bit/64 bit)
Microsoft Windows 7 SP1 (32 bit/64 bit)
Microsoft Windows Vista SP2 (32 bit/64 bit)
Microsoft Windows Server 2012(64 bit)
Microsoft Windows Server 2008 R2
Microsoft Windows Server 2008 SP2 (32 bit/64 bit)
Microsoft Windows Server 2003 R2 SP2 (32 bit/64 bit)
7.2 Installation
Note: Under different operating systems, the screen has a slight difference. Please
operate it according to the tips. Take SP310 (Windows 7) for an example. Recommend to
close the security software before installation in case of preventing installation.
1. Select one interface to connect your printer to the computer.
2. Turn on the printer check if it is connected successfully.
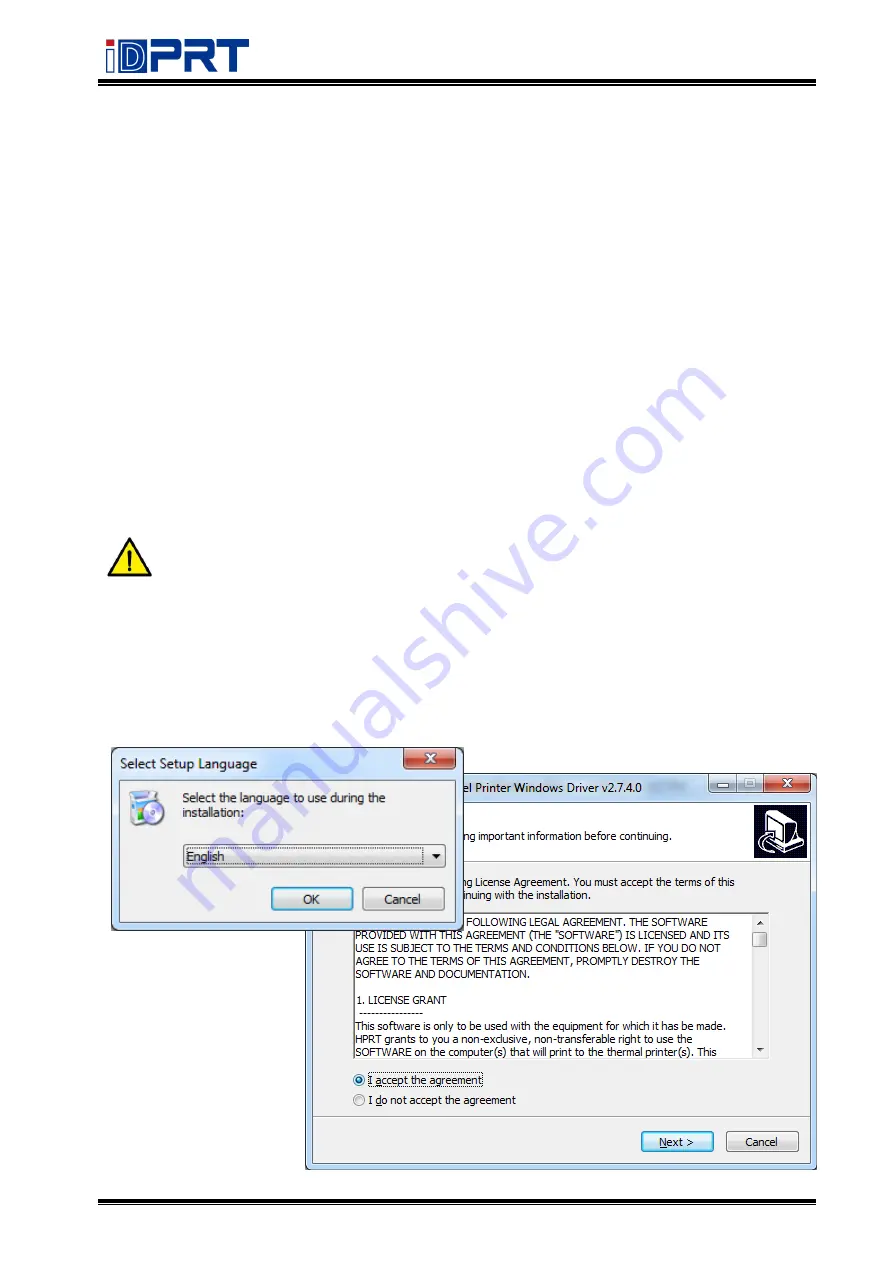
3. Double-click Seagull Driver.
4. R
ead
and agree with
the EULA, click “Next”.
Содержание SP310
Страница 9: ...SP310 User Manual Rev 1 0 9 1 2 Appearances and Components...
Страница 10: ...SP310 User Manual Rev 1 0 10 1 3 Dimension...
Страница 19: ...SP310 User Manual Rev 1 0 19 4 3 Serial Interface PIN No Signal name 1 RTS 2 RXD 3 GND 4 TXD...
Страница 34: ...SP310 User Manual Rev 1 0 34 3 Speed 4 Test...
Страница 35: ...SP310 User Manual Rev 1 0 35 5 Media Handling 6 Media Type...
Страница 36: ...SP310 User Manual Rev 1 0 36 3 Click Watermark it recommends to use BMP format...
Страница 37: ...SP310 User Manual Rev 1 0 37 4 Click Halftone Click Brightness to adjust the brightness...
Страница 40: ...SP310 User Manual Rev 1 0 40 3 Click Ports then select the port according to your needs...
Страница 41: ...SP310 User Manual Rev 1 0 41 4 Click Advanced to set the available time for the printer...
Страница 46: ...SP310 User Manual Rev 1 0 46 4 Type in the password of your computer...
Страница 48: ...SP310 User Manual Rev 1 0 48 8 Under Printer Scanner printer SP310 is available...
Страница 54: ...SP310 User Manual Rev 1 0 54 2 Describe printer then click Apply 3 Select whether to print a test page...
Страница 56: ...SP310 User Manual Rev 1 0 56 Access Control Select the item for detailed setting...
Страница 58: ...SP310 User Manual Rev 1 0 58 Job Options Select the item and the printer will execute appropriate action...
Страница 59: ...SP310 User Manual Rev 1 0 59 Ink Toner Levels...
Страница 62: ...SP310 User Manual Rev 1 0 62 4 Click Next 5 Read and accept the license agreement then click Next...
Страница 63: ...SP310 User Manual Rev 1 0 63 6 Select Features and installation location then click Next 7 Click Install...
Страница 64: ...SP310 User Manual Rev 1 0 64 8 Click Finish...
Страница 68: ...SP310 User Manual Rev 1 0 68 7 Select the item shape then click Next 8 Edit the template size then click Next...
Страница 74: ...SP310 User Manual Rev 1 0 74 4 Click Next 5 Click Install...
Страница 76: ...SP310 User Manual Rev 1 0 76 11 3 Label Edit 1 Double click the icon 2 Click New to create a new template...
Страница 77: ...SP310 User Manual Rev 1 0 77 3 Set up the page according to your needs then click Next...


