SERVICING
25
Mexico Slimline CF440 -
Installation & Servicing
REPLACEMENT OF PARTS
MEX 2264
37 PILOT BURNER REPLACEMENT
35 GENERAL
When replacing any component:
1.
Isolate the electricity supply.
2.
Remove the lower front panel and grille
assembly.
3.
Turn off the gas supply at the boiler.
Note.
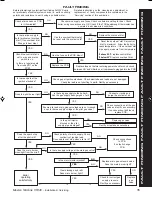
In order to assist fault finding, the control box PCB is fitted
with 2 indicator lights which represent the following boiler conditions:
Neon
I
3
Mains electricity ON.
Neon SG1
Flashes to indicate ignition operation (stops after
detection.)
For replacement of programmer units refer to the separate
Programmer Kit instructions.
The boiler MUST NOT be operated if the casing is not fitted.
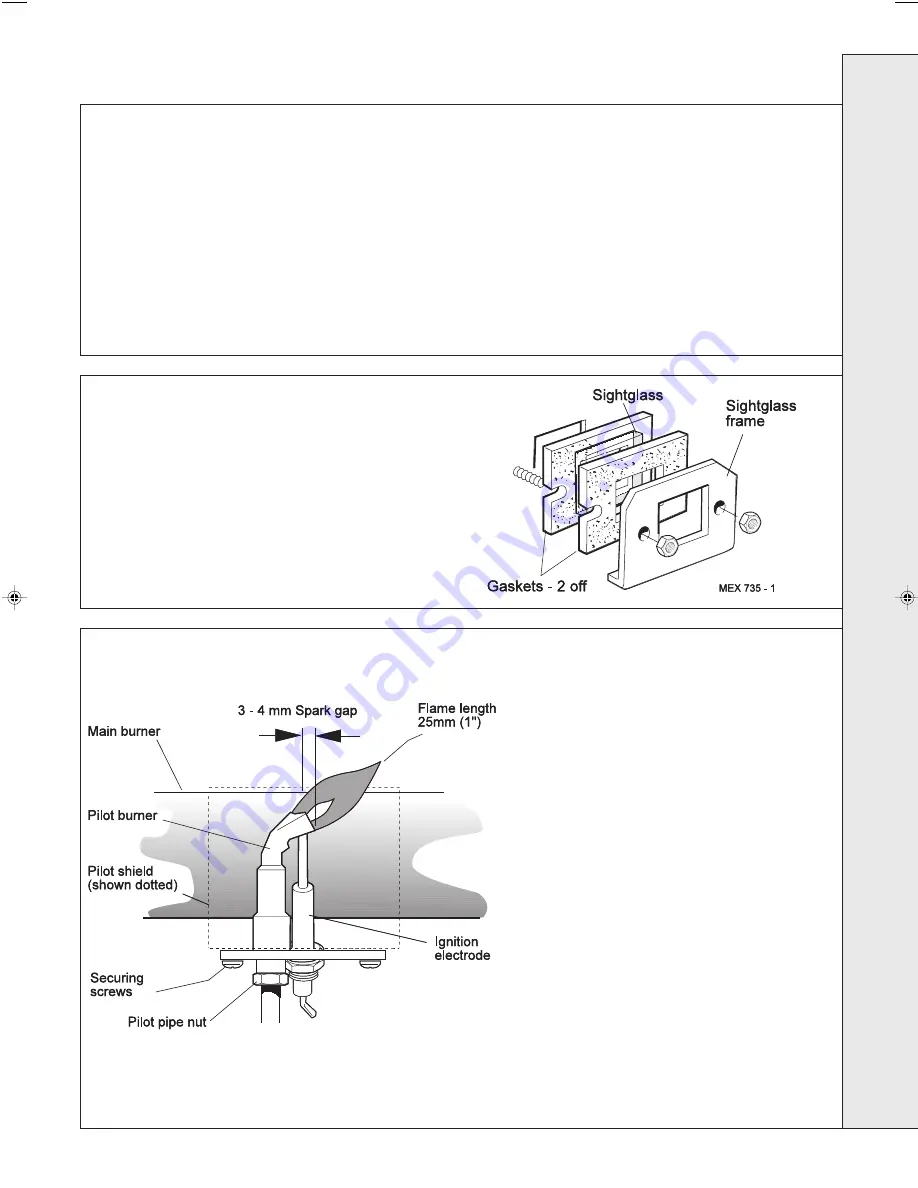
36 SIGHTGLASS REPLACEMENT
1.
Refer to Frame 35.
2.
Unfasten the 2 wing nuts and washers. Remove the
assembly from the front plate.
3.
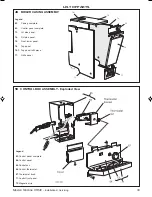
Fit the new sightglass and reassemble, as shown.
4.
Retighten the 2 wing nuts to ensure an airtight seal.
Do NOT overtighten.
1.
Refer to Frame 35.
2.
Undo the 2 screws, lift off the front panel and
remove the grille assembly. Refer to Frame 29.
3.
Disconnect the electrical leads from the gas valve.
4.
Disconnect the ignition lead from the PCB.
5.
Undo the gas cock union. Remove the 2 wing nuts
and withdraw the burner and controls assembly,
complete, from the boiler.
6 .
Remove the ignition electrode. Refer to Frame 42.
7.
Undo the pilot supply pipe connection and ease
clear of the pilot burner. DO NOT LOSE the pilot
injector, which is a push-fit in the pilot burner
housing.
8.
Remove the 2 securing screws and washers, and
withdraw the pilot burner.
9.
Fit the new pilot burner and reassemble in reverse
order, ensuring that:
a.
The injector is in position when refitting the pilot
supply.
b.
A gas-tight joint is made.
c.
The spark gap is correct.
10.
Reassemble in reverse order.
SER
VICING
200946-1.p65
3/9/2004, 3:30 PM
25


