54
STEP 4 of 6
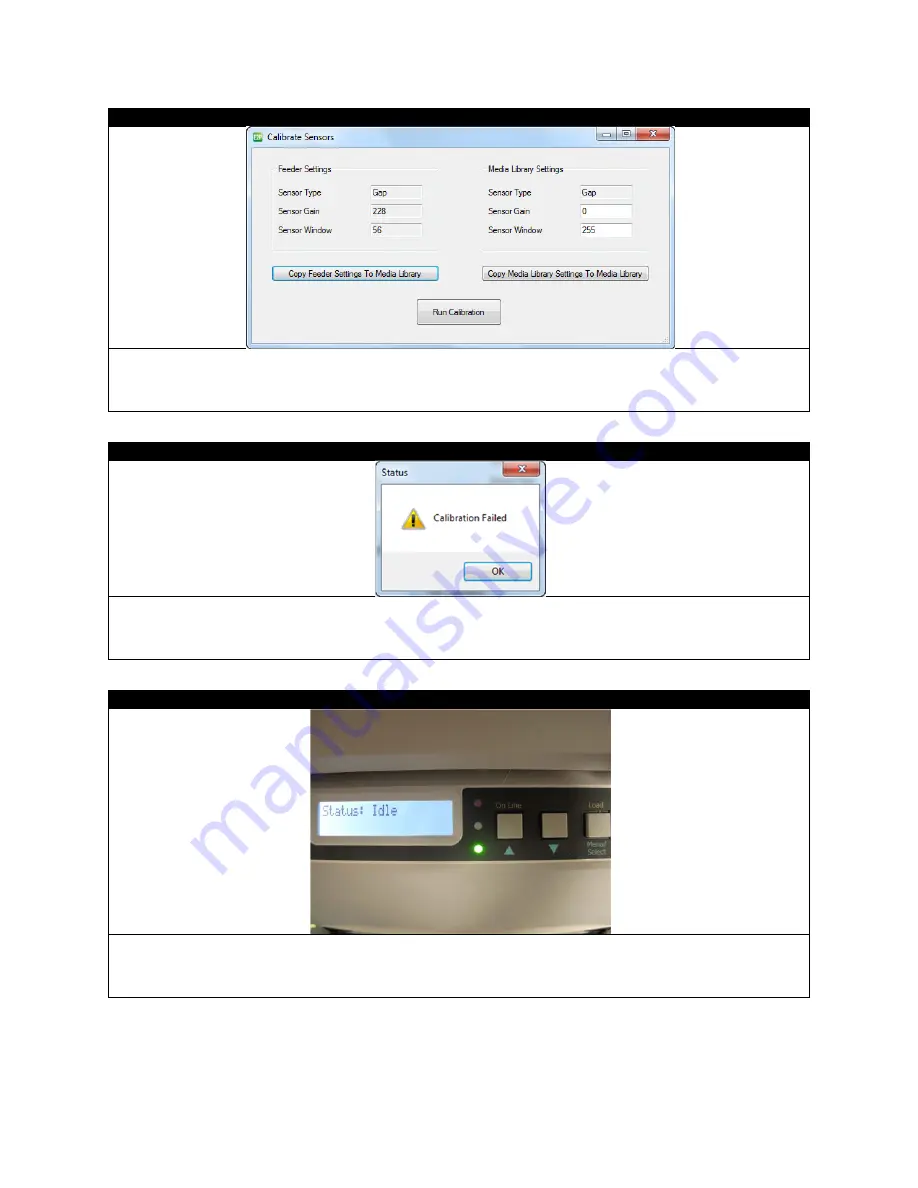
Click
Run Calibration.
The printer will run the paper to the nearest gap mark.
NOTE:
You can use previously stored values in the feeder from the last use by clicking
Copy Feeder Settings To
Media Library
. You can also manually input the values for Sensor Gain and Sensor Window under the Media Library
Settings, and then click
Copy Media Library Settings To Media Library
to update the values in the feeder.
STEP 5 of 6
If the calibration did not work, an error screen will pop up.
Adjust the roll again and make sure the gap of the label is about one inch below the sensor then perform another
calibration.
STEP 6 of 6
After calibration is done, go to the feeder, follow STEP 9-13 of "Loading Media for Continuous Printing" to finish
loading process.
You are now ready to add a label image and print a die-cut label.
Содержание 700
Страница 7: ...7 1 3 Roll Specifications ...
Страница 26: ...26 STEP 4 of 4 Wait until the Done button turns to green Click it to finish the installation ...
Страница 37: ...37 3 Before Printing 3 1 EDGE2Print User Interface STEP 1 of 1 This is the interface of EDGE2Print software ...
Страница 74: ...74 Using Spot White ...
Страница 75: ...75 ...
Страница 93: ...93 STEP 4 of 4 This is the same PDF as the one above with TrimBox ...
Страница 96: ...96 STEP 3 of 3 For variable data printing you can select the above to generate cost report after printing ...
Страница 108: ...108 STEP 5 of 5 Place the drums back into the printer and replace the lid ...


