


104
STEP 5 of 8
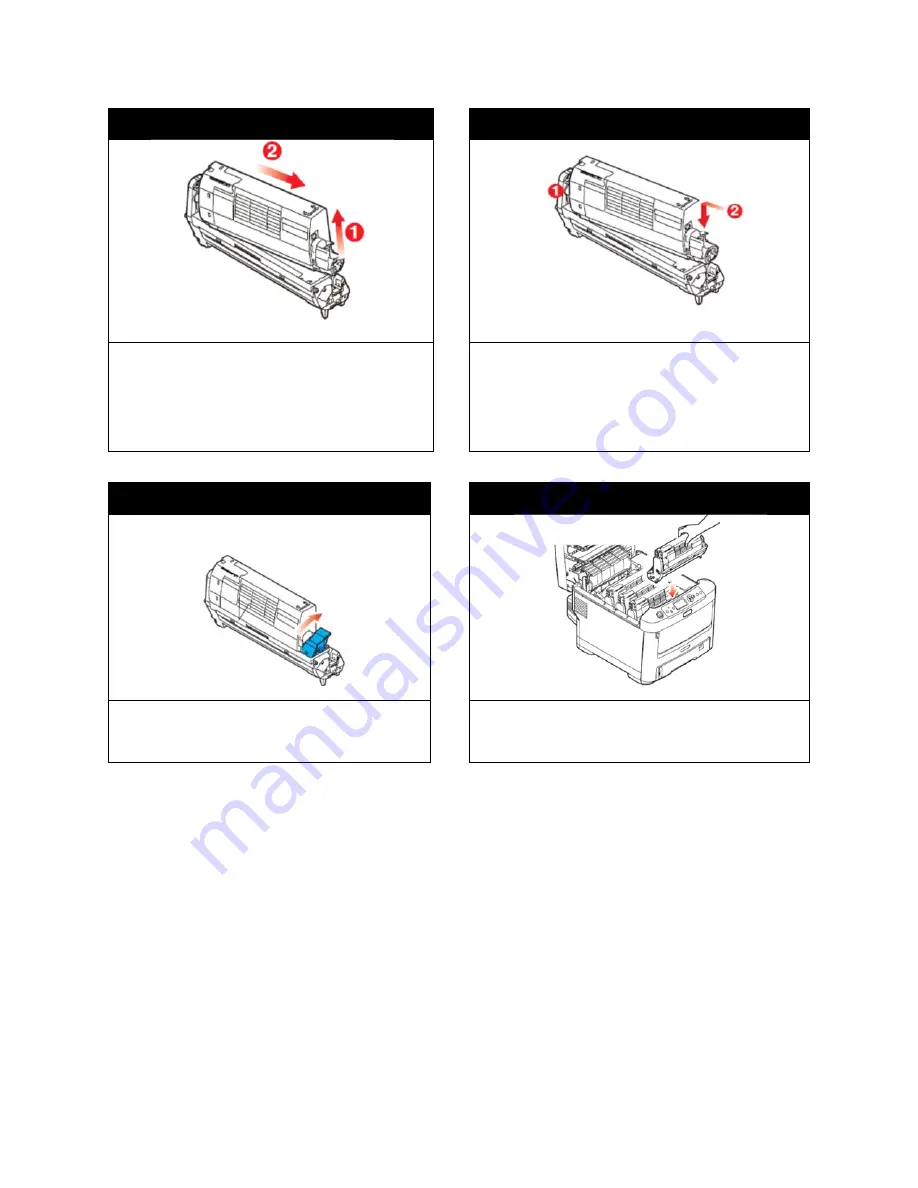
STEP 6 of 8
Lift the right hand end of the toner cartridge (1) and
then draw the cartridge to the right to release the left-
hand end as shown (2) and withdraw the toner
cartridge out of the image drum cartridge. Place the
cartridge on a piece of paper to avoid marking your
furniture.
Place the toner cartridge onto the new image drum
cartridge as shown. Push the left end in first and then
lower the right end in. (It is not necessary to fit a new
toner cartridge at this time unless the remaining toner
level is very low.)
STEP 7 of 8
STEP 8 of 8
Push the colored release lever away from you to
lock the toner cartridge onto the new image drum
unit and release toner into it.
Holding the complete assembly by its top center, lower
it into place in the printer, locating the pins at each end
into their slots in the sides of the printer.
Содержание 700
Страница 7: ...7 1 3 Roll Specifications ...
Страница 26: ...26 STEP 4 of 4 Wait until the Done button turns to green Click it to finish the installation ...
Страница 37: ...37 3 Before Printing 3 1 EDGE2Print User Interface STEP 1 of 1 This is the interface of EDGE2Print software ...
Страница 74: ...74 Using Spot White ...
Страница 75: ...75 ...
Страница 93: ...93 STEP 4 of 4 This is the same PDF as the one above with TrimBox ...
Страница 96: ...96 STEP 3 of 3 For variable data printing you can select the above to generate cost report after printing ...
Страница 108: ...108 STEP 5 of 5 Place the drums back into the printer and replace the lid ...