


53
3.9 Sensor Calibration for Die-cut Label Printing
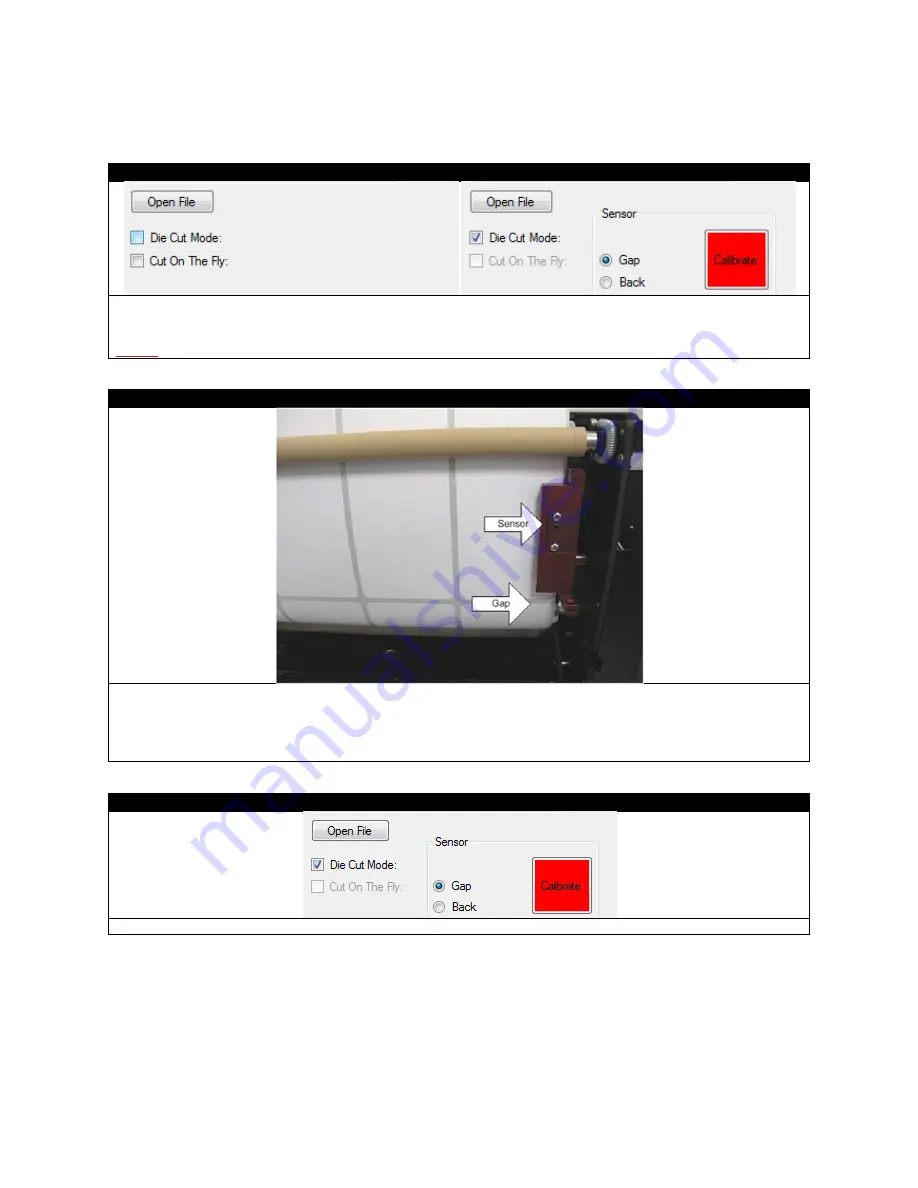
STEP 1 of 6
If your media is die cut, select
Die Cut Mode.
Then select the
Sensor Type.
(We will use the
Gap Sensor
as the
example in the following instructions.)
NOTE:
If the
Calibrate
button is red, it means the sensor needs calibration before printing.
STEP 2 of 6
Refer to STEP 1-8 of “Loading Media for Continuous Printing” for how to load the roll of media. After the die cut roll
is loaded into the tray, line up the gap of the labels about one inch below the sensor.
Close the left/right media guides. Backwind the roll to ensure there is no tension when the sensor is calibrating. If
the roll is fully wound and has tension on it, it will skew the calibration. Close the front cover and push the tray in.
STEP 3 of 6
After the media is properly loaded, click
Calibrate
in the software.
Содержание 700
Страница 7: ...7 1 3 Roll Specifications ...
Страница 26: ...26 STEP 4 of 4 Wait until the Done button turns to green Click it to finish the installation ...
Страница 37: ...37 3 Before Printing 3 1 EDGE2Print User Interface STEP 1 of 1 This is the interface of EDGE2Print software ...
Страница 74: ...74 Using Spot White ...
Страница 75: ...75 ...
Страница 93: ...93 STEP 4 of 4 This is the same PDF as the one above with TrimBox ...
Страница 96: ...96 STEP 3 of 3 For variable data printing you can select the above to generate cost report after printing ...
Страница 108: ...108 STEP 5 of 5 Place the drums back into the printer and replace the lid ...