Note: A message referring to
protected-mode BIOS access
might appear
before installation of Novell patches. It is for information only and can
be ignored.
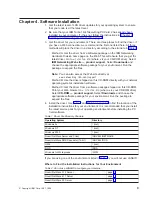
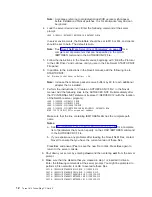
4. Load the server device driver. Enter the following command at the server
prompt:
LOAD X:\NOVELL\NETWARE\IBMTOKEN.LAN DATARATE=M16
In server environments, the DataRate should be set to M16 or M4, and clients
should be set to Auto. The default is Auto.
Note: See “Novell NetWare Server Driver Parameters” on page 20 for a
complete list of parameters that can be specified in the LOAD
IBMTOKEN command in the AUTOEXEC.NCF file.
5. Follow the instructions in the Novell manual, beginning with
″
Bind the Protocol
to the LAN Driver
″
and continue until you are in the File Server STARTUP.NCF
File panel.
6. In addition to the instructions in the Novell manual, add the following line to
STARTUP.NCF:
Set Minimum Packet Receive Buffers = 48
Note: Increase the minimum packet receive buffers by 48 for each additional
adapter that is installed.
7. Perform the instructions in
″
Create an AUTOEXEC.NCF file
″
in the Novell
manual. Add the following lines to the AUTOEXEC.NCF file immediately after
the IPX INTERNAL NET statement (replace C:\SERVER.312\ with the location
of the NetWare server program):
LOAD C:\SERVER.312\NBI31X.NLM
LOAD C:\SERVER.312\MSM31X.NLM
LOAD C:\SERVER.312\TOKENTSM.NLM
LOAD C:\SERVER.312\IBMTOKEN.LAN NAME=IBMLS1 DATARATE=M16
BIND IPX TO IBMLS1 NET=<unique net number>
Make sure that the line containing IBMTOKEN.LAN has the complete path
name.
Notes:
a. See “Novell NetWare Server Driver Messages” on page 50 for a complete
list of parameters that you can specify on the LOAD IBMTOKEN command
in the AUTOEXEC.NCF file.
b. If you experience any problems after loading the Novell NLM files, contact
Novell to ensure that you have the current version of these files.
Press Esc and answer Yes to save the new file to disk. Press Esc again to
return to the server console.
8. Shut down your server by entering down and then entering exit from the server
prompt.
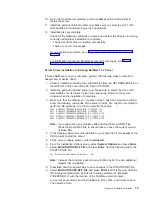
9. Make sure that the diskette that you created in step 1 is inserted in drive A.
Enter the following commands at the server prompt. You might be prompted to
perform a file overwrite; it is OK to overwrite these files.
COPY A:\NOVELL\NETWARE\NBI31X.NLM C:\SERVER.312
COPY A:\NOVELL\NETWARE\MSM31X.NLM C:\SERVER.312
COPY A:\NOVELL\NETWARE\TOKENTSM.NLM C:\SERVER.312
COPY A:\NOVELL\NETWARE\IBMTOKEN.LAN C:\SERVER.312
COPY A:\NOVELL\NETWARE\IBMTOKEN.LDI C:\SERVER.312
12
Turbo 16/4 Token-Ring PC Card 2
Содержание Turbo 16/4 Token-Ring PC Card 2
Страница 1: ...Turbo 16 4 Token Ring PC Card 2 User s Guide IBM...
Страница 2: ......
Страница 3: ...Turbo 16 4 Token Ring PC Card 2 User s Guide IBM...
Страница 8: ...vi Turbo 16 4 Token Ring PC Card 2...
Страница 15: ...Safety Information xiii...
Страница 16: ...xiv Turbo 16 4 Token Ring PC Card 2...
Страница 48: ...32 Turbo 16 4 Token Ring PC Card 2...
Страница 52: ...36 Turbo 16 4 Token Ring PC Card 2...
Страница 60: ...44 Turbo 16 4 Token Ring PC Card 2...
Страница 64: ...48 Turbo 16 4 Token Ring PC Card 2...
Страница 108: ...92 Turbo 16 4 Token Ring PC Card 2...
Страница 110: ...94 Turbo 16 4 Token Ring PC Card 2...
Страница 116: ...100 Turbo 16 4 Token Ring PC Card 2...
Страница 123: ......


