3.
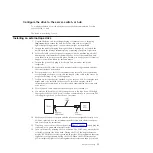
Press and hold the Unload button for 3 or more seconds, then release it to
select the function. The drive performs the dump. The SCD shows
0
, then
goes blank, and the drive exits Maintenance mode. To access the contents of the
dump, see “Function code 5: Copy drive dump.”
Note:
You can also force a drive dump when the tape drive is in normal
operating mode. Simply press and hold the Unload button for ten
seconds. This causes the drive to reboot.
Function code 5: Copy drive dump
Function code
5
copies data from a drive dump (captured in Function code 4) to
the beginning of a scratch (blank) data cartridge.
Attention:
For this function, insert only a scratch (blank) data cartridge or a
cartridge that can be overwritten. During the test, the drive overwrites the data on
the cartridge.
Note:
If you inserted an invalid tape cartridge (for example, Gen 2 or WORM
media), error code
J
or
7
appears in the SCD. If you inserted a
write-protected cartridge, or the media has read-only compatibility (for
example, Gen 3 media), error code
P
appears in the SCD. In either case,
the tape drive unloads the cartridge and exits Maintenance mode after the
cartridge is removed.
To execute Function code 5: Copy drive dump, complete the following steps:
1.
Put the drive in Maintenance mode. (For instructions, see “Entering
Maintenance mode” on page 25.) Index through the Maintenance mode options
until
5
is displayed on the SCD.
2.
Press and hold the Unload button for 3 seconds to select Function code 5. After
selecting Function code 5, the SCD will display option
5
-
1
. Press the
Unload button within 5 seconds to make a different selection. If no other
selection is made, the drive will perform option
5
-
1
.
3.
Press the Unload button once per second to cycle through the following
functions:
v
5
-
1
: copy dump to tape; clears RAM dump
v
5
-
8
: copy dump to flash memory; clears RAM dump
v
5
-
3
: erase flash memory
v
5
-
0
: no function
If you cycle past the desired code, press the Unload button once per second
until the code reappears.
4.
Press and hold the Unload button for 3 or more seconds, then release it to
select one of the above functions.
Chapter 3. Operating
29
Содержание L5X
Страница 2: ......
Страница 10: ...viii Half High LTO Gen 5 SAS Tape Drive Installation and User s Guide...
Страница 14: ...xii Half High LTO Gen 5 SAS Tape Drive Installation and User s Guide...
Страница 16: ...xiv Half High LTO Gen 5 SAS Tape Drive Installation and User s Guide...
Страница 58: ...40 Half High LTO Gen 5 SAS Tape Drive Installation and User s Guide...
Страница 71: ...Figure 14 RID tag on rear panel Chapter 5 Resolving problems 53...
Страница 72: ...54 Half High LTO Gen 5 SAS Tape Drive Installation and User s Guide...
Страница 76: ...58 Half High LTO Gen 5 SAS Tape Drive Installation and User s Guide...
Страница 90: ...72 Half High LTO Gen 5 SAS Tape Drive Installation and User s Guide...
Страница 94: ...Figure 26 Sliding the drive forward 76 Half High LTO Gen 5 SAS Tape Drive Installation and User s Guide...
Страница 102: ...84 Half High LTO Gen 5 SAS Tape Drive Installation and User s Guide...
Страница 119: ......
Страница 120: ...Part Number 60Y1487 Printed in USA 1P P N 60Y1487...

