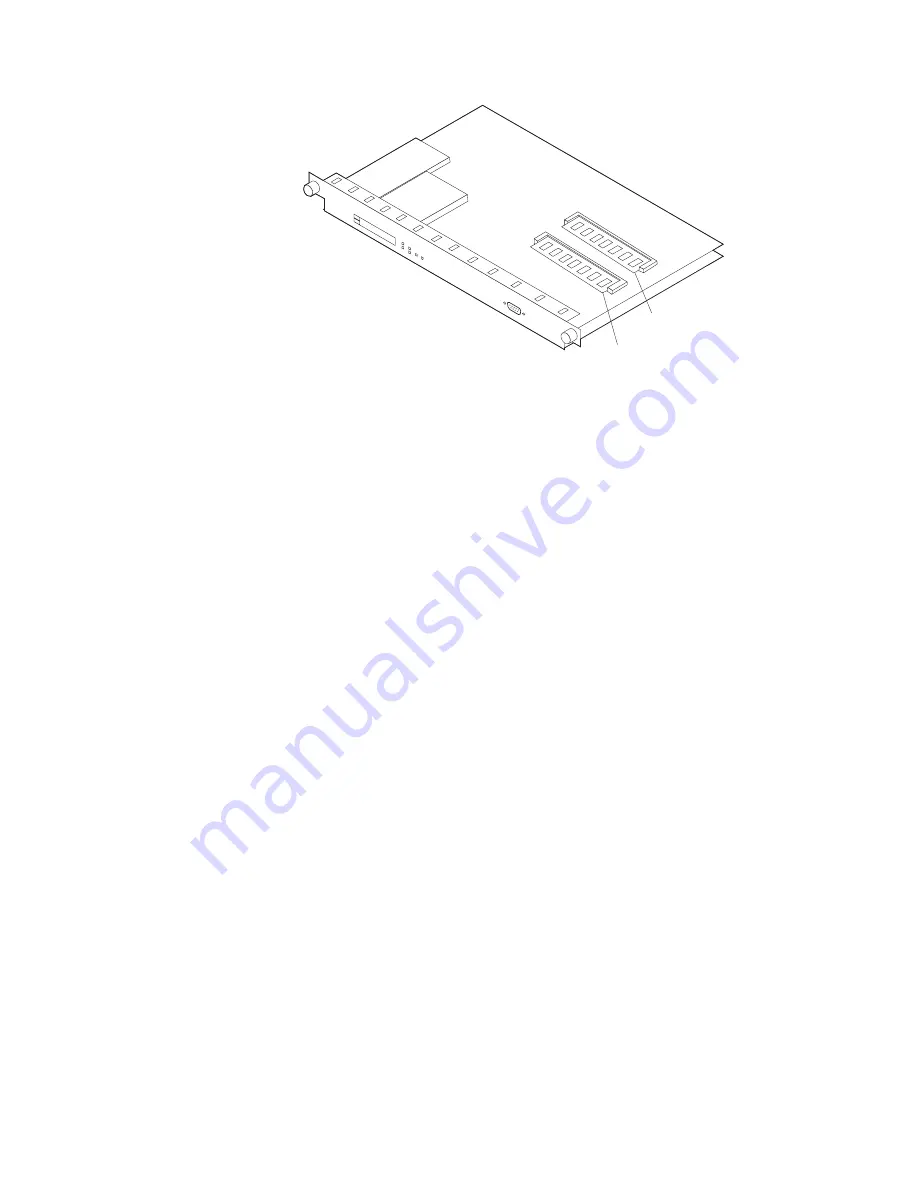
DIMM 1
DIMM 2
7
Gently slide the DIMM module out of its connector socket.
8
Remove the DIMM, in its antistatic bag, from its shipping container.
Attention: Electrostatic discharge (ESD) can damage the static-sensitive
devices on circuit boards. To avoid this kind of damage, use the following
precautions:
¹
Do not remove the DIMM until you are ready to insert it into the
multiaccess enclosure.
¹
Use correct grounding techniques when inspecting and installing the
DIMM. Use a foot strap or grounding mat, or wear a grounded static
discharge wrist strap, or touch a grounded rack or other source of ground
before you handle the DIMM.
9
Remove the DIMM from the antistatic bag. Inspect it for damage. Always
handle the DIMM by the ends (preferably grasp it between the middle finger
and thumb; do not touch the components). If the DIMM appears to be
damaged, return it to the antistatic bag and contact the supplier.
10
Insert the replacement DIMM into the appropriate slot. (Grasping the DIMM
between the middle finger and thumb, place it connector edge down into the
DIMM socket. Applying slight pressure to the top edge of the DIMM, move it
forward until it is correctly aligned and snaps in place.)
The lever will snap back into place as the DIMM is fully inserted.
Chapter 4. Multiaccess Enclosure FRU Exchange
4-33
Содержание 950
Страница 2: ......
Страница 12: ...x 3746 9X0 MAE Installation and Maintenance ...
Страница 22: ...xx 3746 9X0 MAE Installation and Maintenance ...
Страница 28: ...xxvi 3746 9X0 MAE Installation and Maintenance ...
Страница 48: ...Go to Step 6 Customizing the MAE on page 1 21 1 20 3746 9X0 MAE Installation and Maintenance ...
Страница 131: ...Figure 4 5 MAE g Select slot B then press Enter Figure 4 6 MAE Chapter 4 Multiaccess Enclosure FRU Exchange 4 13 ...
Страница 156: ...3 Press Enter 4 You should obtain a window similar to the following 4 38 3746 9X0 MAE Installation and Maintenance ...
Страница 176: ...4 58 3746 9X0 MAE Installation and Maintenance ...
Страница 184: ...Figure 5 4 Current Boot Sequence 5 8 3746 9X0 MAE Installation and Maintenance ...
Страница 243: ...Installing Options Programming None Chapter 6 Installing Options 6 7 ...
Страница 254: ...Installing Options 6 18 3746 9X0 MAE Installation and Maintenance ...
Страница 258: ...Installing Options 7 4 3746 9X0 MAE Installation and Maintenance ...
Страница 264: ...B 4 3746 9X0 MAE Installation and Maintenance ...
Страница 266: ...C 2 3746 9X0 MAE Installation and Maintenance ...
Страница 278: ...D 12 3746 9X0 MAE Installation and Maintenance ...
Страница 288: ...14 Expand the Adapters The following window is displayed E 10 3746 9X0 MAE Installation and Maintenance ...
Страница 294: ...E 16 3746 9X0 MAE Installation and Maintenance ...
Страница 300: ...F 6 3746 9X0 MAE Installation and Maintenance ...
Страница 302: ...G 2 3746 9X0 MAE Installation and Maintenance ...
Страница 306: ...H 4 3746 9X0 MAE Installation and Maintenance ...
Страница 382: ...X 6 3746 9X0 MAE Installation and Maintenance ...
Страница 389: ......


