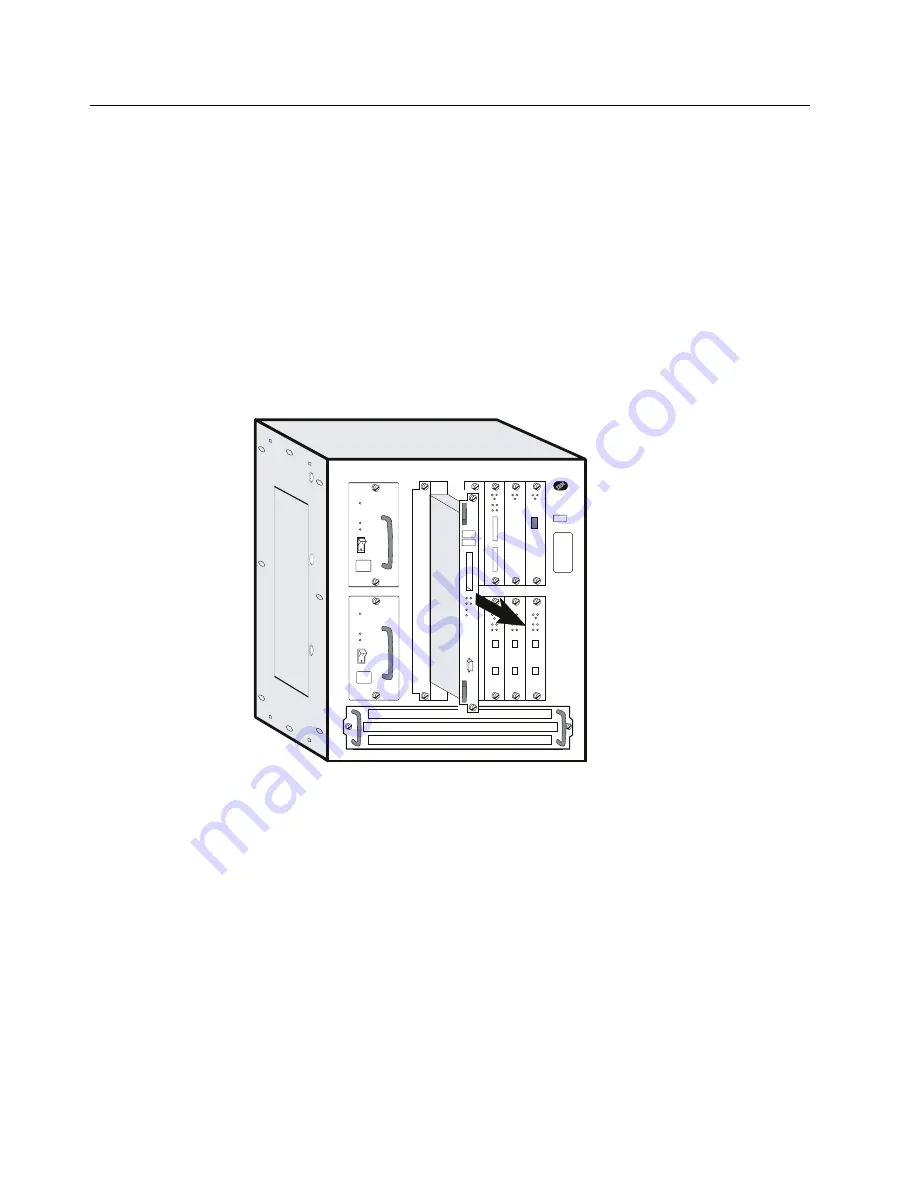
Exchanging the Memory on the System Card
The multiaccess enclosure comes with a minimum of 64 MB (one dual inline
memory module [DIMM]). There are slots for two DIMMs on the system card.
This procedure can be used for removing faulty DIMM modules or to install memory
upgrades to your multiaccess enclosure.
1
Switch OFF each power supply.
2
Label the cables on the system card. Unplug the cables and the PCMCIA
card.
3
Loosen thumbscrews on the system card.
4
Remove the system card and lay it on a soft non-conductive surface.
5
Identify the faulty memory module. See the following for socket designations.
6
Remove the DIMMs by pulling down the lever at the edge of the DIMM
socket. (Use your thumbnail or a small non-metallic device to gently move
the spring latch away from the end of the DIMM.) The DIMM will
automatically be pushed partially out of the slot.
4-32
3746-9X0: MAE Installation and Maintenance
Содержание 950
Страница 2: ......
Страница 12: ...x 3746 9X0 MAE Installation and Maintenance ...
Страница 22: ...xx 3746 9X0 MAE Installation and Maintenance ...
Страница 28: ...xxvi 3746 9X0 MAE Installation and Maintenance ...
Страница 48: ...Go to Step 6 Customizing the MAE on page 1 21 1 20 3746 9X0 MAE Installation and Maintenance ...
Страница 131: ...Figure 4 5 MAE g Select slot B then press Enter Figure 4 6 MAE Chapter 4 Multiaccess Enclosure FRU Exchange 4 13 ...
Страница 156: ...3 Press Enter 4 You should obtain a window similar to the following 4 38 3746 9X0 MAE Installation and Maintenance ...
Страница 176: ...4 58 3746 9X0 MAE Installation and Maintenance ...
Страница 184: ...Figure 5 4 Current Boot Sequence 5 8 3746 9X0 MAE Installation and Maintenance ...
Страница 243: ...Installing Options Programming None Chapter 6 Installing Options 6 7 ...
Страница 254: ...Installing Options 6 18 3746 9X0 MAE Installation and Maintenance ...
Страница 258: ...Installing Options 7 4 3746 9X0 MAE Installation and Maintenance ...
Страница 264: ...B 4 3746 9X0 MAE Installation and Maintenance ...
Страница 266: ...C 2 3746 9X0 MAE Installation and Maintenance ...
Страница 278: ...D 12 3746 9X0 MAE Installation and Maintenance ...
Страница 288: ...14 Expand the Adapters The following window is displayed E 10 3746 9X0 MAE Installation and Maintenance ...
Страница 294: ...E 16 3746 9X0 MAE Installation and Maintenance ...
Страница 300: ...F 6 3746 9X0 MAE Installation and Maintenance ...
Страница 302: ...G 2 3746 9X0 MAE Installation and Maintenance ...
Страница 306: ...H 4 3746 9X0 MAE Installation and Maintenance ...
Страница 382: ...X 6 3746 9X0 MAE Installation and Maintenance ...
Страница 389: ......


