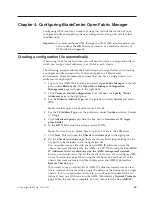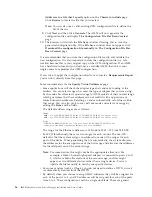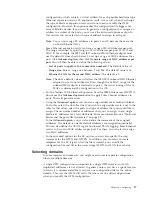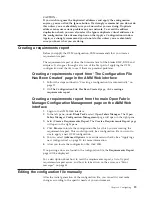
addresses.
Selecting
User
Defined
will
allow
you
to
edit
the
Fibre
Channel
address
range
to
any
range
of
your
choosing.
Click
Next
.
10.
On
the
Boot
Settings
page,
enter
the
storage
target’s
WWPNs
in
the
SAN
WWPN
boxes.
You
can
enter
a
primary
and
secondary
storage
target.
In
the
Blade
LUN
boxes
enter
the
appropriate
LUN
assigned
to
the
blade.
This
will
be
the
LUN
that
the
blade
will
be
booting
from
so
it
will
need
to
have
an
operating
system
installed.
Click
Next
.
11.
On
the
Advance
Options
page,
select
the
check
boxes
to
ignore
three
different
types
of
errors
when
the
profile
is
applied.
The
types
of
errors
are:
a.
Ignore
duplicate
virtual
addresses
in
the
configuration
file
.
When
this
box
is
checked
the
software
will
not
return
an
error
when
a
profile
is
applied
to
a
domain
of
blades
and
that
profile
contains
duplicate
addresses.
b.
Force
the
configuration
to
be
applied
to
powered
on
blades.
Check
this
box
if
you
have
blades
in
your
domain
that
are
currently
powered
on
and
you
are
changing
their
addresses.
The
new
addresses
will
not
be
active
until
the
next
time
that
the
blade
is
powered
on.
If
this
box
is
unchecked,
then
the
profile
will
fail
when
applied
if
there
are
blades
in
the
domain
which
are
currently
powered
on.
c.
Continue
to
apply
the
configuration
file
to
the
rest
of
the
blade
slots
after
an
error
is
received.
When
this
box
is
checked,
the
software
will
ignore
various
errors,
such
as
the
inability
to
log
into
another
chassis,
and
will
continue
to
apply
addresses
to
blades
and
chassis
that
are
accessible.
12.
Click
Next
.
13.
On
the
Manual
Override
page,
you
can
view
and
modify
any
and
all
of
the
addresses
that
were
assigned
to
a
particular
blade.
To
edit
the
settings
of
a
particular
blade
you
will
need
to
select
a
chassis
and
a
blade
then
edit
the
address
settings.
The
following
steps
will
guide
you
through
this
process:
a.
Select
a
chassis
in
the
Select
Chassis
box
by
clicking
on
the
IP
address
of
the
chassis.
b.
Select
a
slot
to
edit
in
the
Select
Slot
box
by
clicking
on
the
slot
number.
c.
Under
the
Select
Chassis
box
there
is
a
selection
box
with
Enable
Slot
,
Disable
Slot
and
Ignore
Slot
selections.
Selecting
Enable
Slot
will
assign
addresses
to
the
blade
connect
to
that
slot.
Selecting
Disable
Slot
removes
any
addresses
assigned
to
that
slot
and
any
blade
connected
to
that
slot
will
revert
to
their
physical
addresses.
Selecting
Ignore
Slot
will
leave
the
addresses
in
their
previous
settings.
The
addresses
will
remain
either
virtual
or
physical
when
this
profile
is
applied.
The
Ignore
Slot
setting
is
useful
when
two
profiles
are
created
for
a
single
chassis
such
as
when
both
Emulex
and
Qlogic
adapter
cards
are
in
the
same
chassis.
d.
For
Ethernet
Settings
,
the
check
box
under
Enable
will
enable
the
virtualization
of
the
MAC
addresses
when
the
box
is
checked.
Use
buttons
-
Add
Ethernet
Port
and
Delete
Ethernet
Port
-
at
the
bottom
of
the
box
to
add
or
remove
an
entry
to
the
table.
Double-click
to
edit
an
entry.
This
section
also
allows
for
the
configuration
of
VLANs
for
the
Ethernet
ports.
These
VLAN
settings
are
used
during
pre-booting
to
an
operating
system,
such
as
when
the
blades
are
booting
through
PXE.
e.
This
Fibre
Channel
Settings
section
works
just
like
the
Ethernet
settings
box
except
that
the
buttons
are
labeled
Add
FC
Port
and
Delete
FC
Port
.
Double-click
to
edit
an
entry.
Checking
the
check
box
under
Enable
will
ensure
that
virtual
Fibre
Channel
addresses
are
generated.
f.
For
Boot
Settings
,
use
the
Add
Boot
Setting
and
Delete
Boot
Setting
buttons
to
add
and
delete
boot
entries
for
the
selected
chassis
and
slot.
The
Chapter
5.
Using
OFM
and
OFM-Advanced
upgrade
27
Содержание 26R0881
Страница 1: ...IBM Systems IBM BladeCenter Open Fabric Manager Installation and User s Guide Version 2 1...
Страница 2: ......
Страница 3: ...IBM Systems IBM BladeCenter Open Fabric Manager Installation and User s Guide Version 2 1...
Страница 6: ...iv IBM BladeCenter Open Fabric Manager Installation and User s Guide...
Страница 8: ...vi IBM BladeCenter Open Fabric Manager Installation and User s Guide...
Страница 10: ...viii IBM BladeCenter Open Fabric Manager Installation and User s Guide...
Страница 12: ...x IBM BladeCenter Open Fabric Manager Installation and User s Guide...
Страница 26: ...14 IBM BladeCenter Open Fabric Manager Installation and User s Guide...
Страница 64: ...52 IBM BladeCenter Open Fabric Manager Installation and User s Guide...
Страница 70: ...58 IBM BladeCenter Open Fabric Manager Installation and User s Guide...
Страница 77: ......
Страница 78: ...Part Number xxxxxxx Printed in USA 1P P N xxxxxxx...


