Installation
5
Step 5.
Connect other peripheral devices, such as Spot Out and/or
Auxiliary BNC monitors, BNC Audio Inputs/Output, Alarm Inputs,
Relay Outputs, or eSATA storage, if using.
Step 6.
Connect the Internet cable to WAN port on the back of the DVR,
if applicable.
Step 7.
Set the NTSC/PAL dip switch to your video standard, if
applicable.
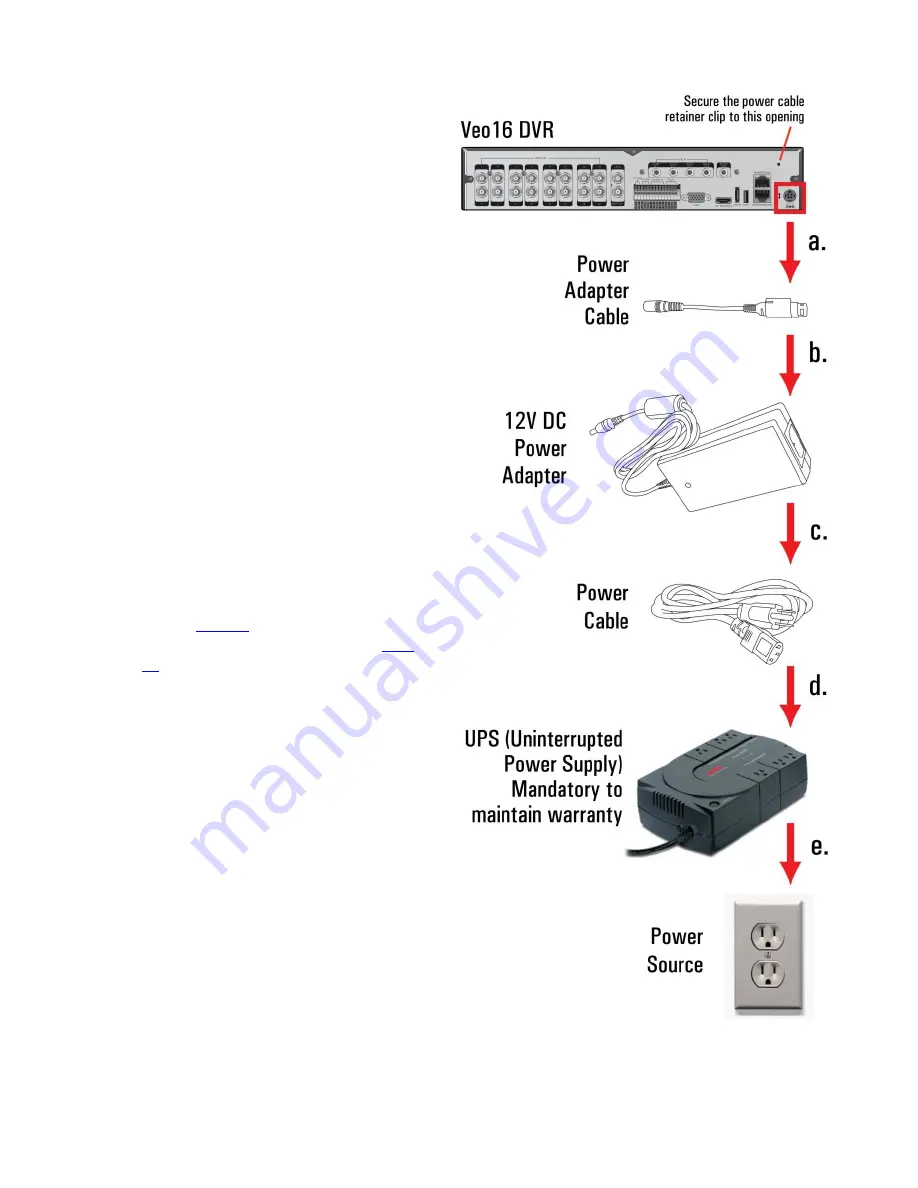
Step 8
(see Fig. 1.4).
Connect Veo16 DVR to the Power Source.
a.
Connect the Power Adapter Cable to the DC 12V port
on the back of the Veo16 DVR.
b.
Connect the 12V DC Power Adapter to the Power
Adapter Cable.
c.
Connect the Power Cable to the DC 12V Power
Adapter.
d.
Connect the Power Cable to the UPS (Uninterrupted
Power Supply). The use of the UPS is mandatory to
maintain DVR warranty.
e.
Connect the UPS to the Power Source / power outlet.
f.
Secure the power cable with the power cable retainer
clip (#5 in
Figure 1.1
), then fasten retainer clip to the
opening on the back of the Veo16 DVR (#F in
Figure
1.2
).
Securing the power cord with the retainer clip will
help prevent unintended disconnection of the power
from the Veo16 DVR.
Once Veo16 DVR is connected to the power source, it will power
on. If it does not, press the Power button on the DVR's front
panel.
Figure 1.4.
Connecting Veo16 DVR to the Power Source
Содержание VEO 16
Страница 43: ...Video Export 40 ...


