Installation
9
1.
Connect one end of a network cable to the WAN (UPLINK) port on the back of the DVR (#E in
Figure 1.2
) and the other end to
the broadband router or a hub.
Note:
Do NOT use LAN (DOWNLINK) port.
2.
Connect the ADSL modem, if using, to the WAN port on the broadband router or hub.
3.
Connect the local PC to the broadband router or hub. Use diagram
Figure 1.7
as a guide.
4.
If using the router, set the port forwarding.
5.
On the remote PC, open the Web Browser window and enter the Veo16 DDNS address into the address bar in this format:
"http//DVRNAME.dvrlink.net:8080". The DVR Web Service Port is set to Port 8080 by default but can be changed in the DVR's
Network Setup Screen.By default, DVRNAME is set to the Veo16 MAC Address but can be changed to a custom value in the
DVR's Network Setup Screen.. E.g. "http://00115f123456.dvrlink.net:8080" OR "http://veo16.dvrlink.net:8080", where DVR
NAME value has been set to "veo16" in the Network Setup screen.
Refer to Network Setup section of this manual for more information on changing DVR's DDNS name and/or Server Port.
6.
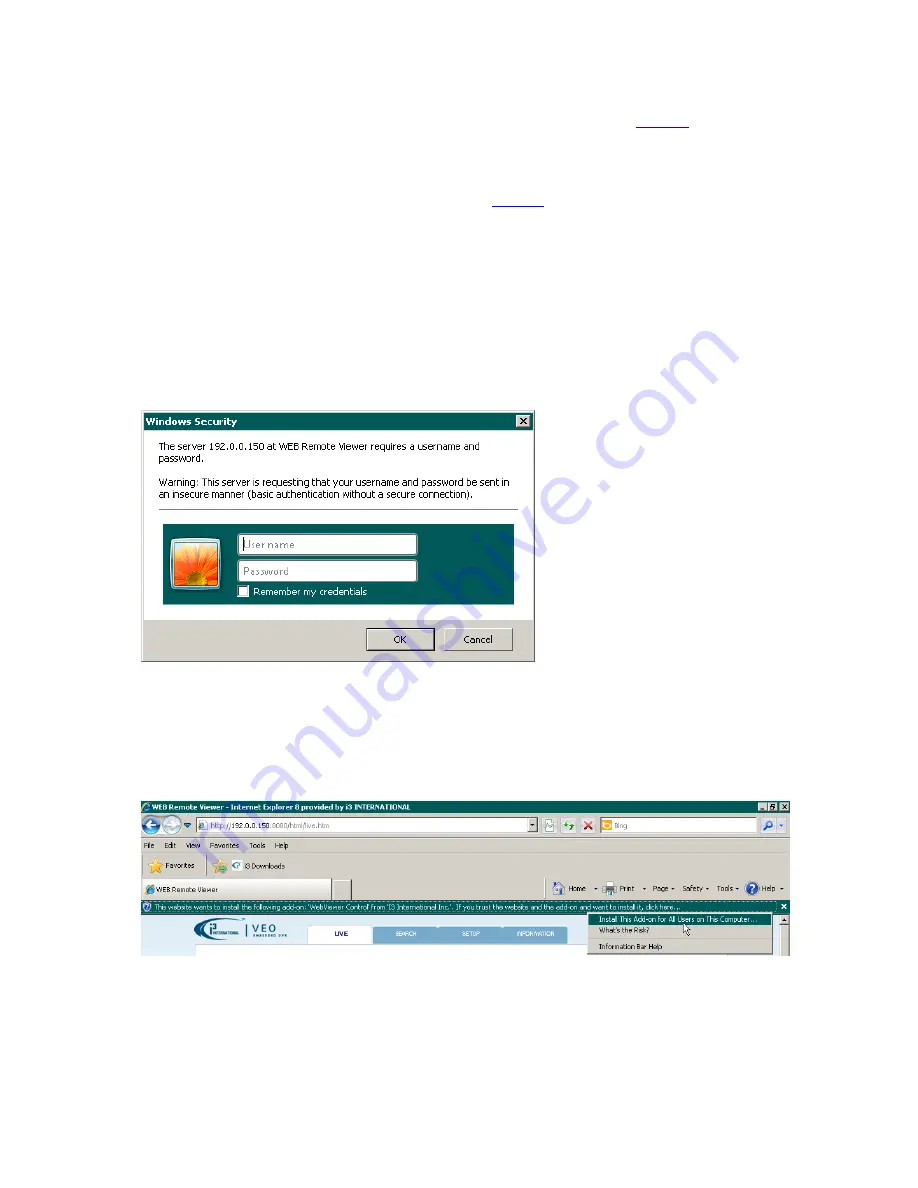
In the Windows Security login window, enter Veo16 Login and Password.
Important:
Veo16 login and password information is
case-sensitive
.
Note:
Factory Default Login:
ADMIN
, Password:
1234.
For Security purposes, it is highly recommended that you change the
factory default administrative password after the initial login. You can change administrative password, add and remove DVR
users in System Setup -> User Management screen. Refer to User Management section of this manual.
7.
The first time you connect to the Veo16 over the local network, your web browser may ask you to install a required Add-on.
Click on the pop-up menu below the address bar, and select "
Install This Add-on for All Users on This Computer...
"
option.
In the next window, click
Install
.
Your Veo16 DVR can now be controlled via Web Browser.
Содержание VEO 16
Страница 43: ...Video Export 40 ...


