


9
English
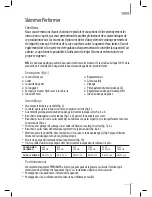
Skimmer Performer
Dear Customer,
we thank You for choosing this quality product. Please read the following instructions
very carefully for best understanding of the characteristics of this new, innovative product.
Hydor’s new skimmer range is equipped with a special drainage system that can regulate
the level in the chamber without changing the quantity of water that is being treated. This
range also comes with an air regulation system that controls the air input allowing the end-
user to adjust the skimmer to specific personal needs.
NB:
the skimmer may present some residue from water as 100% of the production is inspected and tested
in order to guarantee Hydor’s high quality standards.
Description
A.
Main skimmer body
B.
Collection cup
C.
Lid for collection cup
D.
Fitting for collection cup
E.
Foaming pump/s with rotormix brush impeller
F.
Venturi tube
Assembly
•
The skimmer is supplied pre-assembled. (fig.2)
•
Make sure all o-rings are in the correct position.(fig 3)
•
Assemble the drainage extension tube (Ji) as shown in fig 4 a-b
•
Attach the extension tube to the drainage as shown (fig 5 a-b).
•
Attach the foaming pump/s to the connectors, make sure the notches on the pump chamber and on the
pump body correspond (fig 6c)
•
Attach the foaming pump/s to the skimmer, without tightening the flanges too much (fig 7 a-b)
•
Connect the venturi tube to allow air intake (fig 8 a-b)
•
Position the collection cup (fig 9b) and if necessary connect the drainage tube (L) (fig.9a) to discard skim-
mate into a suitable container.
•
Mount the water supply pump (not included) (fig 10) We recommend using a Hydor Seltz L as shown in the
following chart
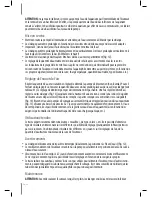
Positioning and installing
The entire PERFORMER range of skimmers can be positioned inside or outside a sump. (fig.11)
Ideal installations are:
•
Water pumped from the aquarium and returning to it;
•
Water pumped from the sump and returning to it;
ATTENTION:
never install a system that pumps water from the aquarium, through the skimmer and returns
PERFORMER
SKIMMER
450
405 US
550
505 US
800
705 US
1250
1005 US
2250
2005 US
3300
3005 US
SUPPLY PUMPS
SELTZ L20
SELTZ L20
SELTZ L20
SELTZ L30
SELTZ L40
SELTZ L40
G.
Air regulation
H.
Silencer (h1)
I.
Drainage tube
J.
Drainage tube extension (j1)
K.
Drainage regulation (k1)
L.
Collection cup drainage tube
Содержание Performer 100/405
Страница 1: ...1 Italiano 1 Italiano Skimmer Performer User s Guide ...
Страница 2: ...2 Assembly A B C D E Ki Hi Ji F G H I L J K fig 1 ...
Страница 3: ...3 fig 4b fig 5a fig 5b fig 2 fig 3 fig 4a fig 6 X Y fig 7a fig 7b ...
Страница 4: ...4 Pump not included fig 10 fig 8a fig 8b fig 9a fig 9b TYPE A TYPE B TYPE C ...
Страница 6: ...6 fig 18a fig 18b fig 20b fig 19 fig 21 fig 20a fig 22 ...
Страница 7: ...7 ...
Страница 47: ...47 ...
Страница 53: ...53 ...
Страница 54: ...54 ...


