HWg-PWR: M-Bus IP energy meter (SNMP, WEB)
HW group
www.HW-group.com
page 9
First steps
1) Connecting the cables
HWg-PWR connects directly to a 230VAC supply; therefore, it should be installed by
qualified personnel only!
Connect the unit to the Ethernet (a patch cable to a switch, or a cross-over
cable to a PC).
Connect the M-Bus with meters. Pay attention to the polarity!
Connect HWg-PWR to the electrical network.
The green Power LED lights up.
If the Ethernet connection works properly, the LINK (amber) LED lights up after
a short while, and then flashes whenever data transfer takes place (activity
indication).
After power up, the amber LINK LED flashes rapidly to indicate IP address
negotiation over DHCP.
The green M-Bus LED indicates communication over the M-Bus.
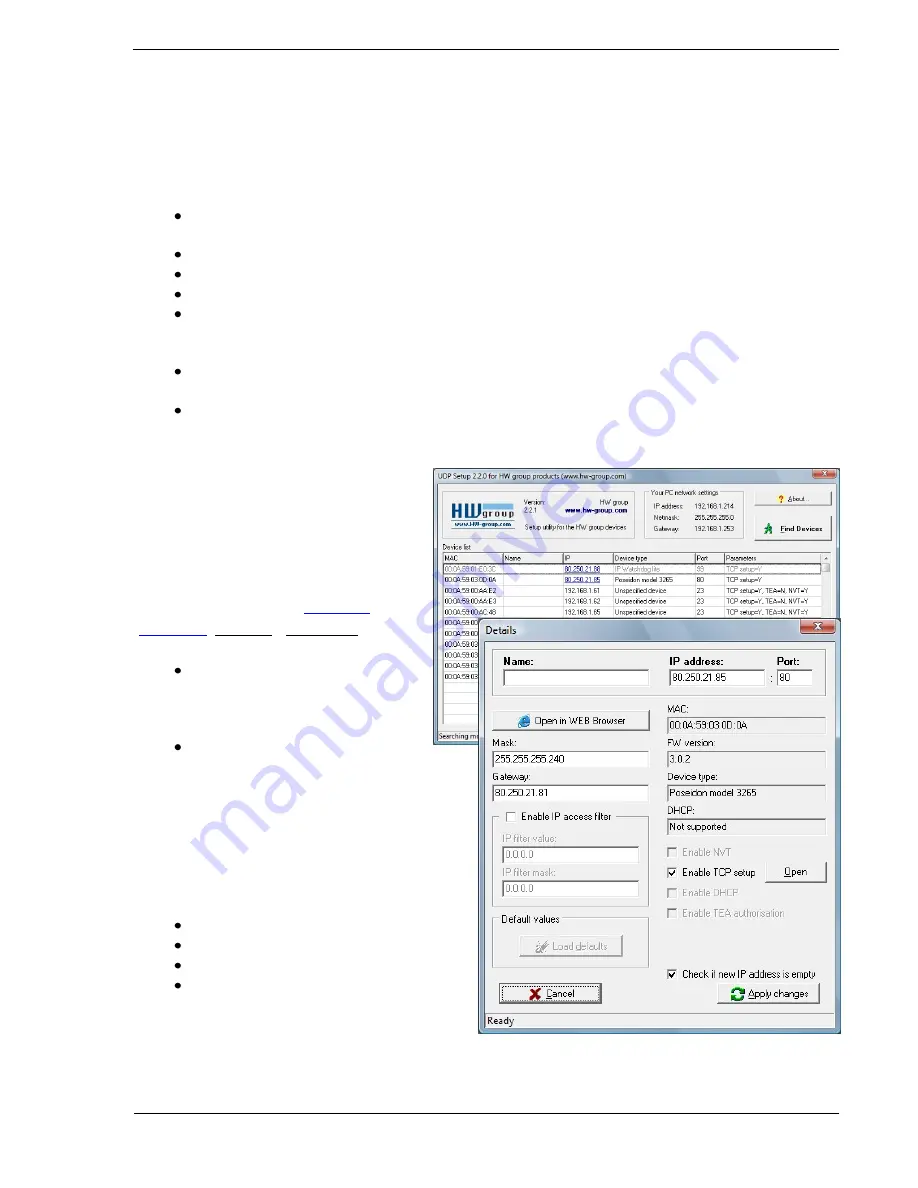
2) Configuring the IP address
–
UDP
Config
UDP Config
utility – root directory of the
supplied CD (Windows and Linux versions).
Available for download at
www.HW-
group.com
, Software > UDP Config.
Click the icon to launch UDP
Config.
The
program
automatically looks for connected
devices.
To search for devices, click the
Find Devices icon.
The program searches for devices on your local
network. Double-click a MAC address to open a
basic device configuration dialog.
Configure the network parameters
IP address / HTTP port (80 by default)
Network mask
Gateway IP address for your network
Device name (optional)
Click the
Apply Changes
button to save the
settings.
Содержание HWg-PWR
Страница 1: ...HWg PWR MANUAL...
Страница 7: ...HWg PWR M Bus IP energy meter SNMP WEB HW group www HW group com page 7 Connecting meters to HWg PWR...
Страница 28: ...HWg PWR M Bus IP energy meter SNMP WEB HW group www HW group com page 28 Mechanical...
Страница 29: ...HWg PWR M Bus IP energy meter SNMP WEB HW group www HW group com page 29...
Страница 30: ...HWg PWR M Bus IP energy meter SNMP WEB HW group www HW group com page 30...
Страница 31: ...HWg PWR M Bus IP energy meter SNMP WEB HW group www HW group com page 31...


