1
Tuff Torq K61 Hydrostatic Transaxle
Drain Oil
Before beginning tear-down clean work area
thoroughly and cover workbench with clean paper.
This is extremely important as just one grain of sand
can cause damage to the Hydrostatic Rotating Group
in the Transaxle.
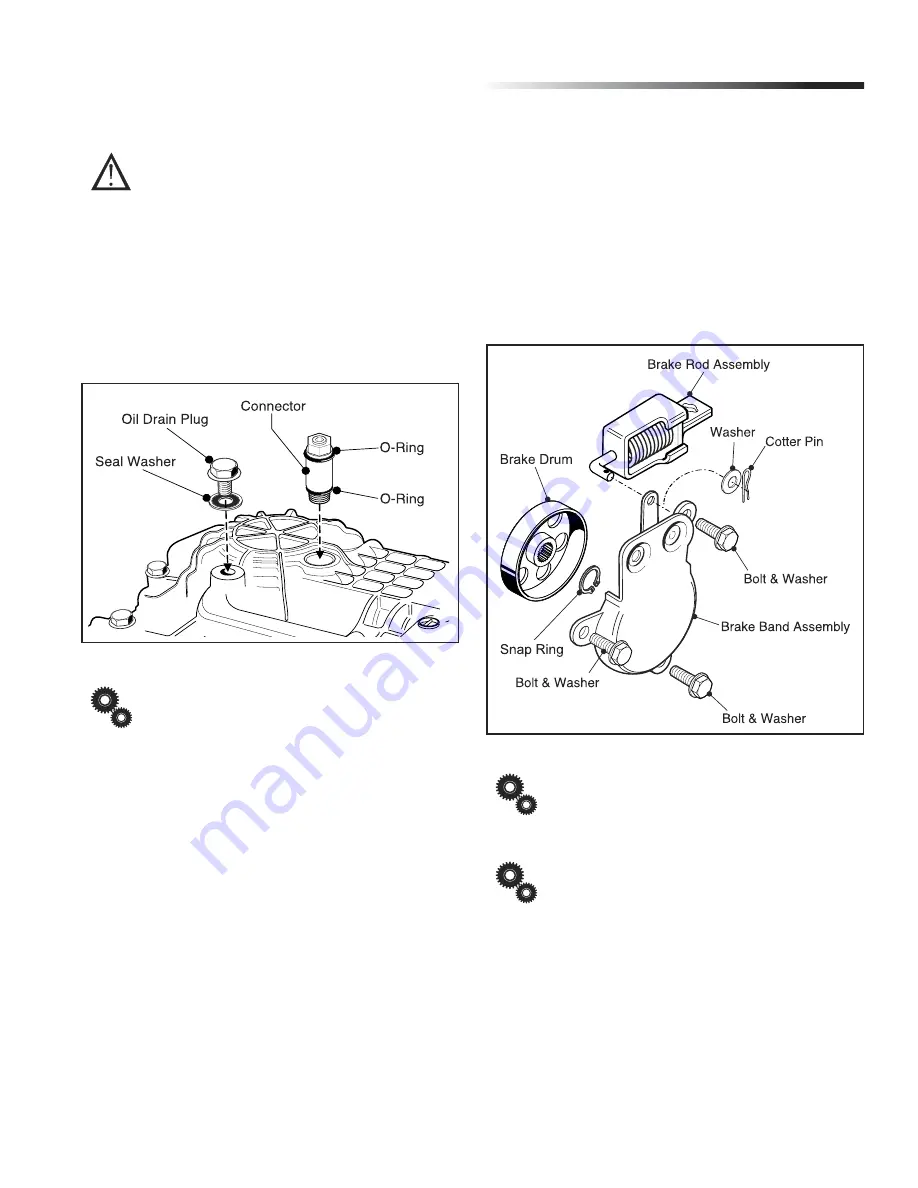
1. Remove the Oil Drain Plug (12 mm wrench) from the
Lower Case of Transaxle and drain oil.
(Fig. 1)
2
.
Remove the Connector (14 mm wrench) from the Center
Case, through the Lower Case and drain the oil from the
Hydrostatic Rotating Groups.
(Fig. 1
)
Fig. 1, Oil Drain Plug and Pressure Fill Plug removal
Always install a new Seal Washer on the Drain
Plug and new O-rings on Pressure Fill Plug when reas-
sembling.
Brake Assembly Removal
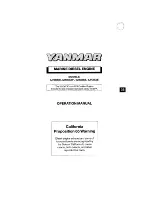
1. Remove the Cotter Pin and Washer from the Brake Rod
Assembly.
(Fig. 2)
2. Remove the Brake Rod Assembly from Brake Arm B (see
Fig. 3) by pivoting 90 degrees and sliding downward.
(Fig. 2)
3. Loosen and remove the (3) 8 mm bolts/washers (12mm
wrench) and detach the Brake Assembly.
(Fig. 2)
4. Remove Snap Ring (Snap Ring Pliers) and the Brake
Drum from Brake Shaft.
(Fig. 2)
Fig. 2, Brake Assembly Removal
Inspect all brake components for wear or dam-
age. Replace as necessary.
Brake drum and brake band are to be free from
oil and dust.
Disassembly of Transaxle
Содержание Tuff Torq K61
Страница 1: ......
Страница 20: ...17 Tuff Torq K61 Hydrostatic Transaxle Hydraulic Flow Diagram ...


