INSTALLATION
9
■
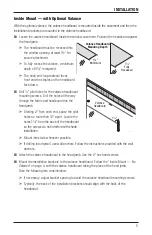
Check alignment. The tops of all L-brackets must be aligned and level.
■
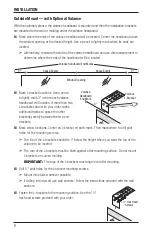
Mark screw locations for attaching the valance headboard. Position the headboard on top of
the L-brackets with its ends aligned with the end marks and the back against the wall.
➤
The hook-and-loop material faces front and the staples on the headboard face down.
➤
Mark the bottom of the headboard (the side with the staples) through the front and rear
slotted holes on the center of the L-brackets.
■
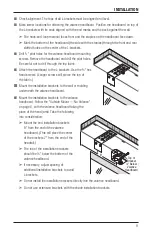
Drill
1
/
8
"
pilot holes for the valance headboard mounting
screws. Remove the headboard and drill the pilot holes.
Be careful not to drill through the top fabric.
■
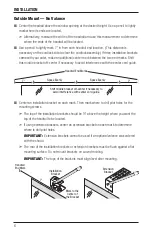
Attach the headboard to the L-brackets. Use the ¾" hex
head screws. (Longer screws will pierce the top of
the fabric.)
■
Mount the installation brackets to the wall or molding
underneath the valance headboard.
■
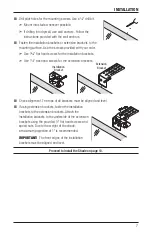
Mount the installation brackets to the valance
headboard. Follow the "Outside Mount — No Valance"
on page 6, with the valance headboard taking the
place of the head jamb. Take the following
into consideration:
➤
Mount the end installation brackets
8" from the end of the valance
headboard. (This will place the center
of the brackets 7" from the end of the
headrail.)
➤
The top of the installation brackets
should be ¼" below the bottom of the
valance headboard.
➤
If necessary, adjust spacing of
additional installation brackets to avoid
L-brackets.
➤
Do not install the installation brackets directly into the valance headboard.
➤
Do not use extension brackets with the shade installation brackets.
8"
Top of
Bracket
¼" Below
Valance
Headboard
Содержание Design Studio
Страница 1: ...Installation Operation Care Roman Shades Straight Pull Cordlock...
Страница 19: ......

