


37
V1.1
Editing a network profile
To edit an existing network profile:
1. At the main
Connection Manager
screen, click
Profiles
. The
Profiles
screen opens.
2. Select the network you wish to edit from the left pane.
3. Click
Edit
.
4. Make the desired changes.
5. Click
OK
.
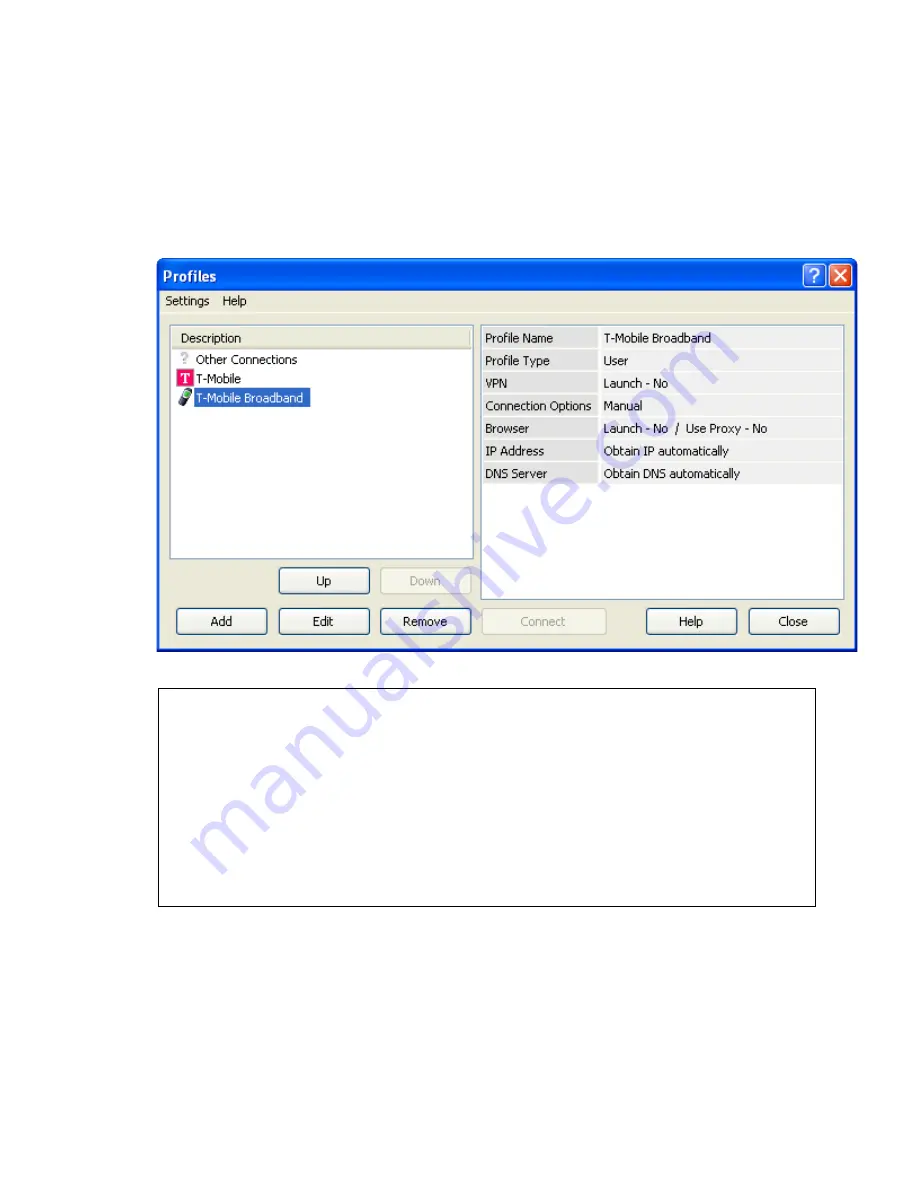
List of network profiles (left pane)
The left pane of the screen contains the list of all the Network Profiles you have defined so far. Also listed here are any Network Profiles that have
been pre-configured by your wireless network provider and any profiles that were automatically added when you first connected to a new network.
You can change or remove any profiles that you have defined and any automatically added profile. However, you can only change the "General"
settings for the pre-configured profiles.
Network profile information (right pane)
•
Profile Name - Name of the network profile. This will be the SSID of the network if there is no profile name assigned.
•
Profile Type - This will show if the Profile was created by your wireless access provider (indicated by the word "Carrier") or by you (indicated
by "User").
•
VPN - This indicates if a VPN connection is set to auto-launch when you establish a connection to this network.
•
Browser - This shows if you have your browser set to auto-launch a page and if you have proxy settings for this profile.
•
IP Address - This will indicate if you are using DHCP (indicated by "Automatic") or have set the IP information for this profile.
•
DNS Server - This shows if you are using the DHCP name servers (indicated by "Automatic") or have set the DNS servers for this profile.


