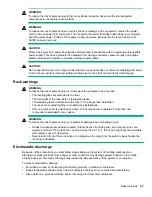
• Avoid touching pins, leads, or circuitry.
• Always be properly grounded when touching a static-sensitive component or assembly. Use one or more
of the following methods when handling or installing electrostatic-sensitive parts:
◦ Use a wrist strap connected by a ground cord to a grounded workstation or computer chassis. Wrist
straps are flexible straps with a minimum of 1 megohm ±10 percent resistance in the ground cords. To
provide proper ground, wear the strap snug against the skin.
◦ Use heel straps, toe straps, or boot straps at standing workstations. Wear the straps on both feet when
standing on conductive floors or dissipating floor mats.
◦ Use conductive field service tools.
◦ Use a portable field service kit with a folding static-dissipating work mat.
If you do not have any of the suggested equipment for proper grounding, have an authorized reseller
install the part.
For more information on static electricity or assistance with product installation, contact an authorized reseller.
Server box contents
The server shipping box contains the following contents:
• A server
• A power cord
• Rack-mounting hardware
• Documentation
Installing hardware options
Install any hardware options before initializing the server. For options installation information, refer to the
option documentation. For server-specific information, see "
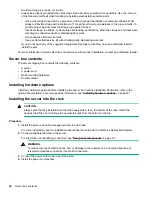
Installing the server into the rack
CAUTION:
Always plan the rack installation so that the heaviest item is on the bottom of the rack. Install the
heaviest item first, and continue to populate the rack from the bottom to the top.
Procedure
1.
Install the server and cable management arm into the rack.
For more information, see the installation instructions that ship with the 2U Quick Deploy Rail System.
2.
Connect peripheral devices to the server.
For information on identifying connectors, see "
on page 16."
WARNING:
To reduce the risk of electric shock, fire, or damage to the equipment, do not plug telephone or
telecommunications connectors into RJ-45 connectors.
3.
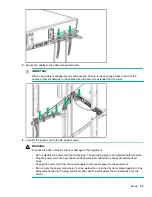
Connect the power cord to the rear of the server.
4.
Install the power cord anchors.
34
Server box contents
Содержание ProLiant DL560 Gen10
Страница 9: ...Eight bay SFF NVMe drive cage Two bay NVMe Six bay SFF HDD drive cage Component identification 9 ...
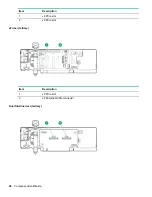
Страница 29: ...Item Description 1 x8 Slimline NVMe connector 2 x8 Slimline NVMe connector Component identification 29 ...
Страница 65: ...2 Prepare the drive 3 Install the drive 4 Observe the LED status of the drive Installing hardware options 65 ...
Страница 100: ... 18 SFF backplanes Group C SAS cables 100 Installing hardware options ...
Страница 101: ... 16 SFF backplanes Group C SAS cables Installing hardware options 101 ...
Страница 111: ...Connected to the system board SATA ports 1 and 2 Connected to the HPE P816i a Smart Array controller Cabling 111 ...
Страница 113: ...Connected to the secondary PCIe riser board Connected to the tertiary PCIe riser board Cabling 113 ...
Страница 114: ...Connected to the system board SATA ports 1 and 2 Connected to the Smart Array controller 114 Cabling ...
Страница 115: ...Drive box 3 cabling Connected to the Primary PCIe riser board Connected to the secondary PCIe riser board Cabling 115 ...
Страница 116: ...Connected to the system board SATA ports 1 and 2 Connected to an HPE Smart Array controller 116 Cabling ...
Страница 119: ...Quad slimline riser installed in the secondary PCIe riser cage Tertiary riser Cabling 119 ...

