


Hardware options installation 94
Retain the blank for future use.
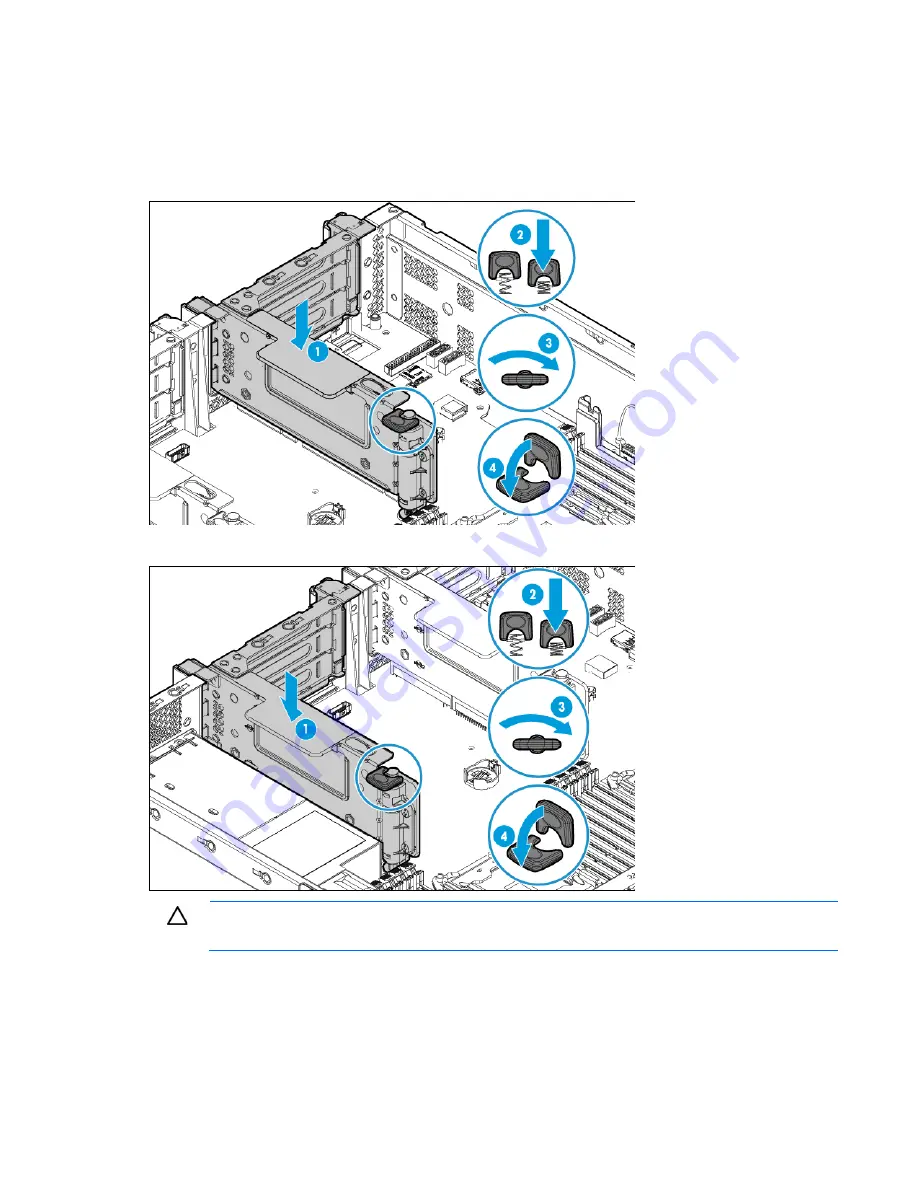
7.
Align the PCI riser board with the corresponding connector on the system board, and then press down
the riser cage.
8.
Push down the release tab, rotate it 180° clockwise, and then press it flat on the PCI riser cage.
o
PCI riser cage assembly installed in the primary PCI riser location
o
PCI riser cage assembly installed in the secondary PCI riser location
CAUTION:
To prevent improper cooling and thermal damage, do not operate the server unless
all PCI slots have either an expansion slot cover or an expansion board installed.
9.
Install the access panel (on page
26
).
10.
Do one of the following:
o
Slide the server into the rack.
o
Install the server into the rack ("
Installing the server into the rack
" on page
36
).
Содержание ProLiant DL180 Gen9
Страница 77: ...Hardware options installation 77 6 Remove the HP Universal Media Bay blank 7 Install the optical drive cage ...
Страница 122: ...Cabling 122 Item Description 5 Fan 5 cable GPU power drive cabling FlexibleLOM sideband signal cabling ...
Страница 126: ...Cabling 126 Item Description 3 USB 3 0 connector cable ...
Страница 157: ...Support and other resources 157 ...
Страница 158: ...Support and other resources 158 ...
Страница 169: ...Index 169 W warnings 34 35 warranty information 147 website HP 151 weight 149 ...


