background image

76

Getting Started Guide

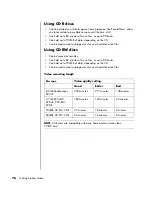
Using CD-R discs

Can’t be erased or written to again. Some programs, like RecordNow!, allow 
you to record data in multiple sessions until the disc is full.

Can hold up to 80 minutes of music files, or up to 99 tracks.

Can hold up to 700MB of data, depending on the CD.

Can be used to create storage discs for your hard disk drive files.

Using CD-RW discs

Can be erased or rewritten.

Can hold up to 80 minutes of music files, or up to 99 tracks.

Can hold up to 700MB of data, depending on the CD.

Can be used to create storage discs for your hard disk drive files.

Video recording length

Disc type

Video quality setting

Good

Better

Best

8.5GB Double-Layer 
DVD+R

325 minutes

217 minutes

108 minutes

4.7GB DVD+RW, 
DVD+R, DVD--RW, 
DVD-R

180 minutes

120 minutes

60 minutes

700MB CD-RW, CD-R

27 minutes

18 minutes

9 minutes

650MB CD-RW, CD-R

24 minutes

16 minutes

8 minutes

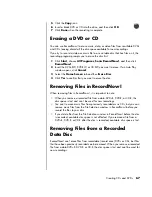
NOTE:

 CD-R discs are compatible with more home and car stereos than 

CD-RW discs.

Содержание Pavilion t3000 - Desktop PC

Страница 1: ...Getting Started Guide ...

Страница 2: ... protection technology that is protected by method claims of certain U S patents and other intellectual property rights owned by Macrovision Corporation and other rights owners Use of this copyright protection technology must be authorized by Macrovision Corporation and is intended for home and other limited viewing uses only unless otherwise authorized by Macrovision Corporation Reverse engineeri...

Страница 3: ...ng Speakers 11 Setting up 3 connector sound 12 Configuring multi channel audio output for the DVD player 13 Setting up 6 connector sound 14 Configuring the Sound Effect Manager 6 connector 15 Configuring sound for recording with the Sound Effect Manager 6 connector 16 Using the Sound Effect Manager 6 connector 17 Using Your PC Top 19 Using Your Docking Bay 19 Using Your Multistorage Bay 22 Storing...

Страница 4: ...e Drive 42 Disconnecting the Drive 43 Working with Digital Images 45 Working with Digital Images 45 Using HP Image Zone Plus 45 Burning a label on a LightScribe media disc 47 Creating disc labels with HP Image Zone Plus 47 Playing CDs and DVDs 51 Playing Music CDs with iTunes 51 Playing CDs and DVDs with Windows Media Player 52 Playing DVD Movies with InterVideo WinDVD 52 Using country region code...

Страница 5: ...l after burning a disc with iTunes 72 Setting Automatic Recording Options 72 Using Compatibility Information 74 Identifying Compatible File Formats 74 Using the Disc Quick Reference Tables 75 Using double layer DVD R discs 75 Using DVD R and DVD R discs 75 Using DVD RW and DVD RW discs 75 Using CD R discs 76 Using CD RW discs 76 Creating Movies Using WinDVD Creator 79 Getting started 79 Using the ...

Страница 6: ... Converting recorded TV to MPEG 2 format Europe only 86 Getting Help 87 Finding Onscreen Guides 87 Finding Guides on the Web 87 Using the Onscreen Help and Support Center 88 Using Instant Support 88 Using Updates from HP 88 Getting messages 89 Turning off messages 89 Re enabling messages 89 Using PC Help Tools 90 Index 91 ...

Страница 7: ...click Safety Comfort Guide Or Type http www hp com ergo into your Web browser address box and then press Enter on the keyboard WARNING Please read Safety Information in the Warranty and Support Guide before installing and connecting your PC to the electrical power system WARNING The power supply is preset for the country region in which you purchased your PC If you move please check the voltage re...

Страница 8: ... computer Some PC models also have connectors on the front of the PC The table does not show all connectors Connector Connector symbol Description Mouse PS 2 connector Keyboard PS 2 connector Universal Serial Bus USB for mouse keyboard digital cameras or other devices with USB connectors Printer parallel Monitor Serial Serial port for some digital cameras or other serial devices Your PC features a...

Страница 9: ...n option to select your language if applicable for your model Click OK and then confirm your selection by clicking Yes Wait until the PC makes preparations It may take up to 30 minutes for this one time language setup on the PC 5 Set up Microsoft Windows by following the onscreen instructions Audio Line Out powered speakers Audio Line In Headphones Microphone FireWire IEEE 1394 for video cameras o...

Страница 10: ...r other Internet access cable is connected 2 Choose an ISP using Easy Internet Sign up To open Easy Internet Sign up a Double click the Easy Internet Sign up icon on the desktop Or Click Start on the taskbar choose All Programs choose Online Services and then click Easy Internet Sign up b Follow the onscreen instructions 3 Connect to your ISP and the Internet after you established your ISP account...

Страница 11: ...our PC Install the new software according to the directions provided by the software manufacturer Check the manufacturer s documentation or customer service information for help if you need it For antivirus software uninstall the existing software program before reinstalling it or installing a new antivirus program Using HP products HP computers include preloaded software for select HP All In One ...

Страница 12: ...s or shortcuts to software programs or files on your PC Use the player area for viewing pictures for listening to your MP3 music files stored on your computer or for watching video clips For searching there is a search bar at the top of HP Organize where you can select the search engine you want to use To open HP Organize Double click the desktop icon Or 1 Click Start on the taskbar 2 Choose All P...

Страница 13: ... the Internet or provide quick access to specific functions NOTE The number location and labeling of buttons vary by keyboard model Icon Feature Description Standby Puts PC into power saving mode screen is blank but PC is still on To make screen reappear press the Esc key or press Standby again May take 10 30 seconds before screen reappears User Switches between the PC users hp or HP Links to an H...

Страница 14: ...lose disc tray B Record C Play or pause D Stop E Skip to the previous track F Skip to the next track Volume control Volume knob or Volume Up and Volume Down buttons Volume knob Increases speaker volume when turned clockwise and decreases volume when turned counterclockwise It can be turned indefinitely even after maximum sound has been reached Volume Up and Down buttons Press the Volume Up button ...

Страница 15: ...button you want to change 6 For the Button configuration click the Down arrow to the right of the list and choose the button capability such as Simple web page with label 7 Enter a display label and the address information For a Web page enter the URL 8 Click OK 9 On the Buttons tab click Apply 10 Repeat steps 5 through 9 for each button you want to customize 11 Click OK to finish NOTE The number ...

Страница 16: ...10 Getting Started Guide ...

Страница 17: ...ty and number of connectors may vary If your PC model includes three sound connectors select models only on the back of the PC see Setting up 3 connector sound on page 12 If your PC model includes six sound connectors select models only on the back of the PC see Setting up 6 connector sound on page 14 NOTE A stereo speaker set is a left right two channel speaker system A multi channel audio speake...

Страница 18: ...fer Refer to the speaker documentation 2 Turn off the PC 3 Connect the three audio cable plugs from the speaker system to the connectors on the back of the PC See the following table 4 Turn on the PC 5 Turn on the speaker system 6 Configure the audio output for this 3 connector multi channel speaker system by performing the following procedure Configuring the Multi Channel Sound Manager 3 connecto...

Страница 19: ...esent this microphone connector is ready to use and does not affect the use of the multi channel audio speaker system To use the microphone connector on the back of the PC with a 3 connector multi channel audio speaker system you must disconnect the cables for the multi channel speakers and change the audio configuration to a two channel audio system Refer to Configuring the Multi Channel Sound Ma...

Страница 20: ...tal audio out and digital audio in connectors for digital sound devices such as a DVD recorder or a digital stereo receiver amplifier The four connectors A B C and E for the 6 connector multi channel speaker system are on the back of the PC NOTE When using the digital out connector for sound 6 connector select models only select Digital S PDIF out to External Processor NOTE To test the speakers mu...

Страница 21: ...stem by performing the following procedure Configuring the Sound Effect Manager 6 connector 1 Click Start on the taskbar 2 Choose Control Panel 3 If it is present click Sounds Speech and Audio Devices 4 Click Sound Effect Manager The window opens 5 Click the Speaker Configuration button 6 Select the option describing the number of speakers in your system for example 7 1 speakers A connector with n...

Страница 22: ...l Panel 3 If it is present click Sounds Speech and Audio Devices 4 Click Sounds and Audio Devices 5 Click the Audio tab 6 In Sound recording select the default device from the drop down list Choose RealTek HD Front Pink Jack to use the microphone connector on the front of the PC RealTek HD Digital Input to use the digital audio in connector on the back of the PC RealTek HD Front Green Jack to use ...

Страница 23: ...d Effect Manager has four buttons that display its control screens To open the Sound Effect Manager 1 Click Start on the taskbar 2 Choose Control Panel 3 If it is present click Sounds Speech and Audio Devices 4 Click Sound Effect Manager The window opens 5 Click a button near the top of the window to see that control screen The Sound Effect Manager control screens Sound Effect selects the Environm...

Страница 24: ...Wizard 6 connector With the Audio Wizard enabled both the microphone connector B and the headphones connector C on the front of the PC can be retasked to perform a different audio function These two connectors are universal audio jacks When you plug in a cable the Wizard asks you to select the function for the cable from a list and then it sets the universal audio jack to perform as the selected f...

Страница 25: ...g bay select models only on the top of the PC chassis You can use the docking bay to Store CDs DVDs or memory cards Dock a peripheral device in the bay such as a digital camera docking station Install a special cover optional and an HP camera and HP camera docking station Both the camera and the docking station are sold separately Install a special cover optional and an iPod Dock for use with an i...

Страница 26: ... of connectors may vary To store CDs DVDs or memory cards Gently press down on the bay lid and slide it open To install a peripheral device an iPod Dock or an HP camera and HP camera docking station 1 Gently press down on the bay lid and slide it open 2 Place the peripheral device the iPod Dock H or the camera docking station A on the top of the PC 3 For a camera place the camera cradle B that cam...

Страница 27: ...thread them to the front of the PC Pull the cables to the center and connect them to the peripheral or the docking station 5 Connect the cables to the back of the PC or to a power outlet For a peripheral refer to the instructions that came with your peripheral device For an iPod Dock connect the iPod cable to the USB Refer to the documentation that came with your iPod C B H K ...

Страница 28: ... guide the edge of the lid into the top of the PC 7 When you want to use it place the iPod M or the HP digital camera E into the docking station 8 Follow the instructions that came with your peripheral or docking station Using Your Multistorage Bay Your PC may have a multistorage bay select models only on the top of the PC chassis You can use the multistorage bay to Store CDs DVDs or memory cards ...

Страница 29: ...onnectors may vary Multistorage bay chassis figure 1 Storing CDs DVDs or memory cards To store CDs and DVDs open the bay cover A in multistorage bay chassis figure 1 and gently lift the two sections to form the spindle B in figure 1 You can store up to ten discs To store memory cards open the top cover and if necessary lower the two spindle sections A in figure 1 Docking a peripheral device To use...

Страница 30: ...on the multistorage bay top To use the chassis top to place a peripheral device do the following 1 Open the bay cover A in figure 1 Hold the cover on each side near the hinges then lift the cover and slide it toward the back of the chassis C in figure 2 Gently lift it off 2 Grasp the tab T in figure 3 and pull it out toward the front of the chassis E in figure 3 Put the tab in its storage area in ...

Страница 31: ...able to the USB or FireWire IEEE 1394 connector on the back of the PC Plug the power cord for the peripheral device into a power outlet Multistorage bay chassis figure 3 Using the optional camera station PC top Your PC chassis may include the optional camera docking station feature Multistorage bay chassis figure 4 E F G T ...

Страница 32: ...r the hinges then lift the cover and slide it toward the back of the chassis C in figure 1 Gently lift it off To make it easy to insert the cables during step 3 grasp the tab T in figure 5 and pull it out toward the front of the chassis E in figure 3 Replace the tab after threading the cables Multistorage bay chassis figure 5 2 Place the camera cradle H in figure 5 included with the camera onto th...

Страница 33: ...t to view the camera images on a TV Plug the power cord M in figure 5 into a power outlet 6 Insert the camera Hold the camera over the camera cradle R in figure 7 with the viewer window toward the front of the PC and lower the camera onto the cradle Multistorage bay chassis figure 7 hp dvd wr iter cd wr iter exp an sio n ba y hp pavi lion 000 0xxx P hp dvd wr iter cd wr iter ex pa nsi on ba y hp p...

Страница 34: ...ay cable tunnel remove the rear top cover 1 Open the bay cover Hold the cover on each side near the hinges and then lift the cover and slide it toward the back of the chassis Gently lift it off 2 Press the tab A in figure 8 inside the bay and slide the top rear cover toward the back of the chassis then lift off the cover Multistorage bay chassis figure 8 A ...

Страница 35: ...d slots and use each media independently Place only one piece of media in a slot at one time Each card slot has its own drive letter and icon When you insert media the display label may change to the title of the media if the title is present Card 4 slot reader 2 slot reader CompactFlash Type I media Lower left slot Upper slot CompactFlash Type II media Lower left slot Upper slot IBM Microdrive di...

Страница 36: ...n use the media contents You can copy files from or to the media 3 When you are finished right click the drive icon select Eject check that the activity light is on but not blinking and then remove the media A steady activity light indicates that the PC is not reading or writing the media CAUTION Do not click Stop in the Safely Remove Hardware window with the USB Mass Storage Device selected Doing...

Страница 37: ...sk drive Receptacle edge holes C lower left Secure Digital SD Memory Card Facing up D upper right MultiMediaCard MMC Facing up D upper right Memory Stick MS Memory Card Facing up E lower right Memory Stick MS Pro Memory Card Facing up E lower right SmartMedia SM Memory Card Facing up B upper left xD media Facing up B upper left A Activity light B Upper left slot C Lower left slot D Upper right slo...

Страница 38: ...es F upper Secure Digital SD Memory Card Upside down gold connector fingers up G lower MultiMediaCard MMC Upside down gold connector fingers up G lower Memory Stick MS Memory Card Upside down gold connector fingers up G lower Memory Stick MS Pro Memory Card Upside down gold connector fingers up G lower SmartMedia SM Memory Card Facing up G lower xD media Facing up G lower A Activity light F Upper ...

Страница 39: ...separately The type of video cable you need depends on your TV If your TV has an S video jack you need an S video cable If your TV has a composite video jack you need a composite video cable and depending on the jacks on the back of your PC you may also need an S video adapter cable Connecting to a TV Set To use your TV as a PC screen 1 Turn off the PC 2 Connect the TV cable using one of the follo...

Страница 40: ...o Line In on the TV and plug the other end of the audio cable into the Audio Out jack green connector on the back of the PC Viewing the PC Image on Your TV Screen 1 Make sure the video and audio cables are connected before you turn on the TV and the PC 2 Turn on the TV Press the Video TV button on your remote control to select the Video setting not the TV setting NOTE The S video adapter cable is ...

Страница 41: ...put Device and then select the TV option 3 Click the OK button 4 When the PC image appears on the TV screen click Yes to keep the setting You have 15 seconds to accept this new setting before it reverts to the previous setting 5 Click the OK button to save changes and then click OK again to close the Display Properties window Ge Force tab 1 Click the Ge Force FX xxxx tab 2 To view the computer ima...

Страница 42: ... again to close the Display Properties window Disabling the TV Option When you want to disconnect the TV from your PC you may need to disable the TV option to return your PC display to its original resolution 1 Right click an empty area of the screen and choose Properties The Display Properties window opens 2 Click the Settings tab 3 Click the Advanced button 4 Look at the tabs and follow the step...

Страница 43: ... In the Current display area select Analog Display or Digital Display 3 Click the Apply button 4 When the PC image appears on the monitor screen click Yes to keep the setting You have 15 seconds to accept this new setting before it reverts to the previous setting 5 Click the OK button to save changes and then click OK again to close the Display Properties window Displays tab disabling 1 Click the ...

Страница 44: ... option See the previous procedure 2 Turn off the TV and the PC 3 Remove the video cable from the TV and the PC 4 Remove the audio cable from the TV and the PC 5 Reconnect your PC speaker cable to the Line Out jack lime green connector on the back of the computer ...

Страница 45: ...ack up other drives on your PC Connecting the Drive As an external drive the HP Personal Media Drive connects and disconnects easily from a USB 2 0 connector on the front or the back of most PCs The drive comes with software an external USB cable and an external power cord and power adapter For information about connecting and using the HP Personal Media Drive as an external drive refer to the doc...

Страница 46: ...rom the PC is turned off the drive automatically turns off When the PC is in standby mode a reduced power state the drive remains turned on Inserting the Drive 1 Turn on the PC 2 Line up the ridges on the bottom of the drive with the two slots on the side or the bottom of the PC drive bay Do not force the drive into the bay it should slide easily into the bay WARNING Do not move the PC with the HP...

Страница 47: ...My Computer 3 Select the drive under Hard Disk Drives The default name is HP Personal Media Drive You can permanently assign a drive letter to avoid the letter changing when you connect and disconnect this drive and other devices Also it is easier for a software program to locate the files on the HP Personal Media Drive if a drive letter is assigned Some programs may not be able to find files if t...

Страница 48: ...To play media files You can play media from an HP Personal Media Drive 1 Click Start on the taskbar 2 Click My Computer 3 Double click the HP Personal Media Drive icon to locate your media file 4 Double click the file Most media files open in Windows Media Player To play music files You can play music files that are stored on the HP Personal Media Drive 1 Click Start on the taskbar click My Comput...

Страница 49: ...l Media Drive safely 1 Close all programs that may be accessing your HP Personal Media Drive Make sure that the activity light on the drive is off 2 Double click the Safely Remove Hardware icon in the system tray on the Start taskbar If this icon is hidden click the arrows on the taskbar to display it The Safely Remove Hardware window opens 3 Double click USB Mass Storage Device to locate your HP ...

Страница 50: ...44 Getting Started Guide ...

Страница 51: ... memory cards used by digital cameras and other digital imaging devices by using the memory card reader select models only Refer to Using the Memory Card Reader on page 29 Using HP Image Zone Plus Use the HP Image Zone Plus software program to manage your photos scanned images and video clips It has all the tools you need for viewing organizing editing printing sharing and protecting digital image...

Страница 52: ...uch as crop and red eye removal to the images and video clips you placed in the selection tray For more information see edit your images in Help Projects Click this tab to create or to print a project using the images in the selection tray Projects include photo album pages cards and flyers For more information see create projects in Help NOTE Click the button labeled Preferences B to customize th...

Страница 53: ...d album organization information to choose which photos to send or choose the photos manually Deleting the keep current option for synchronizing with an iPaq automatically updates the photos on the device every time it synchronizes For more information on using HP Image Zone Plus click the Help link in the control area B of the program window Burning a label on a LightScribe media disc You can bur...

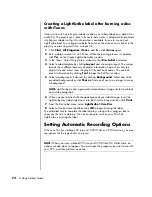
Страница 54: ... 10 When you are satisfied with the appearance of your label design insert the LightScribe disc label side down into the disc drive tray and then click Print 11 From the Disc Label menu select LightScribe 12cm Disc 12 Select a Contrast Level and then click OK to begin burning the label The disc is ejected when the label is complete The estimated time to complete the label displays along with a pro...

Страница 55: ...edia check box is selected and then click Next 6 Select the LightScribe drive from the drop down list and then click Next 7 Insert a blank disc and then click Write disc If you want to create a LightScribe label for your backup disc insert a LightScribe disc with the label side up 8 After the backup is complete turn your disc over with the label side facing down and then click Write Label 9 When t...

Страница 56: ...50 Getting Started Guide ...

Страница 57: ...wizard window opens choose Play Audio CD using iTunes from the list You may have to scroll down in the window to see iTunes Or If the iTunes window does not automatically open click Start on the taskbar choose All Programs click iTunes and then click iTunes 2 The music CD automatically begins to play Or Click the CD in the source list and then click the Play button in the upper left corner of the ...

Страница 58: ...the Playlist You can also control playback by using the media control buttons on the keyboard select models For more information on using Windows Media Player click the Help menu in the Windows Media Player menu bar If necessary first display the menu bar by clicking the up arrow icon in the upper left corner of the Windows Media Player window Playing DVD Movies with InterVideo WinDVD The InterVid...

Страница 59: ...control panel To move the WinDVD control panel place the mouse pointer on the panel but not on a button and drag it to the desired location on the screen To resize the video window when it is not full screen place the mouse pointer on a window corner and drag the border Or Click the Full Screen button in the upper right corner of the WinDVD control panel For information on the InterVideo WinDVD so...

Страница 60: ...t country region Playing Video CDs VCD with InterVideo WinDVD 1 Insert your video CD VCD into a DVD or CD drive 2 Select Play DVD movie using InterVideo WinDVD and click OK Or If the program doesn t open click Start choose All Programs choose InterVideo WinDVD select InterVideo WinDVD Player and then click InterVideo WinDVD 3 If you have a dual language VCD the sound of one language comes out of t...

Страница 61: ...n the upper left corner of the window 4 Click the Look In drop down arrow and select the drive that has the Video CD 5 Double click the MPEGAV folder 6 Select Any File from the Files of type drop down list 7 Select the file and click Open 8 If you have a dual language VCD the sound of one language comes out of the left speaker and the other language comes out of the right speaker Click View on the...

Страница 62: ...56 Getting Started Guide ...

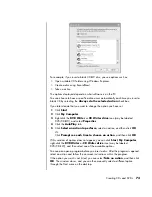
Страница 63: ...e a CD R disc if you are going to play the disc in a CD player CD ROM CD RW DVD ROM or DVD RW R DVD RW R or double layer DVD R drive CD R discs are compatible with more players than CD RW discs NOTE Burn is an industry term used to describe the recording of information onto a DVD or CD Optical recording uses a laser beam to place information onto the disc thus the term burning NOTE If your recordi...

Страница 64: ...ams listed below may not be included with your PC model Software With this program you can iTunes Play music CDs MP3s and other audio files Record music files Record a copy of an existing music or data CD to use on the PC Organize digital files into a library for recording or listening Windows Media Player Play music CDs MP3s and other audio files Play DVD movies Windows Media Player can play DVDs...

Страница 65: ...or wma video files such as wmv asf avi or mpg or image files such as jpg or gif Can create avi and wmv Windows Media Video files InterVideo WinDVD Play DVD movies and video CDs VCD RecordNow Record data and music files Record a copy of an existing music or data CD to use on the PC Create customized music CDs from CDs in your collection or from wav mp3 or wma files These CDs can be played in your h...

Страница 66: ... video DV camera VCR or other analog capture device NOTE Your PC may not include an analog capture device Assemble movies by capturing video clips and scenes into a video project Edit your movies Cut scenes and add music and sound effects still images text video transitions and voice overs Preview movies during editing and before recording final files Create video files export them to your hard di...
Страница 67: ...Click the Copy button in the upper right corner For more information on using Windows Media Player click the Help menu in the Windows Media Player menu bar If necessary first display the menu bar by clicking the Up arrow icon in the upper left corner of the Windows Media Player window Creating Data CDs Using Windows XP Your PC has recording software to record data files such as text files or digit...

Страница 68: ...r or on your PC When recording music files it is important to note that To play your music CD in a home or car stereo it needs to be recorded as a music CD in CD Audio CDA format not as a data CD You must record all music files in one recording session because RecordNow closes the CD after recording is complete Music files can be recorded repeatedly onto a rewritable CD RW disc but all previously ...

Страница 69: ...3 Select Audio CD for Car or Home CD Player 4 Insert a music CD to view the tracks on your CD Select View if you would like to look at another optical drive Or Click Find and then click either Scan for Music or Browse to find music files on your hard disk drive that you want to record 5 Select the tracks you want to record and then click Add 6 Click the Burn icon when you have added all the audio ...

Страница 70: ...t blank RecordNow prompts you to erase it and then automatically begins writing to it when it is erased 9 Click OK It is best not to use the PC while recording 10 Click Done when recording is complete Click the Help icon and then select RecordNow Help for more information about recording music CDs with the RecordNow program NOTE RecordNow scans for all audio files even the sounds from your operati...

Страница 71: ...If the disc is full insert a blank or another appendable disc Or If you are adding files to a disc follow the onscreen instructions 4 To name your disc select Volume Label and then type a name over it RecordNow assigns a name based on the recording date if you don t type a name 5 Add your data files to the file selection window Click the Add Files and Folders button find and select your folders an...

Страница 72: ...ed files RecordNow updates the file and the previous version is overwritten RecordNow allows you to change file names and titles of files you want to record and names of files that were previously recorded As you select data files to record to your disc RecordNow calculates and displays the amount of recording space used on your disc Copying a DVD or CD RecordNow allows you to make a copy of a mus...

Страница 73: ...ase the disc Removing Files in RecordNow When removing files in RecordNow it is important to note When you remove a recorded file from a data DVD R DVD R or CD R the disc space is lost and can t be used for new recordings You can t remove music files from previously recorded music CDs but you can remove music files from the File Selection window in RecordNow before you record the files to your dis...

Страница 74: ...t File Archive 4 Insert a blank CD or DVD into the drive 5 Place a check mark in the Changed since box to limit the scan to files that have been changed since the last time you completed a File Archive 6 Add your files to the Archive window Select one or more categories from the list on the left and click Scan RecordNow scans your hard disk for files related to the category and moves them to the A...

Страница 75: ...ocate your saved image file 5 Click the Burn icon 6 Insert a blank recordable CD or DVD into the drive 7 Click Done when recording is complete Recording Video Files Video quality depends on the quality of the source files the PC speed and its graphics processing ability Refer to the Recording VHS analog video direct to DVD select models only section of this guide Using Disc Labels NOTE Your DVD Wr...

Страница 76: ...urning a label with LightScribe requires three things LightScribe enabled DVD drive LightScribe software LightScribe discs sold separately Burning a label on a LightScribe media disc You can burn the label before or after you burn the disc with data music or picture files Labels can be a simple title and contents list or you can get more creative by adding backgrounds and images You can design and...

Страница 77: ... make sure that Disc Label is selected 3 Click Text and then enter text for the Title and Subtitle 4 For each line of content description click New and enter text for the information you want to include and then click OK 5 Select a label template by clicking Layout and choosing a layout 6 Select a background if desired by clicking Background Select one of the provided backgrounds or click More to ...

Страница 78: ...You can edit playlist information by clicking Text to open the Edit Text window 5 Select a background if desired by clicking Background Select one of the provided backgrounds or click More to find one of your own images to use as a background 6 When you are satisfied with the appearance of your label design insert the LightScribe disc label side down into the disc drive tray and then click Print 7...

Страница 79: ...may be labeled DVD CD RW and select Properties 4 Click the AutoPlay tab 5 Click Select an action to perform select an action and then click OK Or Click Prompt me each time to choose an action and then click OK If this window of options does not appear you can click Start My Computer right click the DVD Writer or CD Writer drive icon may be labeled DVD CD RW and then select one of the available opt...

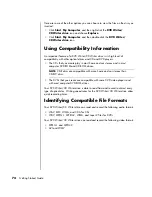
Страница 80: ...reos and in most computer DVD ROM and CD ROM drives The DVDs that you create are compatible with some DVD video players and with most computer DVD ROM drives Your DVD Writer CD Writer drive is able to read from and record to almost every type of optical disc Writing speed rates for the DVD Writer CD Writer drive allow quick recording times Identifying Compatible File Formats Your DVD Writer CD Wri...

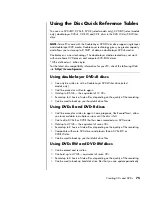
Страница 81: ...equivalent of seven CDs Record up to 2 hours of video files depending on the quality of the recording Compatible with more DVD drives and players than a DVD RW or DVD RW disc Can be used to back up your hard disk drive files Using DVD RW and DVD RW discs Can be erased and rewritten Can hold up to 4 7GB equivalent of seven CDs Record up to 2 hours of video files depending on the quality of the reco...

Страница 82: ...be erased or rewritten Can hold up to 80 minutes of music files or up to 99 tracks Can hold up to 700MB of data depending on the CD Can be used to create storage discs for your hard disk drive files Video recording length Disc type Video quality setting Good Better Best 8 5GB Double Layer DVD R 325 minutes 217 minutes 108 minutes 4 7GB DVD RW DVD R DVD RW DVD R 180 minutes 120 minutes 60 minutes 7...

Страница 83: ...ies by player Varies by player CD RW Data Yes Yes No No MP3 Music Yes Yes Varies by player Varies by player DVD ROM Data No Yes No No DVD movie No Yes No Yes DVD R and DVD R Data Yes Yes No No DVD movie Yes Yes No Varies by player Double Layer DVD R Data Yes Varies by player No Varies by player DVD movie Yes Varies by player No Varies by player DVD RW and DVD RW Data Yes Yes No No DVD movie Yes Ye...

Страница 84: ...nce Optical drive can CD ROM CD RW DVD ROM DVD RW R DVD RW R Double Layer Combo CD RW DVD Read CDs CD Rs and CD RWs Read DVDs Read data on a CD Play music Record data or music to disc for storage or backup View DVD movies Record DVD movies Play PC games ...

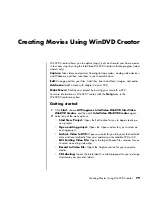
Страница 85: ...ator click the Help menu in the WinDVD Creator menu bar Getting started 1 Click Start choose All Programs InterVideo WinDVD InterVideo WinDVD Creator and then click InterVideo WinDVD Creator again 2 Select one of the menu options Start New Project Opens the Edit section for you to begin creating a new project Open existing project Opens the Open window for you to select an existing project Archive...

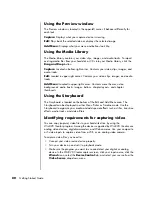
Страница 86: ...chapter thumbnails Using the Storyboard The Storyboard is located on the bottom of the Edit and Add Menu area The Storyboard can be displayed in either Menu Picker or Timeline mode Use the Storyboard to organize your media and add special effects such as titles transition effects audio tracks and video filters Identifying requirements for capturing video You can copy capture video files to your ha...

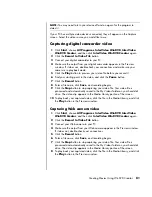
Страница 87: ...atically saved to the My Videos folder on your hard disk drive The video clip appears in the Media Library portion of the screen 10 To play back your captured video click the file in the Media Library and click the Play button in the Preview window Capturing Web camera video 1 Click Start choose All Programs InterVideo WinDVD InterVideo WinDVD Creator and then click InterVideo WinDVD Creator again...

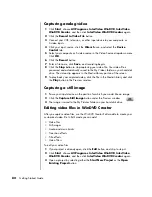
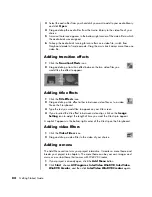
Страница 88: ...rtion of the screen 9 To play back your captured video click the file in the Media Library and click the Play button in the Preview window Capturing a still image 1 Pause your input device on the position for which you would like an image 2 Click the Capture Still Image button under the Preview window 3 The image is saved to the My Pictures folder on your hard disk drive Editing video files in Win...

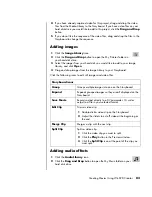
Страница 89: ...m the Image Library to your Storyboard Click the following icons to edit still images and video files Adding audio effects 1 Click the Audio Library icon 2 Click the Drag and Drop button to open the My Music folder on your hard disk drive Storyboard icons Group Groups multiple images into one on the Storyboard Expand Expands grouped images so they are all displayed on the Storyboard Save Movie Rec...

Страница 90: ...nd drop a title effect either in between video files or to a video file on the Storyboard 3 Type the text you would like to appear on your title screen 4 If you inserted the title effect in between video clips click on the Image Setting icon to adjust the length of time you want the title clip to appear A capital T appears in the bottom right corner of the title clip on the Storyboard Adding video...

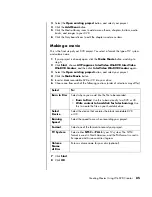
Страница 91: ...on and select your project 4 Click the Make Movie button 5 Insert a blank recordable DVD or CD into your drive 6 Choose one from each of the following sections order of selections may differ 7 Click Start 8 Click OK Select To Burn to Disc Select where you would like the file to be recorded Burn to Disc Use this to burn directly to a DVD or CD Write content to hard disk for later burning Use this t...

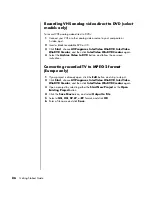
Страница 92: ...again 4 Select the Archive Video to DVD button and follow the onscreen instructions Converting recorded TV to MPEG 2 format Europe only 1 If your project is already open click the Edit button and skip to step 4 2 Click Start choose All Programs InterVideo WinDVD InterVideo WinDVD Creator and then click InterVideo WinDVD Creator again 3 Open a project by selecting either the Start New Project or th...

Страница 93: ... can find guides and information for your PC using the Internet to access a Support Web site To view information for your PC go to the Support Web address listed in the Warranty and Support Guide and search for your product name and number The product number is on the lower front of the PC chassis or is inside the CD storage area NOTE If there are no guide titles listed in the folder your PC has n...

Страница 94: ...e over the Internet with a Support analyst who works with you on solving the problem To start HP Instant Support 1 Click Start on the taskbar 2 Click Help and Support 3 Click Connect to Customer Support 4 Click Start a New Request 5 Follow the onscreen instructions to run a test or submit a problem Your PC must be connected to the Internet to submit a request Using Updates from HP Updates from HP ...

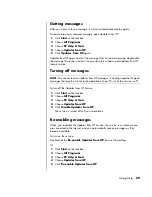
Страница 95: ...art on the taskbar 2 Choose All Programs 3 Choose PC Help Tools 4 Choose Updates from HP 5 Click Disable Updates from HP The service is turned off until you re enable it Re enabling messages When you re enable the Updates from HP Service the service runs whenever you are connected to the Internet and you automatically receive messages as they become available To turn on the service Double click th...

Страница 96: ...t models only in the All Programs menu contains special utilities for PC owners such as support information and programs To see the items in the PC Help Tools folder 1 Click Start on the taskbar 2 Choose All Programs 3 Choose PC Help Tools 4 Click an item to view it or use it ...

Страница 97: ...rpal tunnel syndrome 1 chassis symbols 2 components 3 connecting a TV 33 multi channel speakers 3 connectors 12 multi channel speakers 6 connectors 15 connectors cable tunnel 20 24 PC back 2 symbols on chassis 2 converting recorded TV 86 copying a DVD or CD 66 country region codes 54 creating CDs 57 creating labels 47 customizing keyboard buttons 9 D desktop 6 digital images managing 45 digital pi...

Страница 98: ...ic on and off feature 40 disconnecting the drive 43 inserting a drive 40 location and drive letter 41 storing files 42 I image files 68 adding 83 installing software programs 5 Internet finding an ISP 4 keyboard button 8 organizing destinations 6 signing up with an ISP 4 iPod connecting 20 iTunes 60 creating music CD 60 features 58 playing music CDs 51 K keyboard customizing buttons 9 types of but...

Страница 99: ...les 67 storing files on a DVD or CD 65 removing files 67 repetitive strain injury RSI 1 retasking audio connectors 18 S Safety Comfort Guide 1 safety warnings 1 setting up PC 1 shortcut icons 6 software installing 5 software quick reference 58 sound connectors 11 3 connectors PC 12 6 connectors PC 14 Sound Effect Manager 17 audio wizard 18 retasking connectors 18 sound manager multi channel 3 conn...

Страница 100: ...87 Windows Media Player creating music CDs 61 features 58 play music CDs 52 playing video CDs 55 Windows Movie Maker 2 0 features 59 Windows XP creating data CDs 61 WinDVD 13 control panel 53 features 59 playing DVD movies 52 playing video CDs 54 WinDVD Creator adding a menu 84 adding audio effects 83 adding images 83 adding title effects 84 adding transition effects 84 capture 79 edit 79 editing ...

Отзывы: