background image

Printed in Singapore 11/97

Manual Part Number
5967-0853

HP

10
Ba
s

e

-T Hu

bs

Managem

ent

and

Configuration

*5967-0853*

Technical information in this document

is subject to change without notice.

©Copyright Hewlett-Packard Company

1997. All rights reserved. Reproduction,

adaptation, or translation without prior

written permission is prohibited except

as allowed under the copyright laws.

Less Work, More Network

HP

Ne

tw

o

rki

ng

HP 10Base-T Hubs

Management and
Configuration

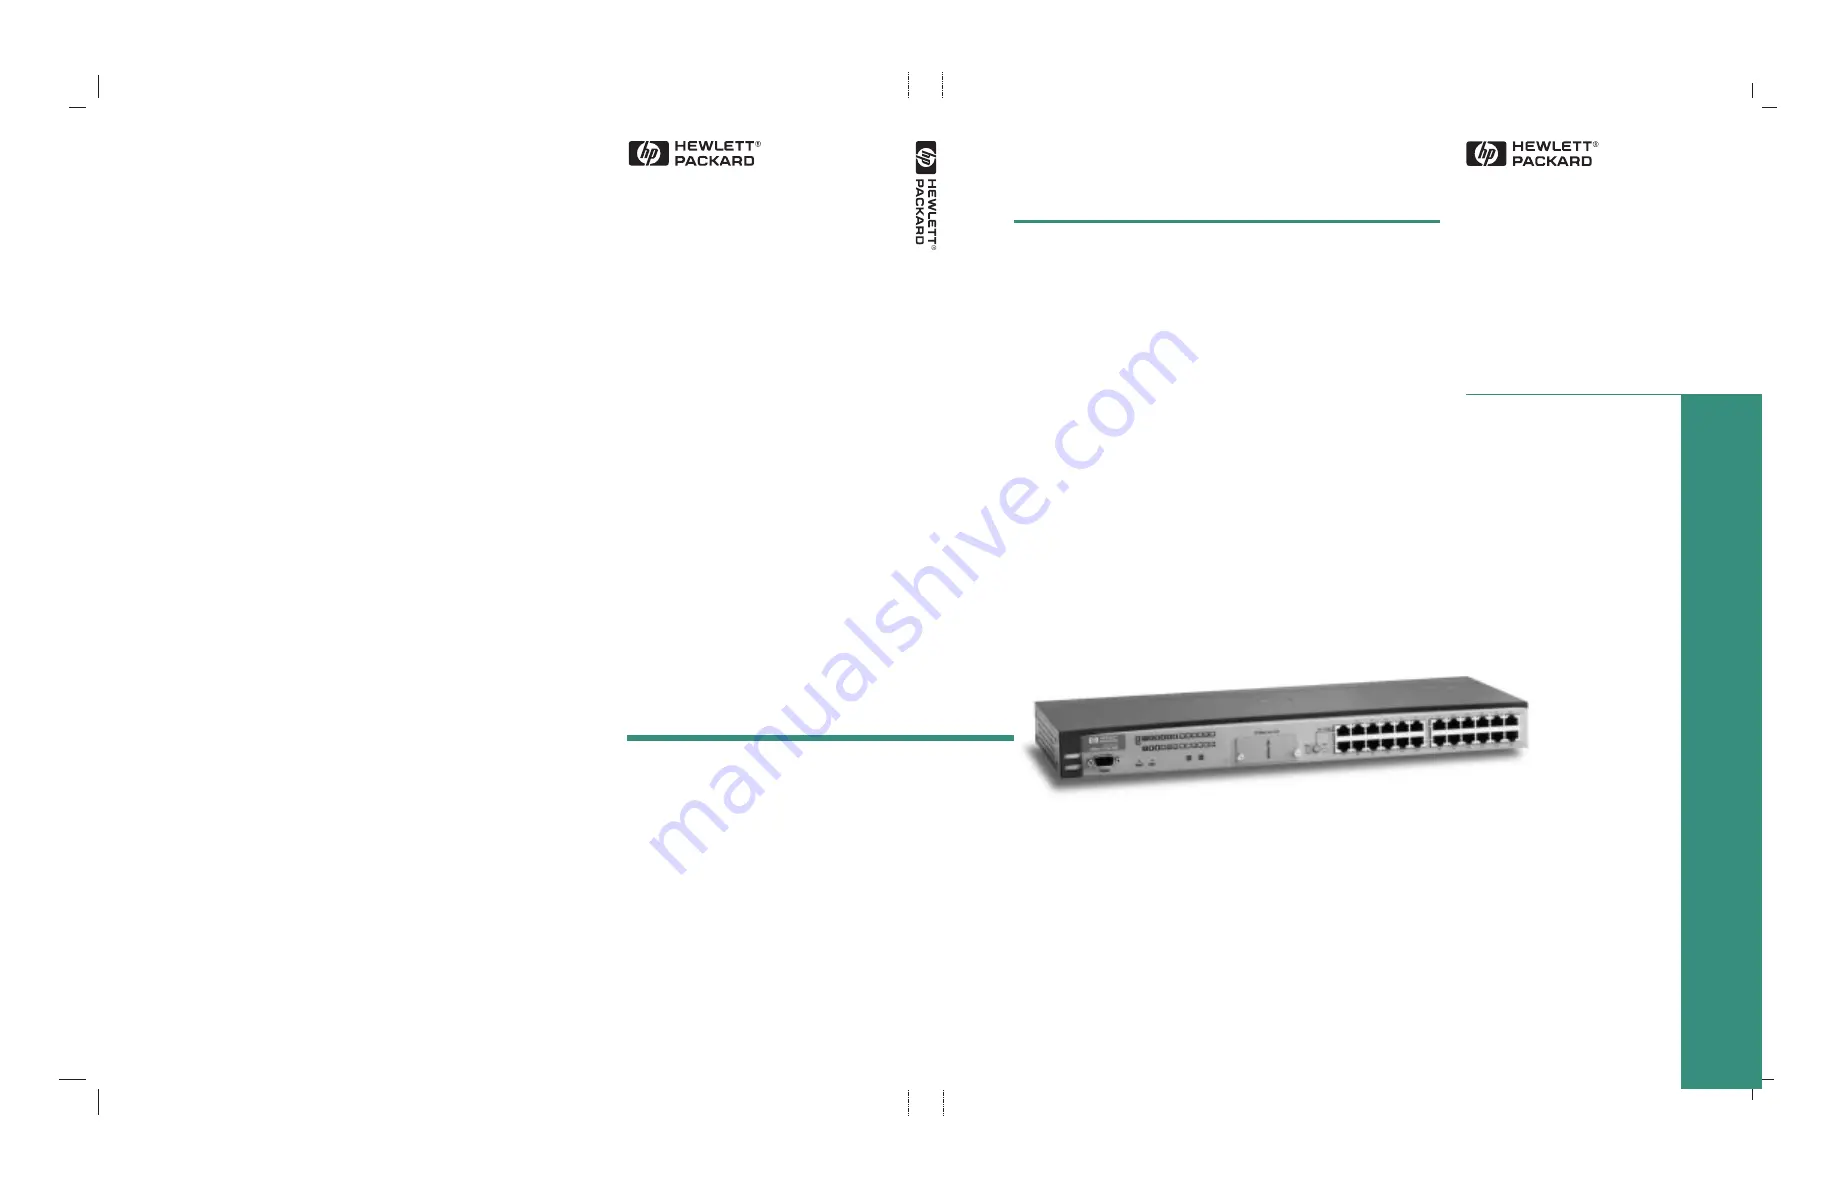
HP 10Base-T Hub 12M

HP 10Base-T Hub 24M

For world-wide support on all

HP Network Connectivity Products

visit our web site at:

http://www.hp.com/go/network_city

Содержание J3128A AdvanceStack 10Base-T Hub-8E

Страница 1: ...ackard Company 1997 All rights reserved Reproduction adaptation or translation without prior written permission is prohibited except as allowed under the copyright laws Less Work More Network HP Networking HP 10Base T Hubs Management and Configuration HP 10Base T Hub 12M HP 10Base T Hub 24M For world wide support on all HP Network Connectivity Products visit our web site at http www hp com go netw...

Страница 2: ...HP 10Base T Hubs Management and Configuration Agent bk AGTCH0 FM5 Page iii Thursday February 19 1998 2 13 PM ...

Страница 3: ...mation contained in this document is subject to change without notice HEWLETT PACKARD COMPANY MAKES NO WARRANTY OF ANY KIND WITH REGARD TO THIS MATERIAL INCLUDING BUT NOT LIMITED TO THE IMPLIED WARRANTIES OF MERCHANTABILITY AND FITNESS FOR A PARTICULAR PURPOSE Hewlett Packard shall not be liable for errors contained herein or for incidental or consequential damages in connection with the furnishin...

Страница 4: ... countries contact your reseller or local HP Customer Care Center see chart on other side for the BBS telephone number for your country Follow the menu system to find and download the latest software agent firmware or drivers for your HP networking product When Downloading Files Files are typically named to correspond to the HP product number of the product they re intended for If the file you dow...

Страница 5: ...lable that provide you with expert HP technical assistance HP SupportPacks purchased from your local reseller provide a variety of services including advanced technical support and around the clock availability Other services offer network design consulting or remote telephone support Contactyour reseller orlocal HP Sales and Support Office for more information North America Hungary 36 1 252 4505 ...

Страница 6: ...onding to an Enter username prompt 2 9 3 Setting an IP Address for the Hub Communication Between the Hub and Network Management Station 3 1 Globally Assigned IP Network Addresses 3 2 IP Configuration Parameters 3 2 Ways of Setting an IP Address 3 3 Manually Setting an IP Address from the Hub Console 3 4 Automatically Acquiring an IP Address Using Bootp DHCP 3 6 4 Running the Browser Interface Syst...

Страница 7: ...ser Interface 6 9 Viewing Hub System Information in the Console 6 10 Port Status 6 11 Changing Port Settings in the Browser Interface 6 13 Viewing the Port Settings in the Console 6 14 Hub Port Counters 6 15 Viewing Port Counter Statistics in the Browser Interface 6 17 Viewing Port Counter Statistics in the Console 6 18 Global Counters 6 19 Viewing Hub Counter Statistics in the Browser Interface 6...

Страница 8: ... 53 Serial Timeout 6 54 Setting a Console Serial Timeout Value 6 55 Hub Configuration Menu 6 56 Hub System Information 6 58 Changing Hub System Information in the Browser Interface 6 60 Changing Hub System Information in the Console 6 61 Port Enable Disable 6 63 Enabling and Disabling Ports in the Browser Interface 6 65 Enabling and Disabling Ports in the Console 6 67 Port Security 6 69 Intruder P...

Страница 9: ...Multiple Hub Configuration Screens to a Log File 6 109 Reboot Hub 6 110 Rebooting the Hub in the Console 6 111 Download OS 6 112 Downloading Firmware to the Hub in the Console 6 113 Return to the Command Prompt 6 114 Changing Your Support URL in the Browser Interface 6 116 How to Find Support Material in the Browser Interface 6 118 7 Troubleshooting Troubleshooting Approaches 7 1 Diagnosing with t...

Страница 10: ...o the manageable HP 10Base T Hubs HP J3301A 10Base T Hub 12M HP J3303A 10Base T Hub 24M Each interface consists of a series of management features accessed either through a menu driven screen system or a split Window with tab navigation both that begin at a home environment Each approach has its advantages that are described in the next sections See chapter 2 for information on connecting up and u...

Страница 11: ...evice icons and other graphical objects to represent values rather than numeric values display of acceptable ranges of values available in configuration list boxes port security configuration available Advantages of Using the Hub Console Interface The following are advantages of using the hub console more comprehensive set of features to work with than the Browser Interface out of band access thro...

Страница 12: ...network problems Identifies users by port and lets you assign easy to remember names to any network device Enables you to configure and monitor network devices from your PC Network Traffic Shows traffic and top talker nodes right on screen Traffic monitor diagrams make bottlenecks easy to see Real time fault isolation improves network reliability See your entire network without having to put RMON ...

Страница 13: ...Agent bk AGTCH1 FM5 Page 4 Thursday February 19 1998 2 13 PM ...

Страница 14: ...rting a hub console session through a direct out of band serial connection through a modem out of band serial connection through an in band Telnet connection using the hub console the two console regions the command prompt region the menu system Agent bk AGTCH2 FM5 Page 1 Thursday February 19 1998 2 13 PM ...

Страница 15: ...plug and go network devices They are shipped with a factory default configuration that will work for most network situations All the hub ports are enabled and the DHCP BOOTP is enabled so the hub can automatically acquire an IP address from a properly configured DHCP or BOOTP server For this basic hub operation it is not necessary to use the console but you can use the console for the uses listed ...

Страница 16: ...Xoff flow control a baud rate of 115200 57600 38400 19200 9600 4800 2400 or 1200 3 Press Enter a few times until the console displays some hub version information followed by the message Type MENU to access the ASCII menu system or HE or for help on console commands and the prompt is displayed The baud rate for communication between the hub and the terminal is set automatically when you press Ente...

Страница 17: ...ole end to the serial port on the PC or terminal 5 Make sure the terminal and modems are functioning properly then estab lishthelinkbetweentheconsole smodemandthehub smodemaccording tothemodeminstructions Seeyourmodemmanufacturer sconfiguration guide for details 6 Press Enter a few times until the console displays some hub version information followed by the message Type MENU to access the ASCII m...

Страница 18: ...e in chapter 6 for details on setting an IP address 2 Enter the command telnet followed by the IP address or system name of the hub for example telnet 192 1 1 10 or telnet your_hub Your Telnet syntax depends on your TCP IP software or your terminal server You can use a system name if you have name resolution system such as Domain Name Server DNS The console then displays some hub version informati...

Страница 19: ...the Command Prompt region which you enter at first This region enables you to perform tasks by issuing commands For details on using commands in this region see Table 2 1 the Menu System region which you access by entering ME from the command prompt The menus enable you to configure hub port and network settings through screens that contain fields and prompts See The Console Menu System later in t...

Страница 20: ...isplaying Help and ID Commands Commands Available The available commands in the Command Prompt region are shown in the following table Table 2 1 Commands Issued from the Console Command Prompt Command Command Name Description DO Download Downloads new versions of hub firmware from a firmware server HE Help Displays some basic help on all console commands ID Identify Displays firmware revision numb...

Страница 21: ...ng viewing hub and port counter statistics configuring access settings configuring security settings configuring port and device settings performing diagnostic tests rebooting the hub downloading new firmware To get into the hub console s menu system enter ME at the command prompt The Main Menu will be displayed as shown in figure 2 2 To navigate through the menus simply enter the number of the me...

Страница 22: ...our network administrator to see if you are using the proper username The interface allows for three retries before discon necting 2 Type in the password string required at the Password prompt Note that when entered the password string is not displayed on the screen for security reasons If you typed the wrong password string the interface displays the following message Password incorrect Check to ...

Страница 23: ...hub for 10 seconds Once you have removed the password you can issue commands in the Command Prompt region or enter the hub s console interface Menu System If you want to change your password and username go to the Password option under the Management Access Configuration Menu For details on process see the reference page in Chapter 6 of this guide for Passwords Agent bk AGTCH2 FM5 Page 10 Thursday...

Страница 24: ...er the network by both a World Wide Web browser application and a network management software application that complies with the Simple Network Management Protocol SNMP standard and has standard SNMP MIB browser functionality The communication between the SNMP network management station and the hub takes place using the network layer protocols IP for TCP IP networks The network layer communication...

Страница 25: ...Make sure that all manageable devices on the network have the same subnet mask The IP configuration parameters are as follows IP Address The IP address of the hub is written in the format X X X X where each X is a decimal number between 1 and 254 Every IP address on a network must be unique Country Phone Number E Mail URL Company Name Address United States Countries not in Europe or Asia Pacific 1...

Страница 26: ...more than 64 routers away The maximum allowable value is 255 Ways of Setting an IP Address To manage the hub using the Browser Interface or from an SNMP network management station your hub needs an IP address Some configuration items in the Hub Console Interface are also not affective unless the hub has an IP address for example setting a Community Name and an Authorized Manager list for the hub N...

Страница 27: ...Management Access Management screen enter 1 to display the IP Configuration Screen shown in figure 3 1 Figure 3 1 The IP Configuration Screen 4 Enter Y at the Change IP configuration Y N prompt The console prompts you to select the method by which you want to assign an IP address to your hub The two options are B ootp DHCP or M anual Config DHCP and Bootp are automatic network address selection pr...

Страница 28: ...ter entering the Time To Live value the console prompts you with Change and save to new IP configuration Y N 7 Enter Y to save all of the values you have set The console then returns you to the IP Configuration screen Note the new address Subnet Mask Default Router and Time To Live values that you have set and verify that they are correct YourhubisnowreadytobemanagedasanetworkdevicethroughtheBrows...

Страница 29: ... configured to use Bootp DHCP to retrieve the IP configuration information The Bootp DHCP Process When the hub is powered on it broadcasts Bootp DHCP requests that contain the hub s MAC address The Bootp DHCP server receives the request and searches its Bootp DHCP table file for an entry that matches the hub s MAC address If a match is found the configuration data in the associated file entry is r...

Страница 30: ...one device may need the address for an hour while another device may use the same address for several days Microsoft NT server includes DHCP server software Consult the NT server online help for information on activating and configuring the DHCP server hphub12M is a user defined symbolic name to help you find the correct section of the bootptab file If you have multiple hubs that will be using BOO...

Страница 31: ...Agent bk AGTCH3 FM5 Page 8 Thursday February 19 1998 2 13 PM ...

Страница 32: ...on policy on the Browser Interface System Requirements to Run the Browser Interface To run the Browser Interface you need the following system requirements Table 4 1 System Requirements Platform Entity Minimum Requirement Desired Requirement PC Platform 90 MHz Pentium 120 MHz Pentium Unix Platform 100 MHz 120 MHz RAM 16 Mbytes 32 Mbytes Pixel Count 800 X 600 1 024 x 760 Color Count 256 65 000 Inte...

Страница 33: ...der the Security Menu In Microsoft Internet Explorer 4 0 click on the Settings menu See the online help in your browser for more specific information on how to enable Javascript 3 Type the IP address of the hub you want to access in the Location field and press Enter If you are using a Domain Name Server DNS your hub may have a friendly name associated with it for example Hub20 that you can type i...

Страница 34: ...t Time Install By clicking on this event the Browser Interface displays the First Time Install window that provides information about first time installations Upon the first session with the Browser Interface the Alert Log always displays the First Time Install alert as shown in the following figure Figure 4 1 The Overview Window during a First Time Install Agent bk AGTCH4 FM5 Page 3 Thursday Febr...

Страница 35: ...terface access parameters and Fault Detection policy for future use with the Browser Interface To set Fault Detection policy click on the jump string select fault detection in the second bullet in the window and go to the section Setting Fault Detection Policy later in this chapter To set Browser Interface access parameters click on the jump string secure access to the device to display the Device...

Страница 36: ... These strings assign you read write privileges The manager strings are used as your defaults for Hub Console Interface access Strings you assign in the manager fields will overwrite previous access strings assigned for both the Browser Interface and the Hub Console Interface Creating Operator Usernames and Password To create an operator username and password perform the following steps 1 Click in...

Страница 37: ...sword perform the following steps 1 Click in the Manager User Name box and type a string The string may be separated by spaces and may include any ASCII character in it The string may be no longer than 15 characters including spaces To represent spaces use the underscore _ character 2 Click in the Manager Password box and type a string The string should not have spaces but may include any ASCII ch...

Страница 38: ...th the simplicity of a mouse click Spend a little bit of time reviewing the following sections to learn about the different pieces of this tool Understanding the Overview Window The Browser Interface Overview Window is the home environment for any entry into the Browser Interface The following figure details the different pieces to it Figure 4 4 The Overview Window Tab Bar Active Button Gauges Are...

Страница 39: ...tton selected The button is darkened and the window associated with the button is displayed Alert Log A list of all events or alerts that can be retrieved from the hub s firmware at the current time Information associated with the alerts is displayed including Status Alert Name the date and time the Alert was reported by the hub and a short description of the alert Alert Log Header Bar The row of ...

Страница 40: ...e shows a sample reading of the Gauges Area Figure 4 5 The Gauges Area The attributes are Utilization The amount of network capacity used on the hub expressed as a percent Collisions The number of Collisions expressed as a percent of all packets received on the hub Broadcasts The number of Broadcast packets expressed as an amount per second collected over a fixed number of seconds Errors The numbe...

Страница 41: ...ached in the current session NotethatthecurrentreadingoftheGaugeNeedleandtheHighWatermark Indicator may be different the High Watermark Indicator maybe higher Once you leave the screen the High Watermark Indicator returns to 0 Gauge Needle The black pointer in the center of the gauge that points to different values on the gauge indicating levels of activity for the attribute Normal Activity Region...

Страница 42: ...gions in the gauge Note thatthe three colors appear in three distinct Gauge Severity Regions They also map to specific Status Indicator shapes that are displayed in two places the Status column in the Alert Log the Status Bar above left of the Gauges Area See Table 4 4 for details on Status Indicator shapes The range of each Gauge Severity Region differs for each attribute For example the upper li...

Страница 43: ... cable A full list of alerts are shown in Table 4 3 Figure 4 7 The Alert Log Each alert contains the following fields of information Status The level of severity of the event generated Severity levels can be Normal Warning and Critical Alert The specific event name being sent Date Time The date and time the event was received by the Browser Interface This value is shown in the format DD MM YY HH M...

Страница 44: ...ing Alert Description First Time Install Important installation information for your hub Problem Driver or NIC Problem software driver or LAN adapter detected on port Problem XCVR or NIC Problem transceiver or LAN adapter card detected on port Problem Cable Problem cable detected on port Cable Length Repeater Hops Problem cable detected on port Packet loss detected which could be due to excessive ...

Страница 45: ...he problem and a possible solution It also provides three management buttons an Acknowledge Event Button that removes the New symbol from the entry a Delete Event Button which removes the alert from the Alert Log a Retest Button which polls the hub again to determine whether or not the error can be regenerated A sample Detail View describing a Polarity Reversal alert is shown here Figure 4 8 Detai...

Страница 46: ...cked to every 15 seconds Acknowledge Selected Events Button RemovestheNewsymbolfrom the entry This feature is useful if you have more than one system admin istrator working on problems It shows that someone has looked at it The Status Bar will no longer consider it a fault needing to be displayed If an alert has not been acknowledged the New label appears in the Status column to the left of the St...

Страница 47: ...ormation about the device you have selected The editable information System Name Location and Contact are maintained in the Administration dialog box Status Figure 4 10 The Status Tab Bar This tab displays the Status Button Bar which contains buttons that display hub settings and statistics that represent recent hub behavior The buttons are Overview The home position for the Browser Interface Disp...

Страница 48: ... disabling System Information Enables you to view and set system information for a selected device IP Configuration Enables you to change existing value for an IP address subnet mask and the gateway address for the hub Port Configuration Enables you to enable and disable ports in addition to viewing the security and source address information Backup Links Enables you to configure a primary and a r...

Страница 49: ...The Diagnostics Tab Bar This tab displays the Diagnostics Button Bar which contains buttons that enable you to perform troubleshooting tasks for your Hub The buttons are Ping Link Test Enables you to send test packets to devices connected to a port using both the IP address Ping and the MAC address Link as criteria for a valid connection Device Reboot Causes the hub to reset its state as though it...

Страница 50: ...m Name Indicates the name of product name of the hub for which you have created your current Browser Interface session Status Label Indicates by test string the severity of the most critical alert in the current display of the Alert Log Most Critical Alert Description A short narrative description of the earliest unacknowledged alert with the current highest severity in the Alert Log appearing in ...

Страница 51: ...to perform two types of fault management tasks controls the types of alerts reported to the Alert Log based on their level of severity controls the sensitivity level required by a port before the port is disabled You perform these tasks in the Fault Detection Window The Fault Detection Window is shown below Figure 4 15 The Fault Detection Window Agent bk AGTCH4 FM5 Page 20 Thursday February 19 199...

Страница 52: ...ing cannot have a higher sensitivity than the one selected in the Log Network Problems list box The mapping between the two settings is shown in the following table Table 4 5 Recommended Settings The recommended sensitivity level for Log Network Problems is High Sensi tivity The recommended sensitivitylevelfor DisableProblem PortsisMedium Sensitivity The Fault Detection Area settings are described...

Страница 53: ...They are Apply Changes This button stores the settings you have selected for all future sessions with the Browser Interface until you decide to change them Clear Changes This button removes your settings and returns the settings for both list boxes to the levels they were at in the last saved detection setting session Reset to Default Settings This button reverts the settings for both list boxes t...

Страница 54: ...es on the hub include Security via configuration of SNMP communities Event reporting via SNMP traps and RMON SNMP v2 Notifications are not supported at this time Managing the hub with a network management tool such as HP AdvanceStack Assistant Monitoring data normally associated with the SNMP agent Get operations Supported Standard MIBs include Bridge MIB RFC 1493 Etherlike MIB RFC 1650 Ethernet M...

Страница 55: ...ion information vlan mib supporting hpVlanGeneralGroup HP EASE MIB version 4 to allow EASE sampling HP Linktest MIB for basic device management linktest mib HP ICF Linktest MIB for link test features icfbasic mib The hub SNMP agent also uses certain variables that are included in a Hewlett Packard proprietary MIB file you can add to the SNMP database in your network management tool You can copy th...

Страница 56: ...e correct community name may access this device with the View and Access levels that have been set for that community If you want to restrict access to one or more specific nodes you can enter up to 10 IP addresses of such nodes Configuring one or more IP addresses means that only the network management stations at those addresses are authorized to use the community name to access the hub Caution ...

Страница 57: ...Agent bk AGTCH5 FM5 Page 4 Thursday February 19 1998 2 13 PM ...

Страница 58: ...down through the environment you will be following the presentation sequence in the reference A Browser Interface Window will be presented in this reference alongside each console screen that provides similar functionality Remember if you are trying to find a Browser Interface Window you need to know the order in which the like Hub Console Screen appears in the applica tion For example to find the...

Страница 59: ...ar Security Intruder Log Clear Port Intrusion LEDs Button in the Intrusion Log Window Management Access Configuration Menu IP Configuration IP Settings Community Name Authorized Managers Console Password Device Passwords Telnet Enable Disable Browser Interface Password Serial Timeout Hub Configuration Menu Hub System Information Hub System Information Port Enable Disable Device View Port Security ...

Страница 60: ...stations to set parameters for the hub allow access to the device via Telnet sessions and assign passwords to the console Hub Configuration Provides options that enable you to configure hub system attributes to turn on or off a port to configure activities that occur uponportsecurityviolations tocreatebackuppathsandtoreverthubsettings to factory default levels Diagnostics Providesoptionsthatenable...

Страница 61: ...6 4 Configuration Reference Configuration Reference Figure 6 1 The Main Menu Screen Agent bk AGTCH6 FM5 Page 4 Thursday February 19 1998 2 13 PM ...

Страница 62: ...Displays hub level statistics for various activity types Security Intruder Log Displaysarecordofunauthorizedendnodesand devices intruders gaining entry to a port on the hub Clear Security Blinking Port LEDs Clears blinking port LEDs associ ated with intruders Hub Status and Counters Attribute Description Screen Name Hub Status and Counters Menu Main Menu Function Displays a list of options that de...

Страница 63: ...6 6 Configuration Reference Configuration Reference Figure 6 2 The Hub Status and Counters Menu Screen Agent bk AGTCH6 FM5 Page 6 Thursday February 19 1998 2 13 PM ...

Страница 64: ...ill be located This can be up to 80 characters including spaces For example Wiring Closet East The console only allows 80 characters to be set and the Browser Interface allows 255 Download Version Provides the versions of ROM firmware and hard ware of the device General System Information Attribute Description Screen Name General System Information Menu Hub Status and Counters Function Displays a ...

Страница 65: ...f test MAC Address Provides the MAC address of the device For example 080009 495925 Serial Number Provides the serial number of the device For example SG63401386 SNMP Module Security Information Indicates whether the hub has experienced a violation generally a packet from a management station that is not authorized to manage to the hub Agent bk AGTCH6 FM5 Page 8 Thursday February 19 1998 2 13 PM ...

Страница 66: ... Identity Window in the Browser Interface click on the Identity Tab The Browser Interface displays the Identity Window The Identity Window is an easy and quick way to determine the IP Address and MAC address of your hub Quick and easy access to MAC Address of hub Quick and easy access to IP Address of hub Agent bk AGTCH6 FM5 Page 9 Thursday February 19 1998 2 13 PM ...

Страница 67: ...face perform the following steps 1 From the Main Menu type 1 and press Enter The Hub Console Interface displays the Hub Status and Counters Menu 2 From the Hub Status and Counters Screen type 1 and press Enter The Hub Console Interface displays the General Status Screen System Up Time provides quick and easy way to tell when the hub was powered on Agent bk AGTCH6 FM5 Page 10 Thursday February 19 1...

Страница 68: ...ailable to receive and transmit packets Port Status Attribute Description Screen Name Port Status Menu in Hub Console Statistics and Counters Function Displays port list that provides information about the state of all ports on the hub Common Use Determining whether the hub is receiving packets from a connected device Identifying which devices are connected to the hub identifying MAC addresses of ...

Страница 69: ...ink beat Last Heard Source Address Shows the MAC address of the device that sent the last packet to the port Addresses are shown only for active ports Security Information Violation on the Browser Interface Indi cates whether the port s security rules have been violated Settings can be No violation Indicates no unauthorized address has attempted to connect to the port Violation Indicates a port in...

Страница 70: ...the Port Settings Button The Browser Interface displays the Port Settings dialog box This dialog box contains a port list with the associated status of each port on the hub 3 Click on a port number for which you want to change the status The port number is highlighted If the port is enabled click on the Disable Selected Port button to make the port inactive If the port disabled click on the Enable...

Страница 71: ...ounters Menu type 2 and press Enter The Hub Console Interface displays the Port Status Screen In the example shown ports 1 and 4 are active and the Link Beat signal has been detected indicating a valid 10Base T connection has been made for both MAC addressesfor devicesconnected to both portsare listed in theLastHeard Source Address column and no security violation has been recorded for either port...

Страница 72: ...they are capable of degrading each other s transmission The number of collisions should be proportional to the number of packets trans mitted over time and the number of nodes on the network Collisions are a normal occurrence on a CSMA CD network collision domain CRC Alignment Errors Provides the total number of errors associated with a Cyclic Redundancy Check code which is typically placed at the...

Страница 73: ...o pass through too many repeaters on the network or too much distance over a 10Base 5 coaxial cable In both cases the packet initially will detect a clear wire but because too much time goes by because of the delays of distance or repeater changes another packet has had the opportunity to enter the wire creating a collision Giant Packets Provides the total number of packets seen by this port that ...

Страница 74: ...Interface displays the Port Counters Window This dialog box can give you a snapshot of the hub s effectiveness Especially note the Collisions and CRC Errors columns If certain ports show high number in these columns you may want to investigate your end nodes Both of these counters are dependent upon time for collisions Collisions are normal occurrences on the network High values can occur for them...

Страница 75: ...form the following steps 1 From the Main Menu type 1 and press Enter The Hub Console Interface displays the Hub Status and Counters Menu 2 From the Hub Status and Counters Menu type 3 and press Enter The Hub Console Interface displays the Port Counters Screen Watch for high counts of Collisions CRC Errors and Broadcast Packets High values indicate heavy port traffic Agent bk AGTCH6 FM5 Page 18 Thu...

Страница 76: ...t where the packet is delivered to a subset of the group within a network as opposed to a true broadcast which forwards the packet to all users on the network Collisions Displays the total number of collisions on the hub A collision is generated when two or more devices attempt to transmit a message on a cable at the same time they are capable of degrading each other s transmission The number of c...

Страница 77: ...e frames from one network are broken up into smaller frames compatible with the network to which they ll be forwarded Jabbers Displays the number of instances where a packet had both of the following problems associated with it the packet was too big in its byte count more than 1518 bytes and caused timing delay in processing of it because of its oversized state Commonly known as oversize the pack...

Страница 78: ...alues in the Global Counters Window in the Browser Interface perform the following tasks 1 From the Tab Bar click on the Status Tab The Browser Interface displays the Status Button Bar 2 From the Status Button Bar click on the Global Counters Button The Browser Interface displays the Global Counters window Agent bk AGTCH6 FM5 Page 21 Thursday February 19 1998 2 13 PM ...

Страница 79: ...lays the Hub Status and Counters Menu 2 From the Hub Status and Counters Menu type 4 and press Enter The Hub Console Interface displays the Global Counters Screen Watch for high levels of Collisions and Broadcast Packets These counters indicate potential overloads on your hub and your network Check any high values that appear in the counter list and then check the time period in which they were re...

Страница 80: ...thorized Managers Screen in the Hub Console Interface Manager intrusions are shown at the top of the Hub Console Interface screen in non tabular form under the heading SNMP Security Information Manager intrusions are indicated in the Browser Interface Window in two ways the string SNMP Agent is displayed in the Port column an IP Address of the unauthorized management station is displayed in the In...

Страница 81: ...en recorded existing entries are removed to maintain a maximum entry count of 20 Entries are removed on the basis of age the oldest entry being removed first the second oldest entry removed next and so on The information shown in the Intruder Log is as follows Violation Time Console only Indicates the amount of time that has elapsed since the hub was powered on in the format DD HH MM SS Port The p...

Страница 82: ...perform the following tasks 1 From the Tab Bar click on the Security Tab The Browser Interface displays the Security Button Bar 2 From the Security Button Bar click on the Intruder Log Button The Browser Interface displays the Intruder Log Window Note that an IP Address is reported here and NOT a MAC address This indicates that the violation was a manager intrusion Agent bk AGTCH6 FM5 Page 25 Thur...

Страница 83: ... in the Port Security Window would not permit the address of the hub attempting to communicate with the port to be admitted Stopping Intruder Flashing LEDs in the Browser Interface When a port recognizes a packet as being sent from an unauthorized hub its LED flashes to indicate that an intruder has been recorded for the port To stop LEDs from flashing in response to port intruders perform the fol...

Страница 84: ...ntrusionareaisatthetopofthescreenunder the heading SNMP Security Information Note that the address of an intruder displayed in this area is an IP Address The port intrusion area is at the bottom of the screen in the table Note that the address of an intruder displayed in this area is a MAC address 4 View all the information to learn about unauthorized access activity occurring on the hub Pay speci...

Страница 85: ...hat have recorded intruders ClearSecurityBlinkingPort LEDs Attribute Description Screen Name Clear Security Blinking Port LEDs Menu Hub Status and Counters Function Enables you to stop port intruder related flashing on LEDs for ports that have recorded intruders Common Use Clearing LEDs flashing on the hub to create a less confusing LED panel Browser Interface Window Intruder Log Button within the...

Страница 86: ... the Hub Status and Counters Menu 2 From the Hub Status and Counters Menu type 6 and press Enter The Hub Console Interface displays the following prompt Executing this command will clear all security violations on the hub Continue Y N 3 Type Y and press Enter All LEDs of ports that have registered intruder entries will stop flashing Before typing Y make sure to note from the Intruder Log which por...

Страница 87: ...ecify the management stations that can manage this device You can configure a list of up to 10 network management stations Telnet Enable Disable Allows you to configure the hub to allow Telnet access Console Password Enables you to set or change the password you use to access the Hub Console Management Access Configuration Menu Attribute Description Screen Name Management Access Configuration Menu...

Страница 88: ...6 31 Configuration Reference Configuration Reference Figure 6 14 The Management Access Configuration Menu Agent bk AGTCH6 FM5 Page 31 Thursday February 19 1998 2 13 PM ...

Страница 89: ...gs are Manual Indicates you have set the hub s IP configuration manually Bootp DHCP Indicates the hub s IP configuration was set automati cally using BOOTP or DHCP IP Address Indicates the IP Address assigned to the hub The IP Address or Internet Protocol address is the network layer address of a device assigned by the administrator of an IP network A sample IP Address is 16 39 2 140 Each of the f...

Страница 90: ... the nearest router in the network If there are no routers the address of the network management station is commonly used Time to Live Indicates the number of IP routers a packet is allowed to cross before the packet is discarded The default value is 32 Increase this value if the hub is managed from a network management station that is more than 32 routers away The maximum allowable value is 255 A...

Страница 91: ...r 2 From the Configuration Button Bar click on the IP Configuration Button The Browser Interface displays the IP Configuration Window 3 To manually configure network values make sure the IP Configuration list box is set to Manual 4 Type IP Address Subnet Mask Default Gateway and Time to Live values in the appropriate fields and click on the Apply Changes button Use the IP ConfigurationList Box to ...

Страница 92: ...ompts you to select the method by which you want to assign an IP Address to your hub The two address assignment options are B ootp DHCP or M anual Config 4 Type M and press Enter to manually assign an IP Address to the hub The console interface prompts you to type an IP Address 5 At the Enter IP Address prompt type an available IP Address and press Enter Continue to supply values for the subnet ma...

Страница 93: ... to manage your HP hubs you can assign a Community Name for both the Read and Write privileges for a user attempting to access a device The different access levels are Full Providesyouwithcompleteaccesstoallfeaturesinthemanagement environment Typical use is to provide access levels to network operators by a network administrator Community Name Attribute Description Screen Name Community List Menu ...

Страница 94: ...ithin the management environment Note that the Community Names Screen comes with a default Community Name of Public that has Read and Write privileges for all areas of the device The following table indicates the recommended combination of Read and Write settings for different levels of access to HP 10Base T Hubs Table 6 2 Community Names Read Write Settings User Level Read Setting Write Setting D...

Страница 95: ...figuration Menu type 2 and press Enter The Hub Console Interface displays the Community List Screen The Community List comes with a preset Community Name Public that provides manager level access To add a Community Name perform the following steps 1 Type A and press Enter The Community List Screen displays the following prompt Enter in community name Unlike most SNMP managementprograms the HP Hub ...

Страница 96: ...mation It also displays the following prompt Enter in Write View as N one D iscovery R U ser F ull 4 Type the Write level access you want this Community Name to provide either N D R U or F and press Enter The Community List Screen redisplays the home Screen and displays the new Community Name in the Community Name List A sample session is shown below Figure 6 18 Adding a Community Name In this exa...

Страница 97: ...displays some basic Read Write mapping information It also displays the following prompt Enter in Write View as N one D iscovery R U ser F ull 4 Type the Write level access you want this Community Name to provide either N D R U or F and press Enter The Community List Screen redisplays the Community List Screen and displays the new Community Name in the Community Name List To delete a Community Nam...

Страница 98: ...ub for which you are creating an authorized manager The security mask is a value that reveals the extent to which the address of the authorized manager needs to be explicit for manager entry to the hub For example a security mask of 255 255 255 251 applied to an address of 15 47 66 40 to disallow values of 15 47 66 46 15 47 66 47 15 47 66 48 and 15 47 66 49 HP recommends you use a security mask va...

Страница 99: ...creen To Add an Authorized Manager perform the following tasks 1 Type A and press Enter The Hub Console Interface displays a numbered list of all available Community Names and the following prompt Select community for manager 1 2 Type the number of the Community Name you want to assign the autho rized manager and press Enter The Hub Console Interface displays the following prompt Enter in Manager ...

Страница 100: ...e Hub Console Interface displays the following prompt Select manager to delete 1 2 Type the number of the authorized manager that you want to remove from the Authorized Managers List and press Enter The Hub Console Interface displays the authorized manager list Note that the authorized manager you just removed no longer is displayed in the Authorized Manager List To Edit an Authorized Manager perf...

Страница 101: ...t mask for the device that you want to act as a manager for the hub and press Enter The Hub Console Interface displays the authorized manager list with the authorized manager you just changed at the bottom of the list Note that the authorized manager is identified first by its community name far left column and then by network addressing information associated with the management station Agent bk ...

Страница 102: ... Security Note that these passwords will only be set for the Browser Interface and not overwrite previous access strings assigned for the Hub Console Interface manager These strings assign you the following read write privileges The manager strings are used as your defaults for Hub Console Interface access Strings you assign in the manager fields will overwrite previous access strings assigned for...

Страница 103: ... string is not echoed displayed in this box when you type it Manager User Name Enables you to enter a string that will be a username providing read write privileges Manager Password Enablesyoutoenterastringthatwillbeapassword providing read write privileges Confirm Manager Password Enables you to verify the read write password by retyping it The string is not echoed displayed in this box when you ...

Страница 104: ...pe a string The string may be separated by spaces and may include any ASCII character in it The string may be no longer than 15 characters including spaces 4 Click in the Operator Password box and type a string The string should not have spaces but may include any ASCII character in it The string may be no longer than 16 characters Note that spaces are allowed in the string for example Jeff Smith ...

Страница 105: ...he Manager User Name box and type a string The string may be separated by spaces and may include any ASCII character in it The string may be no longer than 16 characters including spaces 4 Click in the Manager Password box and type a string The string should not have spaces but may include any ASCII character in it The string may be no longer than 16 characters To represent spaces use the undersco...

Страница 106: ...displays the following prompt Enter new username 4 If you have an existing username the current string is displayed at the prompt Type a new username and press Enter The Hub Console Interface displays the following prompt Enter new password 5 If you have an existing password the current string is displayed at the prompt Type a new password and press Enter The Hub Console Interface displays the fol...

Страница 107: ... users connected to the hub to establish or not establish a Telnet session Telnet Enable Disable Attribute Description Screen Name Telnet Enable Disable Menu Management Access Configuration Function Enables and disables the ability to access the Hub Console Interface using a Telnet connection Common Use Allowing Telnet session to be run Browser Interface Window None Browser Interface Tab Bar None ...

Страница 108: ...e displays the following prompt Telnet is currently Enabled If current console session is telnet disabling telnet will cause loss of connection E nable or D isable Telnet Type E and press Enter to enable the Telnet feature You may now establish a Telnet session with the hub See chapter 2 for more information on running Telnet with the hub If you have already enabled the Telnet feature the Hub Cons...

Страница 109: ...iption Screen Name Web Enable Disable Menu Management Access Configuration Function Turns on and off the ability to manage the hub using the Browser Interface Common Use To keep unauthorized operators from using the Browser Interface Browser Interface Window None Browser Interface Tab Bar None Default Setting Browser Interface is enabled Agent bk AGTCH6 FM5 Page 52 Thursday February 19 1998 2 13 P...

Страница 110: ... current disabled the Hub Console Inter face displays the following prompt Web accesses is currently Disabled E nable or D isable Telnet Type E and press Enter to enable the Browser Interface feature You may nowestablishaBrowserInterfacesessionwiththehub Seechapter2for more information on running a Browser Interface session with the hub If you have already enabled the Browser Interface feature the...

Страница 111: ...uthorized user access by directing the console to be inactive aftertheinterfacehasbeenleftunattendedforasetamountoftime Thehigher the value the less secure the Hub Console Interface is The lower the value the more secure it is as it will become inaccessible more quickly The values can be between 0 and 60 minutes A value of 0 means no timeout Serial Timeout Attribute Description Screen Name Serial ...

Страница 112: ...ent timeout value is 0 minutes Change serial timeout Y N 3 Type Y and press Enter to indicate that you want to change the timeout value The Hub Console Interface displays the following prompt Enter serial timeout in minutes 0 no timeout 60 4 Type the number of minutes you want to allow to lapse with no activity on the Hub Console Interface before it becomes inactive Press Enter The Hub Console Int...

Страница 113: ...ables and two ports on each hub One port is defined as the primary port and the other the backup port The backup port becomes active only if the primary port becomes inactive and will automatically deactivate if the primary port becomes active again Any of the network ports twisted pair or AUI Xcvr can be used as either the primary or backup port Reset Hub to Factory Defaults Enables you to reinit...

Страница 114: ...6 57 Configuration Reference Configuration Reference Figure 6 25 The Hub Configuration Menu Agent bk AGTCH6 FM5 Page 57 Thursday February 19 1998 2 13 PM ...

Страница 115: ...t Download Version The versions of ROM and firmware of the device A sample ROM version is X P1 00 A sample firmware version is A 0 02 System Up Time The amount of time elapsed since the device was powered on Displayed in the format DD HH MM SS where D is days H is hours M is minutes and S is seconds For example 73 43 50 Device Fault Indicates errors discovered during the device self test Only show...

Страница 116: ...rial Number The serial number of the device For example SG63401386 SNMP Module Security Information Indicates whether the hub has experienced a violation generally an packet from a device or manage ment station that has not been authorized to transmit to the hub Agent bk AGTCH6 FM5 Page 59 Thursday February 19 1998 2 13 PM ...

Страница 117: ...ration Button Bar click on the System Information Button The Browser Interface displays the System Information Window 3 In the System Name box type in a string that will help you identify the hub 4 In the System Location box type in a string that will help you identify where the hub has been placed 5 In the System Contact box type in the name of the key person managing the hub 6 Click on the Apply...

Страница 118: ...ace displays the Hub Configuration Menu 2 From the Hub Configuration Menu type 1 and press Enter The Hub Console Interface displays the Hub System Information Screen 3 From the Hub System Information Screen type Y and press Enter toenterorchangesystemparameters TheHubConsoleInterfacedisplays the following prompt Change the system N ame C ontact L ocation Information you can change is System Name S...

Страница 119: ...ct type C and press Enter To enter a new system location type L and press Enter Usingsystemnameasanexample theHubConsoleInterfacedisplays the following prompt Enter in new system location 5 Type in any string and press Enter The string can include spaces and any ASCII character It can be as long as 255 characters You have now created a new system parameter Agent bk AGTCH6 FM5 Page 62 Thursday Febr...

Страница 120: ...or the string XCVR which represents the Trans ceiver Port Also each square contains one of the following letters indicating the status of the port E Indicates the port is on and can receive packets from another device when connected D Indicates the port is off and cannot receive packets from another device when connected Port Enable Disable Attribute Description Screen Name Port Enable Disable Men...

Страница 121: ...selected port The Device View graphic for HP 10Base T Hubs contains the following graph ical objects Power LED Always illuminates green to indicate that power is on If power is not on you will not be able to display the Device View Fault LED Illuminates orange in the event of a fault Port Region A view of all RJ 45 ports on your hub The ports can be in one of three states represented by one of thr...

Страница 122: ...evice View Window which contains a panel graphic of your hub The window initially shows the following message laid over the panel graphic Retrieving Port Status ThismessageindicatesthattheBrowserInterfaceapplicationisretrieving port state information from your HP 10Base T Hub for all the ports on the hub 3 Take a moment to review the panel graphic It is a representation of what you see on the fron...

Страница 123: ...gray with a blue diagonal slash through it indicating the port is enabled but does not detect Link Beat from another device This state means the port either does not have a cable from another device plugged in to it or the connecting device is faulty red indicating the port has been autopartitioned or the port has a security violation 5 To disable a port that is enabled click the left mouse button...

Страница 124: ...e two aspects of the screen it displays a representation of ports on the hub shown in the series of boxes containing port numbers If you have a 24 port hub you will see 25 boxes 24 boxes for RJ 45 ports 1 24 and one box for the XCVR port each box contains one of two settings a D indicating the port is disabled or an E indicating the port is enabled 3 To change a port setting type Y at the Change p...

Страница 125: ...a discrete number and a range of numbers separated by a comma for example 3 6 9 multiple ran ges of numbers separated by a comma for example 3 6 19 21 X or XCVR can be inserted in any of the above conventions to indicate the XCVR port The console displays the following prompt Configure Port as D isabled or E nabled 5 Type E to enable the port or D to disable it and press Enter The console displays...

Страница 126: ...ddress of the device attached to the port and makes it the authorized address Assigned You enter the address of the device that is authorized to be attached to the port Authorized Address Indicates the authorized MAC Address for the port Port Security Attribute Description Screen Name Port Security Menu Hub Configuration Function Sets security parameters on the hub providing address selection for ...

Страница 127: ...ch the authorized address Disable Port Indicates whether the port will be disabled when an incoming packet from the connected node does not match the authorized address The settings can be On Indicates the port will be disabled in response to it receiving an incoming packet from the connected node that does not match the authorized address when Eavesdrop Prevention is enabled Off Indicates the por...

Страница 128: ... to learn about each method When a port is configured for Intruder Prevention the hub examines the source address of each packet coming through the port and compares it with the address permitted by the address selection method If the addresses are not the same the hub concludes that an intruder or unauthorized device is attempting to gain access to the network and takes the appropriate action Act...

Страница 129: ...t and makes it the authorized address If a different device is later attached to the port the new address is learned and becomes the autho rized address First Heard The hub learns the address of the device attached to the port and makes it the authorized address If a different device is later attached to the port the new address is registered as an intruder address This indicates a security violat...

Страница 130: ...hether traps are set or not HP AdvanceStack Assistant for Windows ASA Notification Manager HP AdvanceStack Assistant for Windows OpenView HP OpenView Windows Alarm Log if you are running OpenView as a platform for your SNMP manager HP AdvanceStack Assistant for Unix NT AnyofvarioustopicallyspecificlogsintheHP OpenView Unix Event Categories Region Third Party SNMP Managers Logs of other SNMP manage...

Страница 131: ...sponding to it 3 Launch the Port Security Configuration Window You can do this in one of two ways Double click on the port Click on a port to highlight it the port number and all corresponding fields of information are darkened Then click on the Set Security Policy for Selected Ports Button The Browser Interface displays the Port Configuration Window Take a moment to review this window It contains...

Страница 132: ... the device you want to permit to communicate with the current port 6 From the Prevent Eavesdropping list box select the appropriate setting for this feature The settings are Yes Directs the hub to block transmission of packets not directed to the device connected on that port No Directs the hub to transmit packets to all devices 7 From the Send Alarm list box select the appropriate setting for th...

Страница 133: ...rity Configuration Window The Address Selection method is Continuous meaning the port will continue to learn new addresses as they are received When the port sees a packet not intended for it no alarm will be generated Agent bk AGTCH6 FM5 Page 76 Thursday February 19 1998 2 13 PM ...

Страница 134: ...ring port numbers For a single port simply type the port number For consecutive ports you can type a range value in using a dash For example 3 7 indicates you want to disable security for ports 3 4 5 6 and 7 For a mix of consecutive and non consecutive ports you can use both dashes and commas For example 3 7 12 19 indicates you want to disable security for ports 3 4 5 6 7 12 and 19 After you have ...

Страница 135: ...ected Disabled security is indicated by the following settings None in the Authorized Address column No in the Eavesdrop Prevention column No in the Send Alarm column Figure 6 33 Disabling Port Security from the Port Security Screen The example shows ports 6 7 8 9 and 15 having security disabled Agent bk AGTCH6 FM5 Page 78 Thursday February 19 1998 2 13 PM ...

Страница 136: ...it appears in the list of entries in the Backup Links Screen When no backup link is configured this column displays nothing MAC Address Provides the MAC address of the alternate hub that will become the backup hub in the event of a failure by the primary hub Status Indicates the current use of which port in the backup link port pair that is being used The screen can display one of two settings Usi...

Страница 137: ...f greater distances slower media throughput and higher hop counts the test time value should be higher so more time can be allowed for a response Number of Failures till switching to backup Retries on the Browser Interface Indicates the limit of the number of times the hub does not receive a response from test packets sent to its target device before the hub disables the primary port and activates...

Страница 138: ...he Backup Links Configuration Window 4 From the Primary Port list box select the number of the port on the hub for which you want to assign a backup port 5 From the Backup Port list box select the number of the port on the hub that will act as the backup port when the primary port fails 6 From the MAC Address box type the MAC address of the remote device to which primary and backup ports connected...

Страница 139: ...out during test packet transmissions because of no response from the remote device before being disabled 9 Press the Apply Changes Button Figure 6 35 The Backup Links Configuration Window Remember that this is the MAC address of the device being tested for a reachable link Agent bk AGTCH6 FM5 Page 82 Thursday February 19 1998 2 13 PM ...

Страница 140: ... type 3 and press Enter The Hub Console Interface displays the Hub Configuration Menu 2 From the Hub Configuration Menu type 4 and press Enter The Hub Console Interface displays the Backup Links Configuration Screen Inthisexample backup port 4 has become the active port for failed port 1 while primary port 2 is active and healthyandhas not had to use backup port 10 Agent bk AGTCH6 FM5 Page 83 Thur...

Страница 141: ...isplays the following prompt Enter in MAC Address of test destination 4 Type the MAC address of the remote device you are trying to reach Press Enter The Hub Console Interface displays the following prompt Enter in test time 1 15 sec 5 Type the number of seconds that you want to lapse between test packets transmitted on the primary link to verify that it continues to operate correctly Press Enter ...

Страница 142: ...Reference Figure 6 37 Adding a Backup Link If you want a highly secure connection you don t want to allow too many attempts or timeoutsecondswithin the attempts for the packet to fail Agent bk AGTCH6 FM5 Page 85 Thursday February 19 1998 2 13 PM ...

Страница 143: ...ill act as the backup port when the primary port fails Press Enter The Hub Console Interface displays the following prompt MAC Address of test destination 5 Type the MAC address of the remote device that you are trying to reach Press Enter The Hub Console Interface displays the following prompt Enter in test time 1 15 sec 6 Type the number of seconds that you want to lapse between test packets tra...

Страница 144: ...nfigured the device via Bootp or DHCP servers Reset Hub to Factory Default Attribute Description Screen Name Reset Hub to Factory Default Menu Hub Configuration Function Reinitializes the hub s configuration Common Use Correcting a corrupted hub that was altered by a computer virus network bottlenecking a power failure and other irregular activities Browser Interface Window Facrory Reset Browser I...

Страница 145: ...tics Tab The Browser Interface displays the Diagnostics Button Bar 2 From the Diagnostics Button Bar click on the Factory Reset Button The Browser Interface displays the Factory Reset Window 3 Click on the Reset Device to Factory Defaults Button Careful When you reset the hub you clear all of your settings You may want to record your current settings to reconstruct your environment Agent bk AGTCH6...

Страница 146: ...s the following prompt CAUTION about to apply factory default to the hub Console session will be lost if hub is factory defaulted This will result in all information being cleared This includes the IP configuration Continue Y N 3 Please consider whether you really want to reset the hub If you do you will lose all your information that you have built up during multiple configurations for example Po...

Страница 147: ...nce 4 If you are sure you want to clear all values and reset the hub type Y and press Enter Note that if backup links were configured possible network loops will occur on a factory default Agent bk AGTCH6 FM5 Page 90 Thursday February 19 1998 2 13 PM ...

Страница 148: ...ns a test of the path between the managed device and another device on an IP network that responds to IP Internet Protocol packets During a Ping Test the managed device sends ICMP Internet Control Message Protocol echo request packets to another node with the specified IP Address and waits for echo response packets to return The node must be capable of responding to ICMP packets A failure means th...

Страница 149: ...6 92 Configuration Reference Configuration Reference Figure 6 41 The Diagnostics Menu Agent bk AGTCH6 FM5 Page 92 Thursday February 19 1998 2 13 PM ...

Страница 150: ...tions of the bar in green and red The amount of both green and red area is a proportional representation of how many successful and failed tests have been reported in the current session If the bar is mostly red you may want to check for connection problems Destination IP MAC Address Indicates the network address for the Ping Test or the MAC address for the Link Test of the device to which you wan...

Страница 151: ...the connectivity test Stop Halts the Ping Test Defaults Places default values for the connectivity test parameters The default values are The Ping Test fields in the Hub Console are as follows Test Attempts Indicates the number of times the hub tried to success fully send a packet to the test device Test Successes Indicates he number of times the hub successfully sent a packet to the test device M...

Страница 152: ... Window for your HP 10Base T Hub the Ping Test radio button will be selected 3 Decide whether you want to use the default values set up for either a Ping or Link Test If you do click the left mouse button the Defaults Button and go to Step 7 If not go to the next step 4 Click the left mouse button on the Ping Test radio button 5 In the Destination IP MAC Address box type an IP Address for example ...

Страница 153: ...Seconds box type a number between 1 and 30 that indicates the number of seconds the hub should wait for a response to a test packet request from the target device 8 Click the left mouse button on the Start button Agent bk AGTCH6 FM5 Page 96 Thursday February 19 1998 2 13 PM ...

Страница 154: ...st Screen 3 Type the IP Address of the hub at the Enter Destination IP Address prompt and press Enter The Hub Console Interface displays the following prompt Enter number of packets to send 4 Type a number at that indicates the number of packets the hub should send to the test device to determine whether a valid connection exists between the two devices Press Enter The Hub Console Inter face displ...

Страница 155: ...d to successfully send a packet to the test device Test Successes The number of times the hub successfully sent a packet to the test device Min Response Time ms The number of milliseconds of the least time consuming packet sending test attempt Max Response Time ms The number of milliseconds of the most time consuming packet sending test attempt Total Response Time ms The total number of millisecon...

Страница 156: ...ying portions of the bar in green at the left section of the bar and red at the right section of the bar The amount of both green and red area is a proportional representation of how many successful and failed tests have been reported in the current session If the bar is mostly red you may want to check for connection problems Destination IP MAC Address Indicates the network address for the Ping T...

Страница 157: ...the connectivity test Stop Halts the Ping Test Defaults Places default values for the connectivity test parameters The default values are The fields in the Hub Console are as follows Test Attempts Indicates the number of times the hub tried to success fully send a packet to the test device Test Successes Indicates the number of times the hub successfully sent a packet to the test device Min Respon...

Страница 158: ...Ping Link Test Window Note that one of the top two radio buttons can be selected If this session is your first time in the Ping Link Test Window for your hub the Ping Test radio button will be selected 3 Click the left mouse button on the Link Test radio button 4 Decide whether you want to use the default values set up for a Link Test If you do click the left mouse button the Defaults Button and g...

Страница 159: ...nd to the test device to determine whether a valid connection exists between the two devices 7 In the Timeout in Seconds field type a number between 1 and 30 that indicates the number of seconds you want the hub should wait for a response to a test packet request from the target device 8 Click the left mouse button on the Start button Agent bk AGTCH6 FM5 Page 102 Thursday February 19 1998 2 13 PM ...

Страница 160: ...Screen 3 Type the MAC address of the hub at the Enter Destination MAC Address prompt and press Enter The Hub Console Interface displays the following prompt Enter number of packets to send 4 Type a number at that indicates the number of packets the hub should send to the test device to determine whether a valid connection exists between the two devices Press Enter The Hub Console Inter face displa...

Страница 161: ... the hub tried to successfully send a packet to the test device Test Successes The number of times the hub successfully sent a packet to the test device Min Response Time ms The number of milliseconds of the least time consuming packet sending test attempt Max Response Time ms The number of milliseconds of the most time consuming packet sending test attempt Total Response Time ms The total number ...

Страница 162: ...t Authorized Manager List Port Status Information Security Configuration Browse Hub Configuration Attribute Description Screen Name Browse Hub Configuration Menu Diagnostics Function Displays a master dump of many status screens available showing current values Common Use To obtain a quick glance at all settings and status information without having to search for specific screens Browser Interface...

Страница 163: ...Bar click on the Diagnostics Tab The Browser Interface displays the Diagnostics Button Bar 2 From the Diagnostics Button Bar click on the Configuration Report 3 The Browser Interface displays information from multiple Browser Inter face Windows 4 Scroll through the various regions of the window to learn what values have been set for various parameters You may want to print the window for convenien...

Страница 164: ...e or log file Press ENTER to continue 3 Press Enter The Hub Console Interface displays a continuous dump of screens from the environments listed above 4 Press Ctl S to stop the screen from scrolling See the screen on the following page for a stopped dump midway between two screens 5 Press Ctrl Q to direct the Hub Console Interface to continue scrolling 6 Review values from the screen in which you ...

Страница 165: ... 48 The Browse Configuration Screen Displaying Multiple Screens A sample multiple configuration dump at mid browse Shown are portions of the Backup Links Community List and Authorized Managers screens Agent bk AGTCH6 FM5 Page 108 Thursday February 19 1998 2 13 PM ...

Страница 166: ...t provides the default filename C WINDOWS CAPTURE TXT The HyperTerminal text capture program will send the contents of the Browse Hub Configuration execution to this file 3 If you want to use this filename go to the next step If you want to change the filename the path or the drive that it is on use the Browse Button to locate the directory and drive you want and type in the desired filename 4 Whe...

Страница 167: ...scription Screen Name Reboot Hub Menu Main Menu Function Clears counters on hub as though the hub has been powered on and off Common Use To remove settings from your hub to begin a fresh new session Browser Interface Window Reboot Browser Interface Tab Diagnostics Default Settings None Agent bk AGTCH6 FM5 Page 110 Thursday February 19 1998 2 13 PM ...

Страница 168: ...e following prompt This will cause loss of console session Reset Hub Y N 2 If you are sure you want to reboot the hub type Y and press Enter The hub will reboot and the Hub Console Interface displays the following prompt Disconnected Careful Rebootingwill cause you to lose your current Hub Console session Unlike the Reset Hub option however all values will persist to the next session Agent bk AGTC...

Страница 169: ... information about the state of all ports on the hub Download OS Attribute Description Screen Name Download OS Menu Main Menu Function Installs new agent firmware Common Use Upgrades to a better version of firmware Web Counterpart None Web Tab Bar None Default Settings Agent bk AGTCH6 FM5 Page 112 Thursday February 19 1998 2 13 PM ...

Страница 170: ...ess Enter The Hub Console Interface displays the following prompt The serial download protocol is xmodem If downloading begin xmodem transfer after responding Y to the query WARNING This command will erase the hub firmware Do you wish to continue Y N 4 If you are sure you are ready to proceed type Y and press Enter New firmware is downloaded to the hub The Hub Console Interface may display a new m...

Страница 171: ... prompt and press Enter Return to the Command Prompt Attribute Description Screen Name Return to the Command Prompt Menu Function Returns you to the Command Prompt region of the Hub Console Interface Common Use Enabling you to use command prompts to perform tasks Browser Interface Window None Browser Interface Tab None Default Settings None Agent bk AGTCH6 FM5 Page 114 Thursday February 19 1998 2 ...

Страница 172: ...he address will now be the current string that launches the Browser Interface support site Clear Changes Button Removes any changes you made to the URL string in the event you made a mistake typing them and restores the current URL in the Support URL box Support URL Attribute Description Screen Name None Menu None Function Enables you to change the default World Wide Web URL for your Browser Inter...

Страница 173: ...ecurrent support URL string is highlighted or darkened indicating you have selected the string 4 Press the Delete key on your keyboard 5 Type the URL string that will launch the support site you want 6 Click on the Apply Changes button If you decide you want to return to the current URL before clicking on the Apply Changes button click on the Clear Changes button to remove whatever new text you ha...

Страница 174: ...ort URL Support Attribute Description Screen Name None Menu None Function Displays the support site specified in the Support URL Common Use To learn more about the nature of the Browser Interface Browser Interface Window Support Browser Interface Tab Support Default Settings None Agent bk AGTCH6 FM5 Page 117 Thursday February 19 1998 2 13 PM ...

Страница 175: ...terface perform the following steps 1 From the Tab Bar click on the Support Tab The Browser Interface displays the Home Page of the Hewlett Packard Network City Web Site 2 From the Network City sidebar to the left click on the Support Button 3 Click on all support related strings The Network City World Wide Web home pageis launchedbythe Support Tab Agent bk AGTCH6 FM5 Page 118 Thursday February 19...

Страница 176: ...6 119 Configuration Reference Configuration Reference Agent bk AGTCH6 FM5 Page 119 Thursday February 19 1998 2 13 PM ...

Страница 177: ...Agent bk AGTCH6 FM5 Page 120 Thursday February 19 1998 2 13 PM ...

Страница 178: ...bed in the section Diagnosing with the LEDs in this chapter YoucandiagnosehubsontheHPJ3301AandHPJ3303A themanagedhubs by By using the Browser Interface a Web based interface that provides a full management environment By using the Hub Console s diagnostic functions as described in the HP 10Base T Hubs Management and Configuration guide By using the HP AdvanceStack Assistant ASA or other SNMP manag...

Страница 179: ...and plugging the hub back in If the PowerLEDis stillnoton verify that the AC source works by plugging another device into the outlet Or try plugging the hub into a different outlet or try a different power cord If this condition persists call your HP authorized LAN dealer or HP representative for assistance I lost the password Press the Clear button for 10 seconds See page 2 4 for more details IP ...

Страница 180: ...ort information for the HP J3301A and HP J3303A LED LED Color Meaning of LED Power Green On indicates the hub is receiving power Off indicates the hub is not receiving power Activity Green Flickering rapid flashing indicates a packet is beingtransmittedtoorfromaport Normally theLED appears to flicker In heavy traffic it may appear on all the time Off indicates no packet is being transmitted to or ...

Страница 181: ...ed a transceiver module is installed Off indicates the Xcvr port is disabled Slow Flash indicates the port has been auto partitioned Theslowflashisapproximatelyonceevery1 5seconds 75secondsonand 75secondsoff LED Color Meaning of LED Twisted pair Ports Green On indicates Link Beat is detected from the attached node Off indicates the port is not receiving the link beat signal from the attached node ...

Страница 182: ...hapter1that details the MDI MDI X switch ON ON Very frequent collisions are occurring which could indicate a network fault or improperly terminated cable ON Slow Flash Slow Flash The port has been auto partitioned because of an excessive collision condition Check cable connections and status of attached network devices for causes of the excess collisions The hub will automatically recover after ce...

Страница 183: ...Agent bk AGTCH7 FM5 Page 6 Thursday February 19 1998 2 13 PM ...

Страница 184: ...Area 4 9 4 10 AUI Xcvr LED 7 4 Authorized Manager List Browse Hub Configuration 6 105 authorized manager list 6 23 Authorized Managers 3 3 adding 6 42 editing 6 43 number of network management stations limit 6 41 removing 6 43 setting 6 42 Authorized Managers Screen 6 30 about 6 41 IP or IPX Security Mask column 6 41 Manager IP or IPX Address column 6 41 auto discovery 5 3 B Backup Link field Back...

Страница 185: ...ng 4 7 where to run 4 2 Browser Interface access controlling 6 53 disabling 6 53 enabling 6 53 Browser Interface elements 4 7 Browser Interface Tab Bar 4 8 Button Bar Browser Interface 4 8 C Clear Changes Button Support URL Window 6 115 Clear Security Intruder Log screen 6 5 Collision LED 7 3 7 5 Collisions 6 19 Collisions attribute Gauges Area 4 9 Collisions counter 6 15 commands issuing in the H...

Страница 186: ...4 Enable Disable Button 6 64 Select All Ports Button 6 64 DHCP using 3 7 diagnosing with the LEDs 7 2 Diagnostics Menu 6 92 about 6 91 Diagnostics screen 6 3 Disable Selected Ports Button Device View Window 6 64 disabling ports from the Hub Console Interface 6 67 disabling ports from the Browser Interface 6 65 Domain Name Server 4 2 Download OS option 6 112 Download Version 6 7 6 58 E Eavesdrop De...

Страница 187: ...AdvanceStack Assistant 5 1 6 23 6 32 6 36 6 70 alarm management 6 73 working with Community Names 6 36 HP proprietary MIB 5 2 hub reference 7 3 troubleshooting 7 1 hub console accessing 2 6 advantages 1 2 baud rate 2 3 command prompt 2 6 2 9 command prompt commands 2 7 command prompt region 2 6 2 9 communication parameters 2 3 connecting with a serial cable 2 3 Console port 2 3 escaping 6 114 flow...

Страница 188: ...ers 6 20 L Last Heard Source Address 6 12 Late Collisions counter 6 16 LEDs AUI Xcvr 7 4 Collision 7 3 diagnosing the hub status 7 2 patterns showing error conditions 7 5 Power 7 3 twisted pair ports 7 4 Link Beat determining connection 6 14 Device View 6 64 Link Status 6 12 Link Test 6 91 6 99 about 6 91 6 99 Defaults 6 100 Destination IP MAC Address 6 93 6 99 failed 6 99 IP MAC Address 6 102 Max...

Страница 189: ...e configuration information sending to a log file 6 109 viewing from the Hub Console Interface 6 107 viewing from the Browser Interface 6 106 N network management communication with the hub 3 1 network management functions 5 3 network manager address 5 3 Normal Activity Region Gauges Area 4 10 Number of Failures till switching to backup field Backup Links Screen 6 80 Number of Packets to Send Link...

Страница 190: ... pair 7 4 Port Number 6 11 Port Number column Port Security Screen 6 69 Port Region Device View Window 6 64 Port Security Intruder Prevention 6 71 port security alarm destinations 6 73 alarms 6 73 disabling from the Hub Console Interface 6 77 6 78 Eavesdrop Detection 6 71 Intruder Prevention 6 71 removing both consecutive and single ports 6 77 removing for a single port 6 77 removing for consecuti...

Страница 191: ...face 6 27 violation time 6 24 violator address 6 24 Security Intruder Log screen 6 5 Select All Ports Button Device View Window 6 64 Self Test 7 5 Serial Number 6 8 6 59 Set Security Policy for Selected Ports Button 6 74 SNMP 5 1 configure 5 3 IP address 5 1 traps 5 1 v1 agent 5 1 SNMP communities 5 3 SNMP public community 5 3 SNMP Security Information 6 27 standard MIB 5 1 Start Button Link Test ...

Страница 192: ...ubleshooting approaches 7 1 diagnosing with the LEDs 7 2 LED patterns showing errors 7 5 using the Diagnostics options 6 91 twisted pair ports LED description 7 4 U unauthorized device 6 24 unauthorized devices 6 23 6 26 unauthorized manager 6 23 unauthorized packets 6 73 URL for Browser Interface changng default 6 115 URL for Browser Interface support changing default 6 116 URL for support defaul...

Страница 193: ...10 Index Index Agent bk AGENT IX Page 10 Thursday February 19 1998 2 13 PM ...

Страница 194: ...ackard Company 1997 All rights reserved Reproduction adaptation or translation without prior written permission is prohibited except as allowed under the copyright laws Less Work More Network HP Networking HP 10Base T Hubs Management and Configuration HP 10Base T Hub 12M HP 10Base T Hub 24M For world wide support on all HP Network Connectivity Products visit our web site at http www hp com go netw...

Отзывы: