


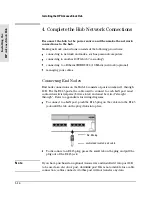


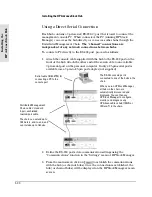


4. Complete the Hub Network Connections
Reconnect the hub to the power source and then make the network
connections to the hub.
Making network connections consists of the following procedures:
connecting to network end nodes, such as personal computers
connecting to another 100VG hub (“cascading”)
connecting to a Ethernet/IEEE 802.3 (10 Mbit/s) network (optional)
managing your cables
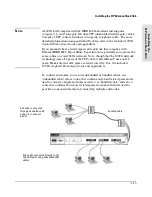
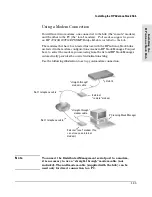
Connecting End Nodes
End node connections on the Hub-14 consists of ports numbered 1 through
12B. For the RJ-45 ports, the cable used to connect to each LAN port must
contain four twisted-pairs (8 wires total) and must be wired “straight
through”. Refer to appendix A for wiring diagrams.
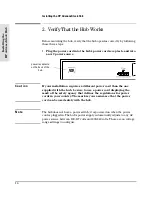
To connect to a LAN port, push the RJ-45 plug on the cable into the RJ-45
jack until the tab on the plug clicks into place.
To disconnect an RJ-45 plug, press the small tab on the plug and pull the
plug out of the RJ-45 jack.
N o t e
If you have purchased an optional transceiver and installed it into port 12B
to be used as a
downlink
port, downlink port 12A is not available for a cable
connection; cables connected to this port will not transfer any data.
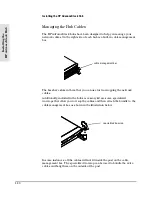
RJ-45 plug
unshielded twisted-pair cable
In
sta
lli
n
g
t
h
e
HP
A
d
v
a
nc
e
S
t
a
c
k
H
u
b
Installing the HP AdvanceStack Hub
1-14
Содержание J2415A
Страница 1: ...Installation and Reference Guide HP J2415A HP AdvanceStack 100VG Hub 14 ...
Страница 2: ......
Страница 3: ...HP AdvanceStack 100VG Hub 14 Installation and Reference Guide ...
Страница 8: ......
Страница 10: ......
Страница 14: ...B Specifications Safety and Regulatory Statements Index Contents x ...
Страница 40: ......
Страница 58: ......
Страница 86: ......
Страница 95: ...B Specifications ...
Страница 98: ......
Страница 99: ...Safety and Regulatory Statements ...
Страница 105: ...Safety Information Japanese Safety Information Safety Information Japanese 7 ...
Страница 108: ......
Страница 109: ...Index ...
Страница 115: ......


