


9. Firmly tighten the screws holding the rear brackets to the rear adapter plate.
10. Go to Grounding the chassis.
Using a mechanical lift to mount the chassis in a four-post rack
Prerequisites
• The R0X37A Aruba 6400 4-post Rack Mountl Kit is installed on your four-post rack or cabinet.
• Rack ears are mounted on the chassis. (See Installing rail spacers and front rack ears for the four-
• The support hardware included in the four-post rack mount hardware kit is installed on the chassis and
on the rear posts of the rack. (See Installing the optional R0X37A Aruba 6400 4-post Rack Mount Kit.
WARNING: A fully populated Aruba 6405 chassis weighs up to 61 kg (133 lbs), and a fully
populated Aruba 6410 chassis weighs up to 100 kg (219 lbs). Ensure that the combined weight
of the chassis with all components installed does not exceed the maximum load capacity of
your mechanical lift.
Procedure
1. Raise the chassis to the level of the installed rack rails.
2. Move the lift toward the rack until the lift platform is less than 2.5 cm (1 inch) from the rack mount shelf.
3. Lock the lift wheels.
4. Slide the chassis onto the rack mount shelf until the rack ears contact the front rack posts. Use the
screws provided to secure the rack ears to the front posts.
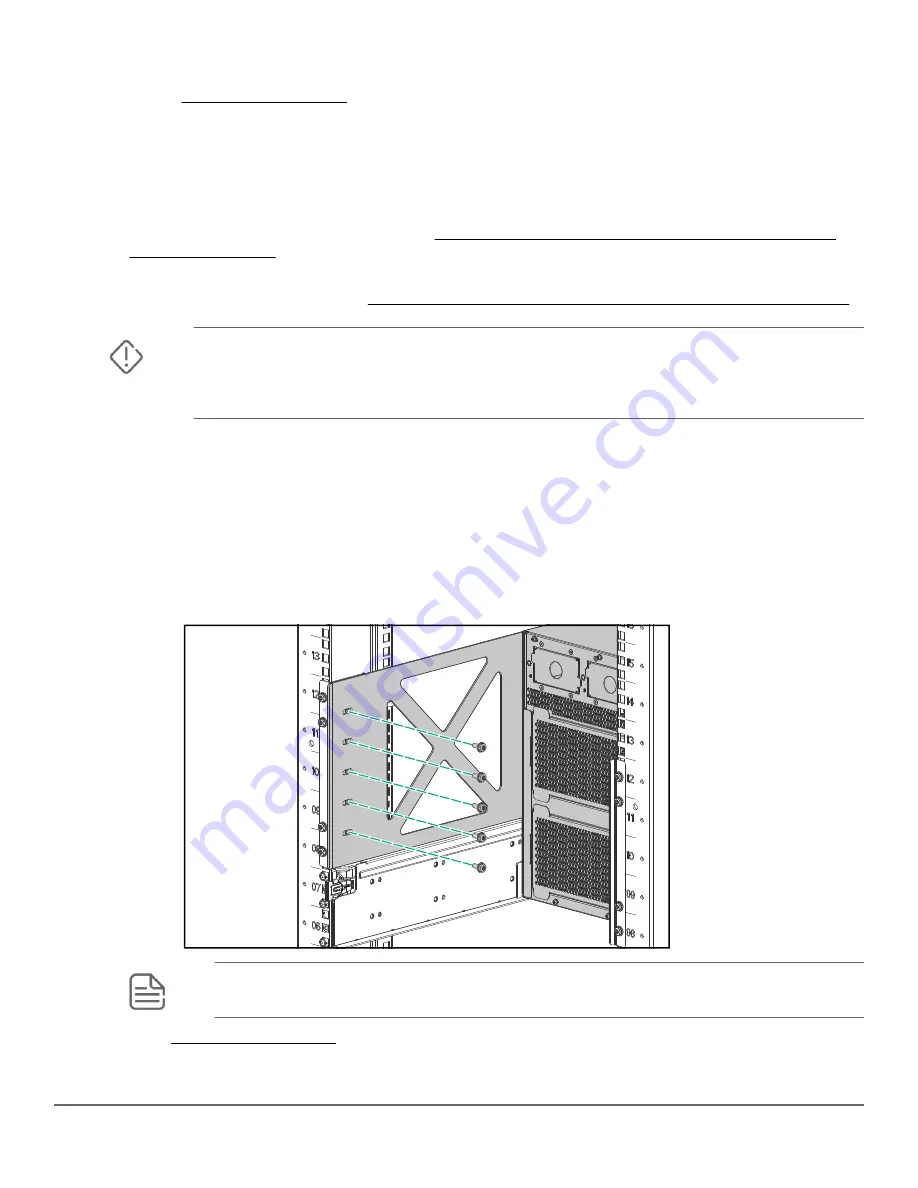
5. Secure the rear adapter plates you installed earlier to the rear post rack brackets with the included 10-32
screws.
NOTE: Do not tighten the screws holding the rear bracket to the rear adapter plate until the
switch chassis is installed and all parts are attached.
6. Go to Grounding the chassis.
Chapter 6 Mounting the switch
65
Содержание Aruba 6400 Series
Страница 77: ...Chapter 7 Installing components 77 ...


