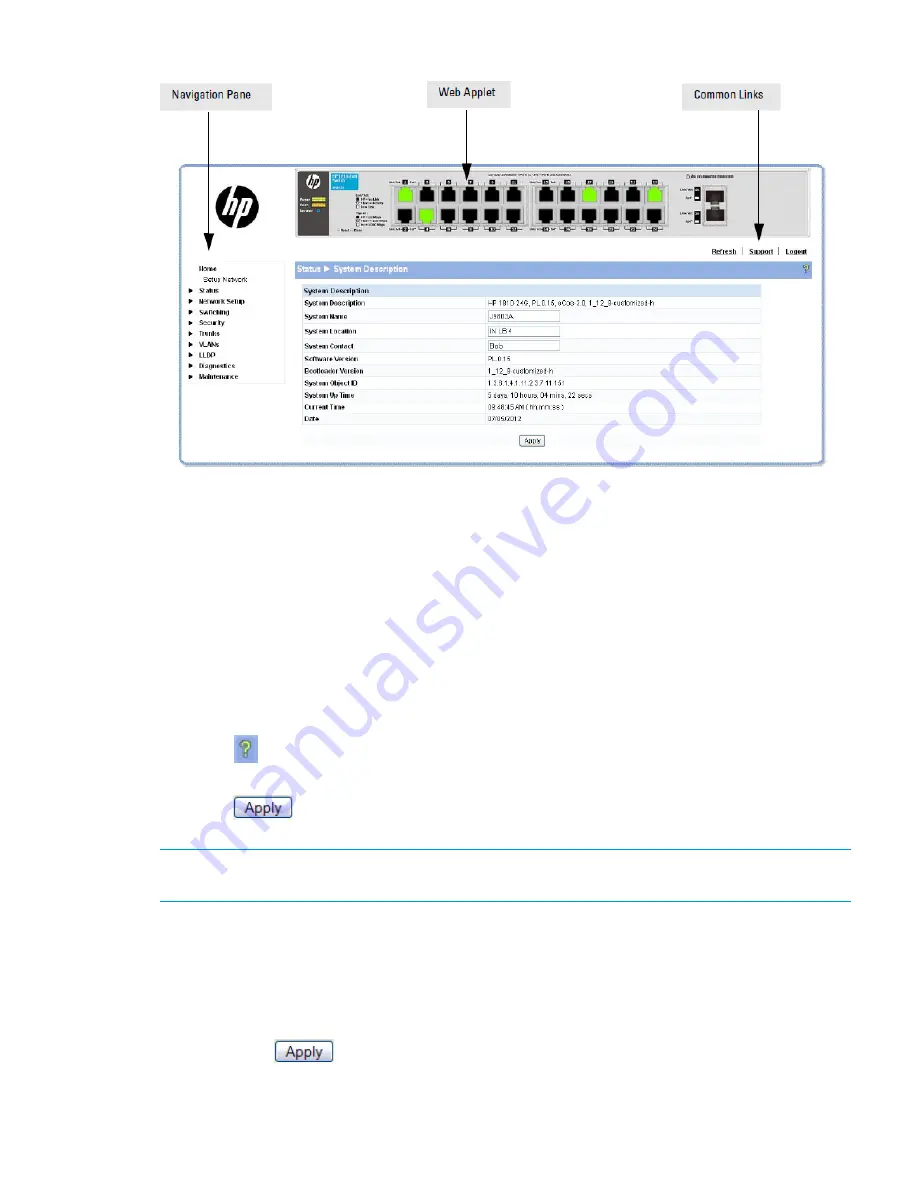
Figure 2 Interface layout and features
Click on any topic in the navigation page to display related configuration options.
The System Description page displays when you first log on and when you click
Home
or
Status
> System Description
in the navigation pane. See
“System Description page” (page 12)
for more
information.
You can click the
Setup Network
link beneath
Home
to display the
Get Connected
page, which
you use to set up a management connection to the switch. You can also click
Network Setup > Get
Connected
to display this page. See
“Get Connected” (page 25)
for more information.
The Web Applet displays summary information for the switch LEDs and port status in a graphical
format. For information on the Web Applet, see
“Web Applet” (page 10)
.
Common page elements
•
Click
on each page to display a help panel that explains the fields and configuration
options on the page.
•
Click
to send the updated configuration to the switch. Configuration changes take
effect immediately.
NOTE:
Configuration changes take effect immediately and are saved to the system configuration
file after a 1-minute delay. See
“Saving changes” (page 9)
.
•
Click
Refresh
to refresh the page with the latest information from the switch.
•
Click
Support
to access the HP ProCurve Web site (Internet access required).
•
Click
Logout
to end the current management session.
Saving changes
When you click
, changes are saved automatically to the syst em configuration file in flash
memory.
A progress indicator is displayed next to the Help icon while the operation is in progress.
Getting started with the web interface
9


