26
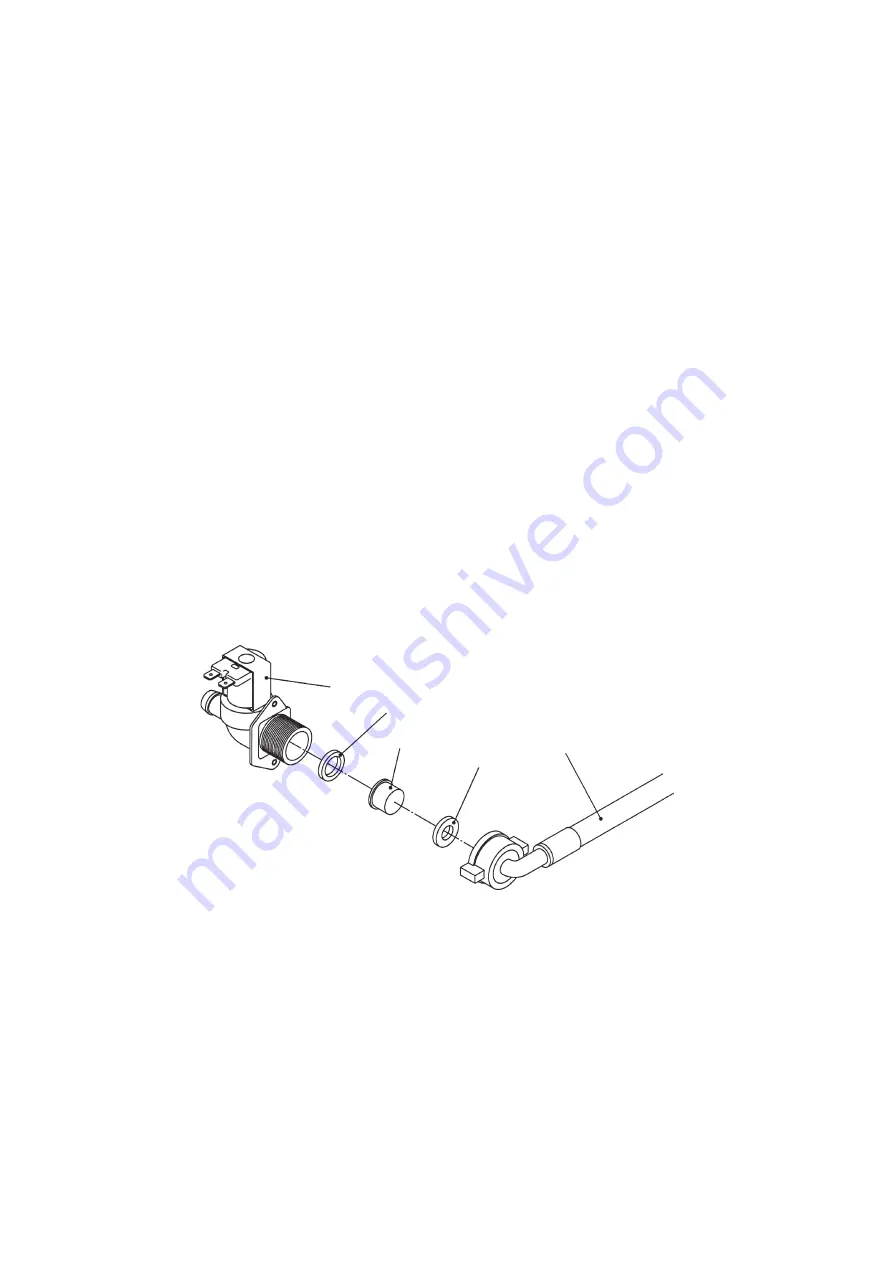
2. WATER VALVE
1) Unplug the icemaker or disconnect the power source.
2) Close the water supply tap.
3) Remove the top panel and front panel.
4) Disconnect the inlet hose from the water valve.
5) Remove the mesh filter from the water valve.
6) Clean the mesh using a brush.
7) Replace the mesh and inlet hose in their correct positions.
8) Open the shut-off valve.
9) Plug in the icemaker or connect the power source.
10) Check for leaks.
11) Replace the panels in their correct positions.
Fig. 6
Coil
Do not remove
Filter
Packing
Inlet Hose
Содержание IM-240ANE
Страница 4: ...1 I SPECIFICATIONS 1 DIMENSIONS SPECIFICATIONS a IM 240DNE Air cooled ...
Страница 5: ...2 b IM 240DNE C Air cooled ...
Страница 6: ...3 c IM 240DWNE Water cooled ...
Страница 7: ...4 d IM 240DWNE C Water cooled ...
Страница 8: ...5 e IM 240DWNE R452 Water cooled ...
Страница 9: ...6 f IM 240ANE Air cooled ...
Страница 10: ...7 g IM 240AWNE Water cooled ...
Страница 11: ...8 h IM 240DSNE Remote Air cooled ...
Страница 12: ...9 j URC 240C E 4 Condenser Unit ...
Страница 20: ...17 a CONTROLLER BOARD LAYOUT Main Board Sub Board Combination ...
Страница 37: ...34 2 WIRING DIAGRAM a IM 240DNE C XNE C IM 240DWNE C R452 XWNE C R452 IM 240ANE AWNE ...
Страница 38: ...35 b IM 240DSNE XSNE URC 240C E 4 ...
Страница 69: ...66 Fig 16 Controller Board Board Support Control Box Cover Screw ...


