background image

5

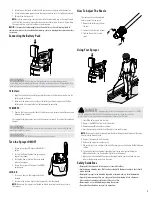
5�  Carefully pour the liquid into the tank� Rinse the measuring cap with clean water�
6�  Screw the measuring cap back onto the sprayer, making sure it is tightened securely�
7�  Reinstall the battery pack�

NOTE: 

If using a measuring container other than the measuring cap, or if using a funnel 

to fill the tank, be sure to thoroughly clean and rinse these items after use� If premixing 

the spray solution, rinse the container used for mixing�

NOTICE:

 It is important to thoroughly clean the unit after each use. Allowing liquid to 

remain in an idle tool for an extended period may cause its moving pieces and connectors 

to seize up.

Connecting the Battery Pack

WARNING:

 Always remove battery pack from your tool when you are 

assembling parts, making adjustments, cleaning, or when not in use. Removing battery 

pack will prevent accidental starting that could cause serious personal injury. 

TO INSTALL:


1�  Align the raised rib on the battery pack with groove in the battery port and place the 

battery pack in the tool�

2�  Make sure the latches on each side of the battery pack snap in place and that the 

battery pack is secured in the tool before beginning operation

TO REMOVE: 

1�  Depress the latches on both sides of the battery pack to release the battery pack and 

remove it from the tool�

For complete charging instructions, see the operator’s manuals for your battery pack and 

charger� 

WARNING:

 Risk of fire or explosion. Spray area must be well ventilated and 

away from sparks or flames. 

WARNING:

 DO NOT use on or near electronic devices.

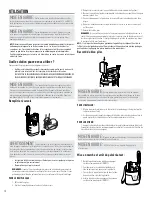
Turn the Sprayer ON/OFF

1�  To turn the sprayer ON, depress the ON/OFF 

button� 

2�  To start the flow of liquid at the spray wand, 

depress the trigger� 

3�  To stop the flow of liquid at the spray wand, 

release the trigger� 

4�  To turn the sprayer OFF, depress the ON/OFF 

button again�

LOCK-ON

1�  To lock-on, depress the trigger and slide it 

forward� 

2�  To release the lock-on, depress the trigger and slide it backward

NOTE:

 Make sure the trigger is not locked on before inserting the battery pack into  

the sprayer�

How To Adjust The Nozzle

The spray nozzle can be adjusted 
from a stream to a fan spray�
1�  Remove the battery pack from 

the tool�

2�  Loosen the nozzle for a stream�
3�  Tighten the nozzle for a fan 

spray�

Using Your Sprayer


DANGER: 

I

mproper application of cleaning solution can result in SEVERE 

INJURY or DEATH. Follow CDC and EPA guidelines for cleaning. Follow the chemical 

manufacturer’s safety instructions and guidelines listed on the SDS sheet. 


1�  Install the battery pack into the tool� 
2�  Depress the ON/OFF button to start the motor�
3�  Remove and hold the handle as shown�
4�  Aim the sprayer nozzle directly at the objects you wish to spray� 

NOTE:

 Make sure to stand far enough from the object being sprayed to prevent the spray 

from splashing back onto you� 
5�  Depress the trigger to start the spray�
6�  Release the trigger to stop the spray�
7�  Always empty, clean, and drain the tank after every use as directed in the Maintenance 

section�

8�  Thoroughly clean the chemical sprayer before storing or before switching to a 

different chemical� See Cleaning the Unit later in this manual�

9�  When you are finished with the sprayer, thoroughly wash your hands and any area 

where skin has been exposed to the spray

Safety Guidelines

• Never point the spray end of the sprayer at yourself or others. 
• Avoid spraying on windy days. Mist can be accidentally blown onto objects that should 

not be sprayed. 

• Never point sprayer in the direction of people or animals; always direct downwind.
• Especially in warmer weather, use sprayer in the early morning or late afternoon. 

Excessive heat can evaporate the mist before it settles. 

• Never smoke, eat, or drink while operating the sprayer. 
• Do not touch nozzle when sprayer is in operation.

Содержание BH90200

Страница 1: ...ld has been dropped damaged left outdoors or dropped into water call customer service at 1 800 406 2005 Do not pull or carry charger by cord Keep cord away from heated surfaces Do not unplug charger by pulling on cord To unplug charger grasp the plug not the cord Do not handle charger plug or charger terminals with wet hands Use safety equipment Always wear eye protection with side shields or gogg...

Страница 2: ...is rule will reduce the risk of serious personal injury Do not use a battery pack or appliance that is damaged or modified Damaged or modified batteries may exhibit unpredictable behavior resulting in fire explosion or risk of injury Do not open or modify the battery pack Released electrolyte is corrosive and may cause damage to the eyes or skin It may be toxic if swallowed Do not expose a battery...

Страница 3: ...duct with damaged or missing parts could result in serious personal injury 1 Inspect the product carefully to make sure no breakage or damage occurred during shipping 2 Don t throw the packaging out until you are sure there was no breakage or damage to your sprayer 3 If any parts are damaged or missing please call 1 800 406 2005 for assistance What s in the Box Sprayer Hose Measuring Cap Spray Wan...

Страница 4: ...ction with side shields or goggles marked to comply with ANSI Z87 1 Failure to do so could result in fluids entering your eyes resulting in possible serious injury WARNING Use safety equipment Protect your eyes skin and lungs while mixing filling spraying and cleaning Failure to do so may result in serious personal injury and damage to property NOTICE Before each use inspect the entire product for...

Страница 5: ... depress the ON OFF button again LOCK ON 1 To lock on depress the trigger and slide it forward 2 To release the lock on depress the trigger and slide it backward NOTE Make sure the trigger is not locked on before inserting the battery pack into the sprayer How To Adjust The Nozzle The spray nozzle can be adjusted from a stream to a fan spray 1 Remove the battery pack from the tool 2 Loosen the noz...

Страница 6: ...cals properly Disposal of contaminated rinse water should be performed according to local ordinances and bylaws Draining the tank If there is any liquid left in the tank after spraying the tank should be drained before cleaning HOW TO CLEAN THE TANK AND WAND ASSEMBLY 1 Fill the tank about one third full with clean water A small amount of mild household detergent may be added NOTE Never use flammab...

Страница 7: ...ol of Warrantor This warranty also does not cover use outside the country in which the product was initially purchased or resale of the product by the original owner Pick up delivery transportation and house calls are not covered by this warranty In addition this warranty does not cover any product that has been altered or modified or repairs made necessary by normal wear or the use of other produ...

Страница 8: ...uit ou qui est peu familier avec les directives utiliser ce produit Conservez le pulvérisateur à l intérieur dans un endroit sécuritaire et bien aéré avec le réservoir à fluide vide Ne laissez pas de passant ou d enfant aller dans l aire de pulvérisation pendant l utilisation du produit L exposition à certains produits chimiques peut s avérer dangereuse N utilisez pas le chargeur si la fiche ou le...

Страница 9: ...ngestion N exposez pas le bloc piles ou l appareil au feu ou à une température excessive L exposition au feu ou à une température supérieure à 130 C 265 F représente un risque d explosion Ne jetez pas la ou les piles dans un feu L élément de pile pourrait exploser Consultez les codes locaux pour connaître les directives d élimination spéciales le cas échéant Vous ne devez ni écraser ni échapper ni...

Страница 10: ...ar l EPA indique que Techtronic Industries société affiliée à HOOVER Inc participe volontairement à un programme industriel de collecte et de recyclage des piles usagées à la fin de leur durée utile lorsqu elles sont mises hors service au Canada et aux États Unis Le programme de recyclage de la RBRC offre une solution de rechange pratique qui permet d éviter que les piles soient jetées à la poubel...

Страница 11: ...change Harnais du réservoir dorsal Manuel d utilisation MISE EN GARDE Ne tentez pas de modifier ce produit ou de créer des accessoires dont l utilisation avec ce produit n est pas recommandée Une telle modifica tion est considérée comme une utilisation inappropriée et est susceptible d entraîner une situation dangereuse pouvant causer des blessures graves Raccord du tube de pulvérisation 1 Insérez...

Страница 12: ... contenant à mesurer ou un entonnoir pour remplir le réservoir assurez vous de bien les nettoyer et les rincer après leur utilisation Si vous prémélangez la solution de pulvérisation rincez le contenant utilisé pour le mélange POUR LE REMPLISSAGE 1 Retirez le bloc piles 2 Dévissez le bouchon doseur et enlevez le du réservoir 3 Remplissez le réservoir avec la quantité d eau désirée maximum de 2 gal...

Страница 13: ...orsque le pulvérisateur fonctionne DIRECTIVES RELATIVES À L ENTRETIEN Si l appareil ne fonctionne pas comme il le devrait est tombé est endommagé a été laissé à l extérieur ou a pris l eau communiquez avec le Service à la clientèle au 1 800 406 2005 avant de continuer à l utiliser Ce produit ne contient aucune pièce réparable Veuillez communiquer avec le Service à la clientèle au 1 800 406 2005 MI...

Страница 14: ...tion de vous offrir un remboursement ou un crédit en magasin le cas échéant équivalant au prix d achat réel en date de l achat initial comme indiqué sur le reçu de vente original Les pièces de rechange peuvent être nouvelles remises à neuf légèrement utilisées ou réusinées à l entière discrétion du garant PERSONNES COUVERTES PAR LA PRÉSENTE GARANTIE La présente garantie limitée s applique uniqueme...

Страница 15: ...ucciones lo utilicen Guarde el pulverizador en un espacio interior seguro y bien ventilado con el depósito de líquidos vacío No permita la presencia de transeúntes o niños en la zona mientras se utiliza este producto La exposición a algunos productos químicos puede ser peligrosa No utilice el cargador si el cable o el enchufe se encuentran dañados Si el producto o el cargador no funcionan como deb...

Страница 16: ...aquete de baterías no se encuentre en uso manténgalo alejado de otros objetos metálicos como sujetapapeles monedas llaves clavos tornillos u otros objetos metálicos pequeños que puedan establecer una conexión de un terminal a otro Si se produce un cortocircuito en los terminales de la batería se pueden generar quemaduras o un incendio Tenga cuidado al manipular las baterías para no provocar un cor...

Страница 17: ...lectar y reciclar estas baterías al final de su vida útil cuando se sacan de servicio en Estados Unidos o Canadá El programa RBRC ofrece una buena alternativa al desecho de las baterías de iones de litio utilizadas en la basura o en caudales de residuos municipales lo que puede ser ilegal en su zona Visite la página www rbrc org call2recycle para obtener información sobre las prohibiciones restric...

Страница 18: ... de la mochila Manual del operador ADVERTENCIA No intente modificar este producto ni crear accesorios no recomendados para su uso con este producto Cualquier alteración o modificación de este tipo se considera uso indebido y podría provocar una condición peligrosa que provoque lesiones personales graves Conexión de la varilla de pulverización 1 Inserte la varilla de pulverización en el mango como ...

Страница 19: ...cla PARA LLENAR 1 Retire el paquete de baterías 2 Desenrosque la tapa medidora y retírela del tanque 3 Llene el tanque con la cantidad de agua deseada hasta 2 galones 4 Mida la cantidad recomendada de líquido La tapa medidora se puede utilizar para medir hasta 4 onzas 5 Vierta con cuidado el líquido en el tanque Enjuague la tapa medidora con agua limpia 6 Vuelva a enroscar la tapa medidora en el p...

Страница 20: ...ene piezas reparables Llame al Servicio de atención al cliente al 1 800 922 9200 ADVERTENCIA Para evitar lesiones personales graves retire siempre el paquete de baterías de la herramienta cuando realice la limpieza o el mantenimiento ADVERTENCIA Use siempre protección para los ojos con protectores laterales o gafas protectoras con la marca de cumplimiento de la norma ANSI Z87 1 Si no lo hace podrí...

Страница 21: ... recibo de venta original Las piezas y los repuestos pueden ser nuevos reacondicionados conpocousoorefabricados segúnelcriteriodelGarante PERSONAS AFECTADAS POR LA COBERTURA DE LA GARANTÍA LIMITADA Esta garantía limitada se extiende únicamente al comprador minorista original con comprobante de compra original del Garante o un distribuidor autorizado de productos del Garante en EE UU Tiendas de int...

Страница 22: ......

Страница 23: ......

Страница 24: ......

Отзывы: