Security Solutions Partner
6
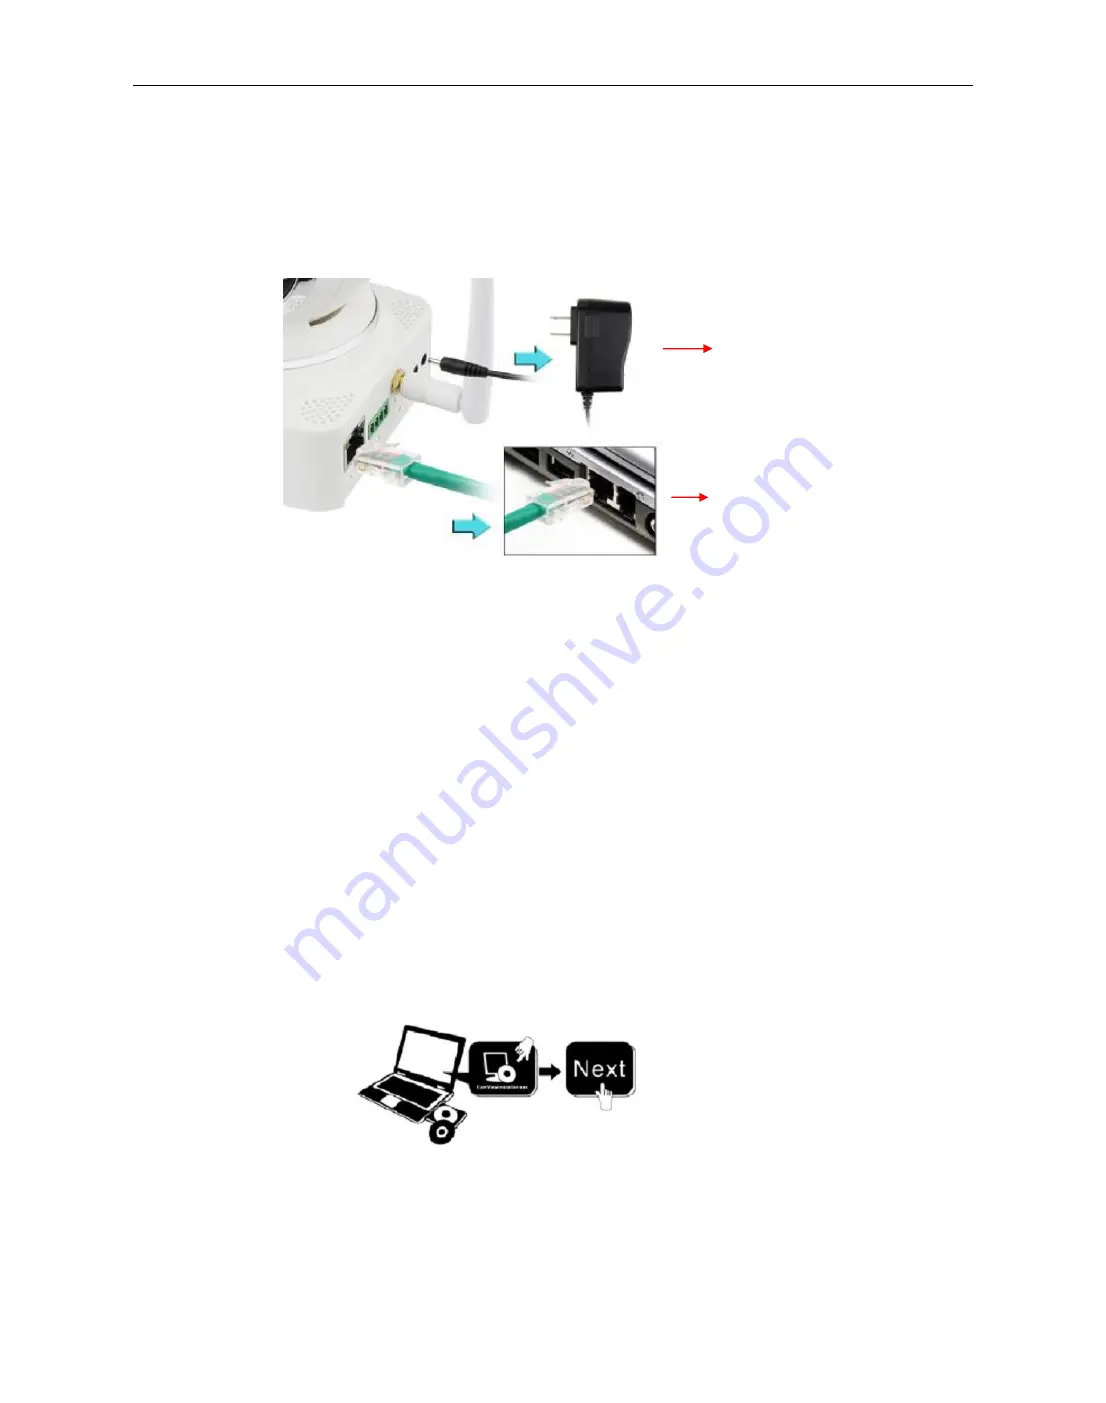
3. Plug the network cable into camera and connect the other end to router/switch
4. It takes approx. 30 seconds to boot up the camera, then you will find the IP address from
“
IP Camera Tool
”
(Figure: 2.1)
5. When the power and network cable is connected, the green LED of the real panel will turn on, the amber
LED will keep flashing, and the Indicator LED in the front of the camera will flash. (This indicator can be
controlled by software)
Figure1.4
1.6 Software Installation
Note
:
For a smoother installation process, we suggest you to turn OFF your Firewall and Antivirus before
install the ActiveX, Don
’
t worry, it is safe.
Install the following software:
1. IP Camera Tool
: Open the CD, double click
“
IPCamSetup.exe
”
, click
next,
you will complete the software
installation. (figure1.6/ 1.7/ 1.8)
For Mac users, please find the search tool under the folder
“
MacOS
”
, there is a portable application which
needs no installation and can be run on Mac simply after a few clicks.
2. ActiveX
: Double click
“
Appinstall.exe
”—“
Next
”—“
Install
”—“
Finish
”
.
Figure1.5
Power up your camera
via the provided power
adapter
Connect the RJ45 cable
to your camera and the
other end goes to your
router


