Security Solutions Partner
37
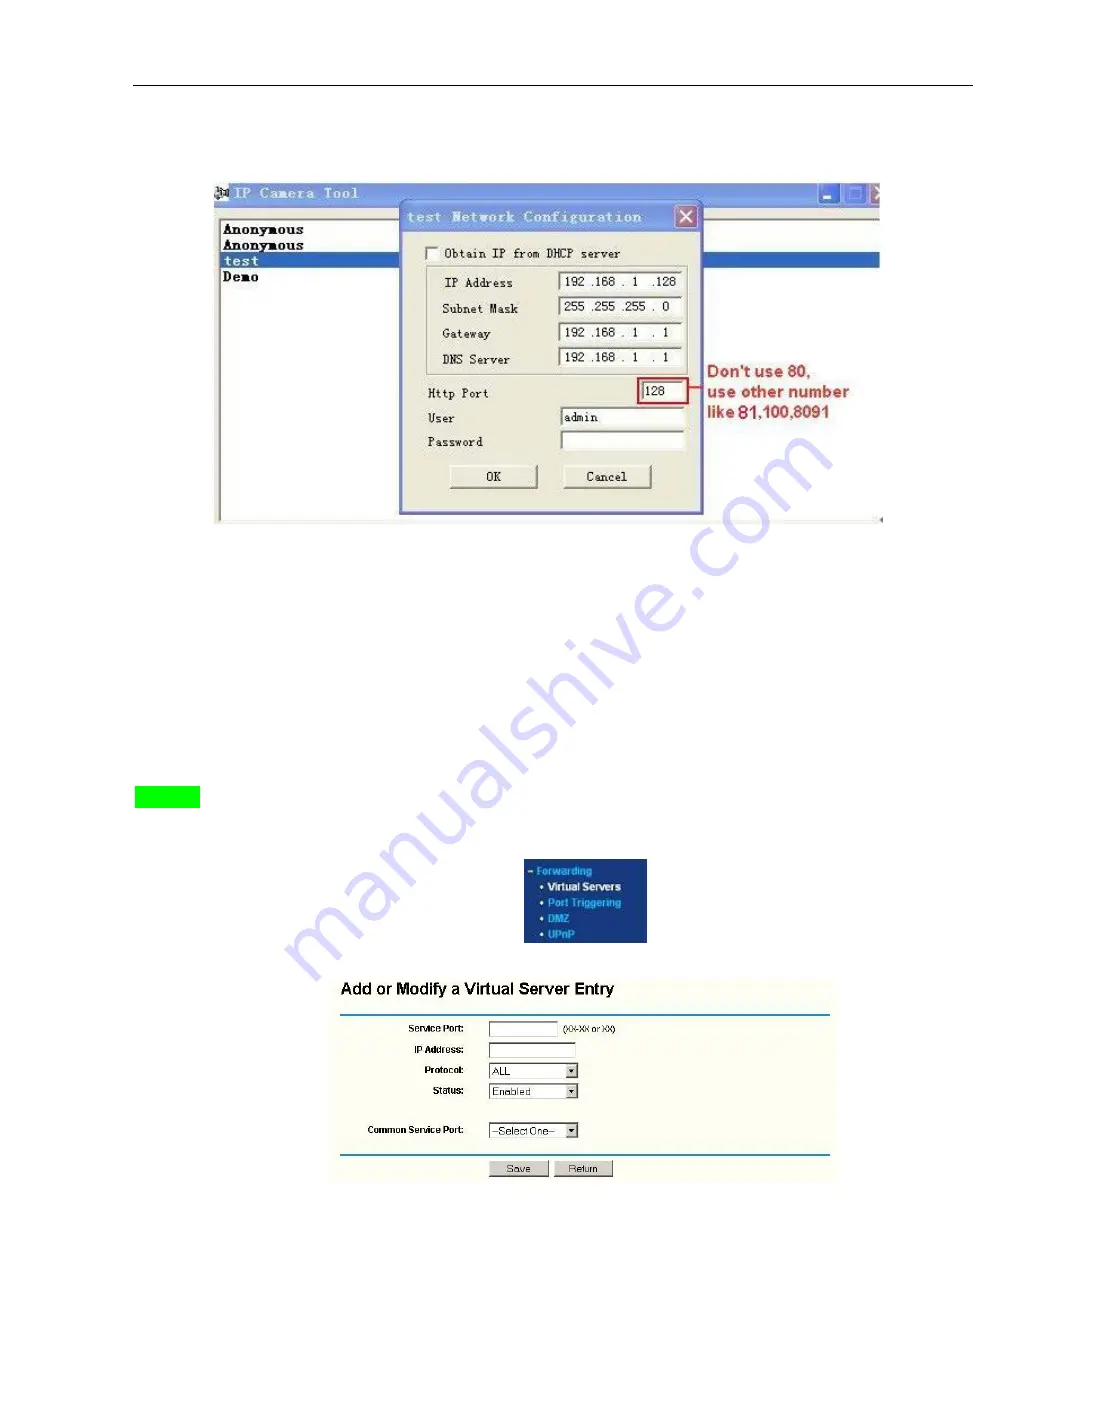
The default port of the camera is
“
80
”
, please change
“
80
”
to any other one you like, such as
“
81
”
,
“
100
”
,
“
8091
”
etc. Click
“
OK
”
, the camera will reboot, wait about 30 seconds
.
Figure 7.4
Make sure the
“
Subnet Mask
”
,
“
Gateway
”
,
“
DNS Server
”
is the same as your router.
Set Port Forwarding in the router
.
This is the most important step. Setting up your port forwarding in your router to the IP of your camera correctly,
then the DDNS will work. Because there are so many kinds of routers from all over the world, it
’
s difficult to
show universal steps, but here are some samples of different routers
’
port forwarding settings as shown below,
just for reference
:
TP-LINK:
1. Login the router
.
2. Choose
“
Forwarding
”
, select
“
Virtual Servers
”
3. Click the Add New button, pop-up below:
Figure 7.5
Fill the service port (
except 80
), IP address of the camera, then click Save
NOTE
: The port and IP address should be the same as Camera.


