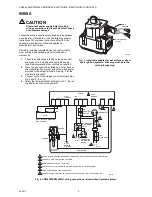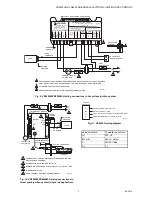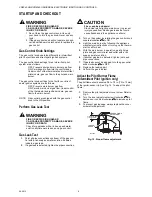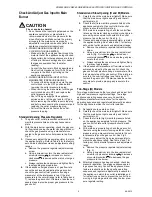
VR8245 AND VR8345 UNIVERSAL ELECTRONIC IGNITION GAS CONTROLS
3
69-2013
CAUTION
Never apply a jumper across or short the valve
coil terminals. This can burn out the heat
anticipator in the thermostat or damage the
electronic intermittent pilot (IP) module.
IMPORTANT:
These gas controls are shipped with protective
seals over inlet and outlet tappings. Do not
remove seals until ready to connect piping.
Follow the appliance manufacturer instructions if
available; otherwise, use the following instructions.
Converting Between Natural And LP Gas
WARNING
FIRE OR EXPLOSION HAZARD
CAN CAUSE PROPERTY DAMAGE, SEVERE
INJURY, OR DEATH
Do not attempt to use a gas control set for natural
gas on LP gas or a gas control set for LP gas on
natural gas.
Convert standard-opening gas controls from natural gas
to LP gas with the conversion kit included with this
TRADELINE® gas control. For conversion kit part
number, see Table 3.
Use Pipe Adapter to Solve Swing Radius
Problems
In some field service applications, space limitations make
it difficult or impossible to thread the gas control onto the
gas supply pipe. This problem can be resolved for many
installations by using a pipe adapter. Install the pipe
adapter on the end of the supply pipe in place of the gas
control by following the same precautions and instructions
that are used for installing the gas control. After the pipe
adapter is installed, attach the gas control to the adapter
as outlined in the Install Pipe Adapters to Gas Control
section.
NOTE: Using a pipe adapter increases the overall length
of the gas control.
Install Pipe Adapter to Gas Control
Install adapter to gas control as follows:
Bushings
1.
Remove seal over gas control inlet or outlet.
2.
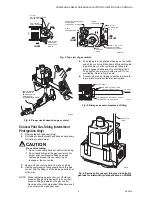
Apply moderate amount of good quality pipe com-
pound to bushing, leaving two end threads bare.
See Fig. 1.
3.
Insert bushing in gas control and carefully thread
pipe into the bushing until tight.
Fig. 1. Use moderate amount of pipe compound.
Location
Locate the combination gas control in the appliance
vestibule on the gas manifold. In replacement
applications, locate the gas control in the same location
as the old control.
Do not locate the gas control where it can be affected by
steam cleaning, high humidity, dripping water, corrosive
chemicals, dust or grease accumulation, or excessive
heat.
For proper operation, follow these guidelines:
• Locate gas control in a well-ventilated area.
• Mount gas control high enough above the cabinet
bottom to avoid exposure to flooding or splashing
water.
• Make sure the ambient temperature does not exceed
the ambient temperature ratings for each component.
• Cover gas control when the appliance is cleaned with
water, steam, or chemicals or to avoid dust and grease
accumulation.
• Avoid locating gas control where exposure to corrosive
chemical fumes or dripping water is possible.
Install Piping to Gas Control
All piping must comply with applicable codes and
ordinances or with the National Fuel Gas Code (ANSI
Z223.1 NFPA No. 54), whichever applies. Tubing
installation must comply with approved standards and
practices.
VR8345Q4563
VR8205Q2555
36E54-214, 36G54-214
VR8304Q4511
36C76-406, 36C76-420,
36C76-463
VR8305Q4146, VR8305Q4500 36D13-208, 36D13-405
36E96-314,
720-082 (7200IPER2-4)
Table 4. Cross Reference. (Continued)
Universal
Replacement
Cross Reference
Universal
Service Part
Honeywell
White-Rodgers
Robert-Shaw
TWO IMPERFECT
THREADS
GAS CONTROL
THREAD PIPE THE AMOUNT
SHOWN IN TABLE FOR
INSERTION INTO GAS CONTROL
APPLY A MODERATE AMOUNT OF
PIPE COMPOUND TO PIPE ONLY
(LEAVE TWO END THREADS BARE).
M3075B
PIPE

