


E2 - 19
(7)[Type-a]
(2)
(2)
(4)
(4)
(3)
(c)
(6)
A
D
C
F
E
(a)
(b)
(5)
(8)[Type-c]
(7)
B
(d)
G
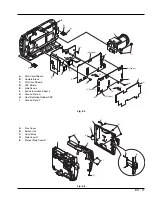
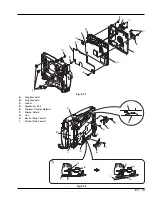
Fig. 4-2
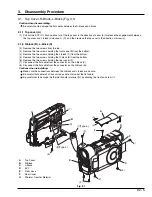
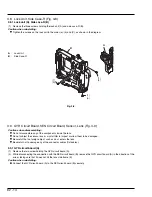
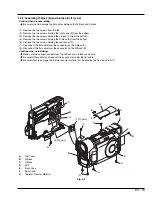
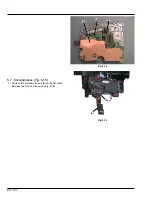
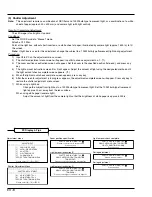
4.2.2 Separating R-block (B) and L-block (C) (Fig. 4-2)
Caution when disassembling:
Be careful not to damage the flat cables between the R-block and L-block.
(2) Remove the two screws from the top.
(3) Remove the two screws holding the front case (E) from the bottom.
(4) Remove the two screws holding the L-block (C) from the bottom.
(5) Remove the two screws holding the R-block (B) from the bottom.
(6) Remove the two screws holding the rear cover (F).
(7) Disconnect the flat cable from the connector on the L-block (C).
(8) Disconnect the flat cable from the connector on the R-block (B).
Cautions when reinstalling:
Make sure the connections between the R-block and L-block are secure.
Be careful that cable (d) of lock unit does not enter under the flat cable.
Be careful not to damage the thermal transfer material (G) by allowing the front case to hit it.
A :
Top Cover
B :
R-Block
C :
L-Block
D :
EVF
E :
Front Case
F :
Rear Cover
G :
Thermal Transfer Material