4 - 51
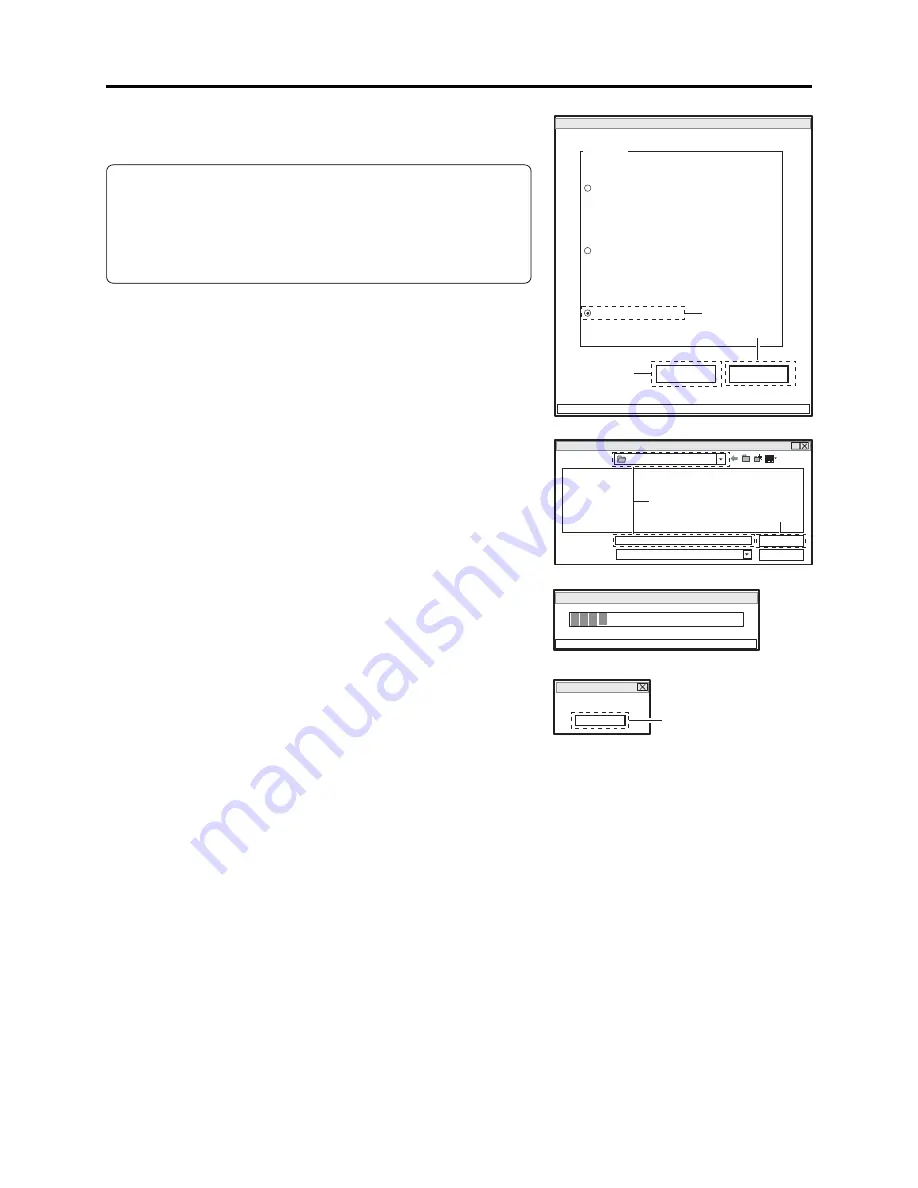
3) Choose Original Data Backup on the DATA INITIALIZE
MENU screen.
Note:
Do not choose “Initial Data Write” on the DATA
INITIALIZE MENU.
Refer to “6-4-1 Initial Data Write” after backup for
“Initial Data Write”.
4) Click the EXECUTE button on DATA INITIALIZE
MENU screen to proceed with the BACKUP FILE
SELECT screen.
5) From the BACKUP FILE SELECT screen, select or set
the names of folder and file in which the data is stored.
This section refers to the folder and file as “EEP” and
“backup.eep” for explanation: Freely select and set easy-
to-understand names.
6) Click the SAVE button on BACKUP FILE SELECT
screen to start backup.
The progress status can be confirmed using the
PROGRESS STATUS dialog.
7) When backup is complete, the BACKUP FINISHED
dialog will appear: Click the OK button in dialog to
restore the DATA INITIALIZE MENU screen.
8) Then click the RETURN buttons on each menu screen to
restore the MODEL SELECT screen, and click the EXIT
button on MODEL SELECT screen to exit the
adjustment program.
9) Disconnect the DVD video camera/recorder, jig/tool and
power supply, and then replace the MAN circuit board.
DATA INITIALIZE MENU screen
Data Initialize
Initial Data Write
EXECUTE
RETURN
CONNECTION
FILE MENU
Original Data Backup
Backup Data Write
4
3
8
PROGRESS STATUS dialog
BACKUP FINISHED dialog
?
Look in (T):
File name (N):
File of type (T):
backup
.eep
*
Save (S)
Cancel
EEP
5
6
BACKUP FILE SELECT screen
EEPROM Data Backup
PLEASE WAIT A MOMENT
FINISHED
FINISHED READING DATA
OK
7
Troubleshooting > Special Functions


