--- 25 ---
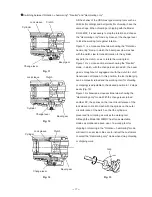
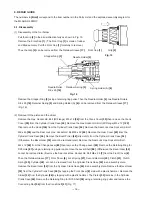
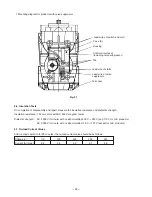
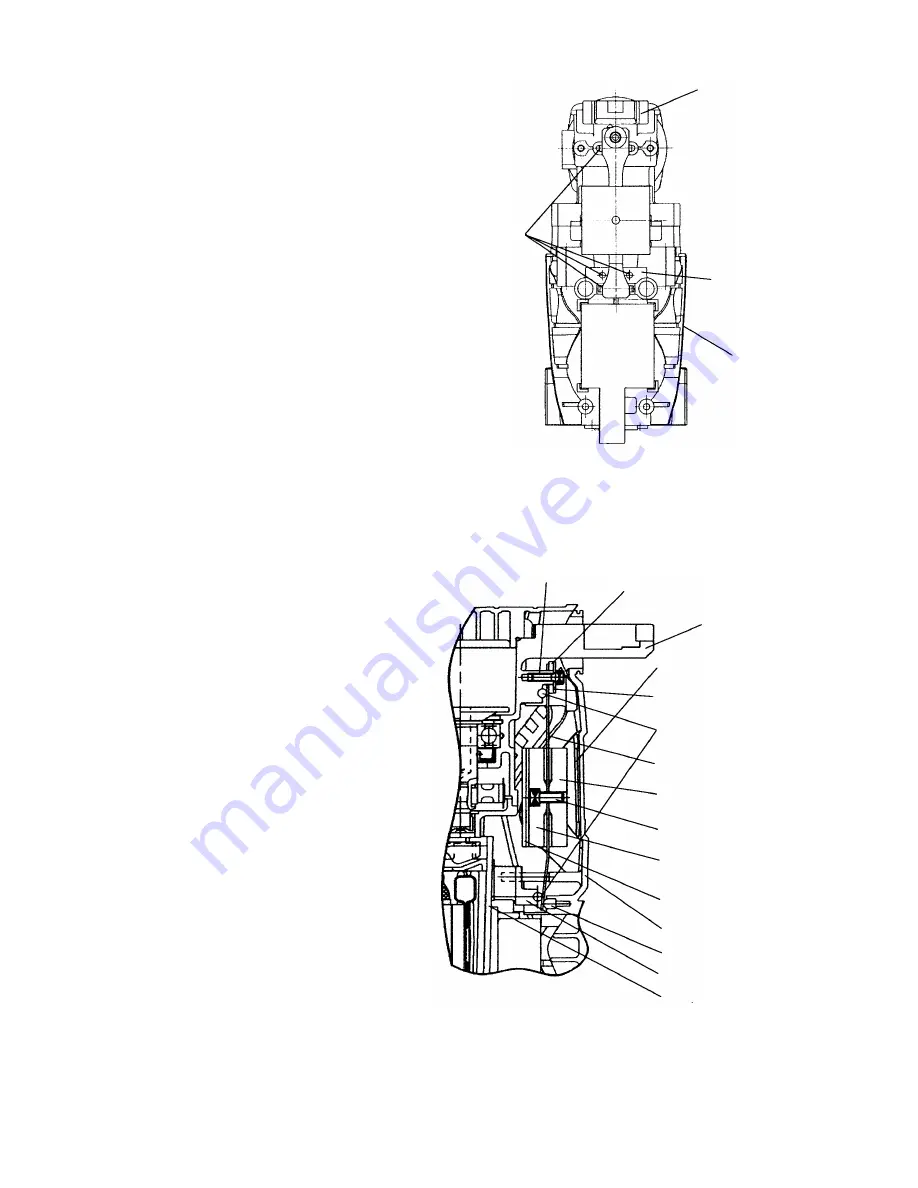
Fig. 28
Housing Ass'y
[123]
Spring Base
[134]
Mount the Spring Base
[134]
to the Housing
Ass'y
[123]
being careful of the mounting
direction. Mount one Needle Roller
[70]
to the
Cylinder Crank Case
[46]
and three Needle
Rollers
[70]
to the Spring Base
[134]
. Before
mounting, apply grease to the Needle Rollers
[70]
to avoid being removed (Fig. 28).
Cylinder Crank Case
[46]
Needle Roller
(4 pcs.)
[70]
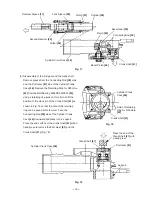
Mount the assembly of the Leaf Spring
[66]
,
Weight (A)
[74]
and Weight (B)
[73]
to the
Cylinder Crank Case
[46]
. Then mount Spring
Bumper (A)
[67]
and Washer
[68]
to the
Cylinder Crank Case
[46]
in this order and fix
it with the Seal Lock Hex. Socket Hd. Bolt
M4 x 12
[69]
. At this time, check that the Leaf
Spring
[66]
is fitted in the center of the
Needle Rollers
[70]
and the Leaf Spring
[66]
is curved to the main body.
Apply grease to Spring Bumper (B)
[95]
and
mount it to the Back Cover
[96]
being careful
of the mounting direction. To replace Rubber
Sheet (A)
[94]
, sufficiently degrease the
adhering surface of the Back Cover
[96]
and
adhere Rubber Sheet (A)
[94]
to the Back
Cover
[96]
securely.
Mount the Back Cover
[96]
to the Cylinder
Crank Case
[46]
and the Housing Ass'y
[123]
.
At this time, check that Spring Bumper (B)
[95]
and Rubber Sheet (A)
[94]
are adhered
and the Needle Rollers
[70]
are mounted to
the Cylinder Crank Case
[46]
and the Spring
Base
[134]
(Fig. 29).
Weight (B)
[73]
Spring Bumper (A)
[67]
Cylinder Crank
Case
[46]
Rubber Sheet (B)
[72]
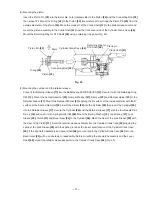
Fig. 29
Washer
[68]
Seal Lock Hex. Socket
Hd. Bolt M4 x 12
[69]
Seal Lock Hex. Socket
Hd. Bolt M5 x 12
[71]
Leaf Spring
[66]
Rubber Sheet (A)
[94]
Needle Roller (4 pcs.)
[70]
Weight (A)
[74]
Spring Base
[134]
Back Cover
[96]
Spring Bumper (B)
[95]
Housing Ass'y
[123]
Содержание DH 40MRY
Страница 39: ......


