GB - 16 -
0.25 MHz steps using
“
“ or “
”
buttons, you can
select the 224.25MHz .When you type and select the
frequency, the corresponding station will be displayed.
• To store the st ation to the programme number se-
lected, select
“Store”
option using
“
“ or “
”
but-
ton and then press
“
“ or “
”
button to store it.
• Now as you had selected the
“Frequency Search”
,
the tuning mode of the program is stored as Fre-
quency Search Mode.
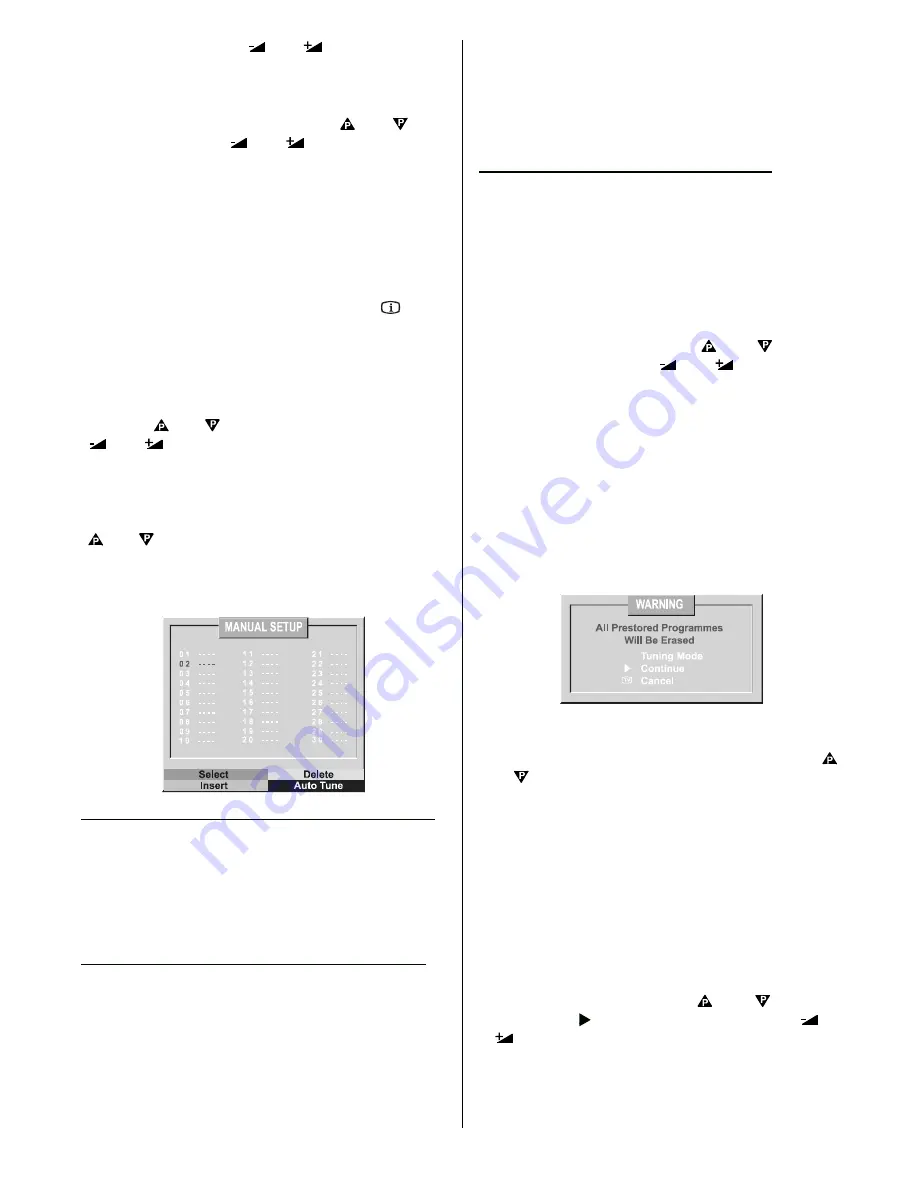
Manual Setup
The
Manual Setup
Menu
displays the programme
names and numbers. You can use this menu to delete
or insert a channel and to auto store the programmes.
This menu can be accessed directly via the “
”
INFO
button provided the TV is not already displaying a menu.
The
Manual Setup
Menu
can be reached via
Install
in
the
Main Menu.
Press the Blue button on the remote control handset this
will display the
Install
menu then select
Manual Setup
using the
“
“ or “
”
buttons. Next press either of the
“
“ or “
”
buttons.
When you have entered the
Manual Setup
all the pro-
gramme names and numbers will be displayed on the
screen. Programme number one (1) will be in red and
flashing while all the others are in white. By using the
“
“ or “
”
buttons you can move the flashing display
to select another programme number and name.
Pressing the
RED
button on the remote control will re-
tune the channel on the flashing programme number.
To delete a channel from a programme number:
• To move the red flashing display on to the channel
you want to delete.
• Press the
YELLOW BUTTON
on the remote con-
trol. Now the channel will be deleted and all the other
channels below this programme number will be
moved up one position.
To insert a channel into a programme number:
• Move the red flashing display on to the channel you
want to insert.
• Press the
RED BUTTON
on the remote control.
That channel will now be displayed on the screen.
• Move the red flashing display on to the required pro-
gramme number position.
• Press the
GREEN BUTTON
on the remote control
this will insert the channel shown on the screen into
that programme number position. The channel that
was occupying that position will be moved down one
and the position from where the selected channel
was moved from will be filled by the channel below.
APS (Automatic Programming System)
The APS menu appears when you switch on your
TV for
the first time.
APS automatically tunes your TV into the TV channels
received in your area.
If you wish to run the APS at another time you will have
to do the following.
• Press the
BLUE
button on the remote control hand-
set this will display the Install menu then select
MANUAL SETUP
using the “
“ or “
” buttons.
Next press either of the “
“ or “
” buttons.
• You are now in the
MANUAL SETUP
menu.
• Press the
BLUE
button on the remote control hand-
set. This will select AutoTune and start APS. (Press-
ing the TV button on the remote control can stop this
operation.)
When APS has finished a t
able of all the channels tuned
in will be displayed on the screen. If you are not happy
with the line up of the channels this can be changed.
Please refer to the section on how to delete and insert
a channel from a programme number located in the
MANUAL SETUP
section.
• If you do not want the stations to be stored automati-
cally, cancel APS pressing
“TV”
button.
• If you want to continue, then first by pressing the
“
“
or “
”
buttons, come to the
“Tuning Mode ”
item
and select the mode at which your TV will run the
APS. If you select Channel Tuning Mode, APS will run
according to Channel Tuning Mode and will auto-
search according to the Channel numbers of the sta-
tions in your area. If you select Frequency T
uning
Mode, APS will run according to Frequency Tuning
Mode and will auto-search according to the frequen-
cies of the stations in your area. Selected tuning
mode will appear in the highlightened bar at the bot-
tom of the
WARNING
menu.
• Then, after selecting the Tuning Mode if you want to
start APS, by pressing the
“
“ or “
”
buttons,
come to the
“
Start
”
item and by pressing
“
“ or
“
”
button start the APS.
• When you start APS the below menu will appear on
the screen.
Содержание C28W440N
Страница 1: ...Users Guide C28W440N CL28W440AN ...


