


-21-
MN1-5008 Rev. 7
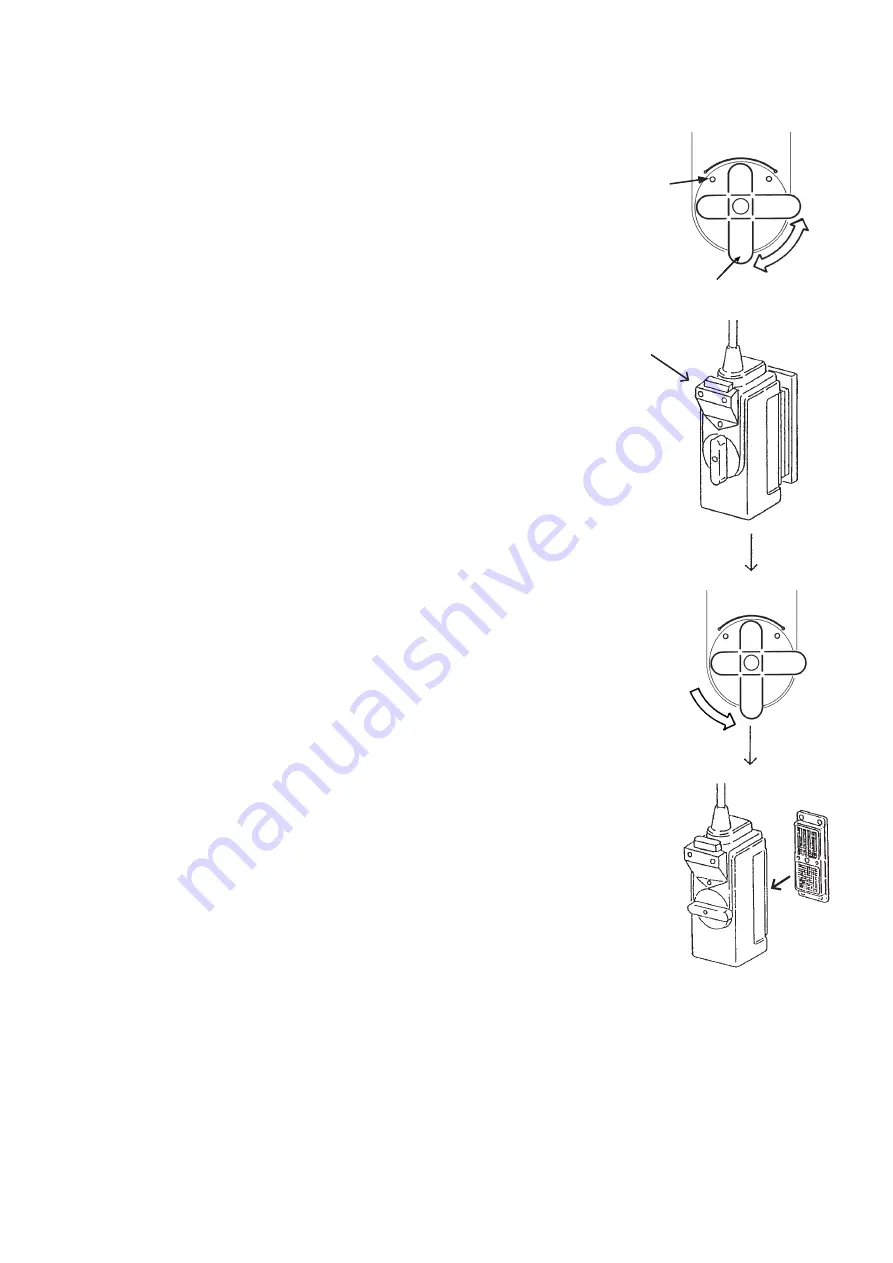
4-5. Removing from the ultrasound diagnostic instrument
The lock lever of the connector moves over the range shown in the figure
at right.
Align the ○ mark with the LOCK or RELEASE position and lock or
release the probe connector.
Use the procedure below to remove the scanner from the probe
connector.
• Removal procedure
The scanner is removed when in one of the following states.
• The power switch is set to OFF.
• The image displayed on the ultrasound diagnostic instrument is
frozen.
1. Remove the cable for driving to the upper part of the connector box.
2. Turn the connector lock lever to align the ○ mark on the lever with
the RELEASE position.
3. Firmly grasp the connector unit and pull it out from the probe
connector of the ultrasound diagnostic instrument.
This completes the removal of the scanner.
After use, perform washing, disinfection and sterilization of the scanner
by following the procedure in section 5 “Washing, Disinfection and
Sterilization”.
If the scanner will not be used for an extended period of time, store it by
following the instructions in section 6 “Storage”.
Lock lever
Movable
range
○ mark
LOCK
RELEASE
RELEASE
LOCK
Small connector
Содержание ASU-1003
Страница 2: ...MN1 5008 Rev 7 ii ...
Страница 6: ...MN1 5008 Rev 7 vi ...
Страница 14: ... 8 MN1 5008 Rev 7 Label A 2 Storage case Label B ...
Страница 22: ... 16 MN1 5008 Rev 7 ...
Страница 34: ... 28 MN1 5008 Rev 7 ...
Страница 36: ... 30 MN1 5008 Rev 7 ...
Страница 38: ... 32 MN1 5008 Rev 7 ...
Страница 42: ... 36 MN1 5008 Rev 7 ...