Service 37
PHOTO NO. 3034
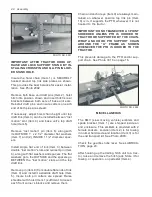
4. Clean entire clutch and lock collar assem-
bly. Replace broken or worn parts and re-
assemble with leaf springs between internal
“step” of driving keys and clutch hub. OB-
SERVE “STEP” AND LEAF SPRING ARE
ASSEMBLED AWAY FROM DIRECTION
OF ROTATION. See Photo 3035.
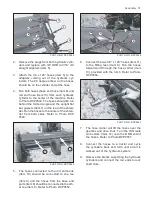
5. Reinstall 3 balls previously removed and re-
assemble lock collar with snap ring. Thor-
oughly lubricate overrun clutch while rotat-
ing it.
PHOTO NO. 3035
top half and reseat it on bottom half. Apply
pressure, or tap lightly, until top half is firmly
in place. Replace, and retorque the 12 previ-
ously removed socket head bolts.
Commercial anaerobic sealants have installa-
tion and SAFETY CAUTIONS on their containers.
These should be adhered to.
PTO-OVERRUN CLUTCH
All 4 PTO’s have an overrun clutch at their juncture
with the gearbox input shaft. This includes a sliding
lock collar identical to the lock collar at the tractor
end.
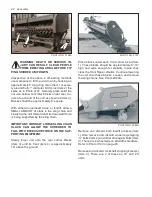
1. Depress collar (Item 1) and extract external
snap ring (2), allowing collar to slide off. See
Photo 3349.
PHOTO NO. 3349
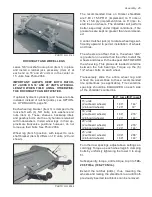
2. Insure balls in 3 holes (Item 1) are preserved
for reinstallation. Contract internal snap ring
(Item 2) and at same time axially withdraw
clutch hub (Item 3), along with 2 driving keys
and 2 leaf springs from the external enclosure.
See Photo 3034.
IMPORTANT: PARTICULARLY NOTE DIREC-
TION OF ORIGINAL FACTORY CLUTCH KEYS
AND LEAF SPRINGS INSTALLATION. INSURE
CLUTCH IS REASSEMBLED THE SAME WAY,
OTHERWISE IT WILL NOT FUNCTION.


