2
3
Vedpak 120_Version 3_01.2018
160783
FEATURES:
Supports up to 3 CCD Camera inputs (Mini DIN Connector).
Extra RCA input for multimedia (VCD, DVD, Game device).
Provide 1 Video / 1 Audio signal output.
Auto detection for NTSC / PAL System.
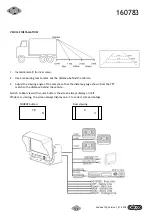
Signal Trigger for Cam A / Cam B / Cam R / AV View.
Auto brightness adjustment by CDS.
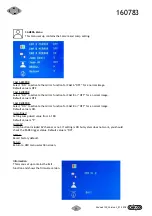
Back mirror status selection via OSD.
Video output select via OSD (Back / Door / AV).
Power latching.
Switch timer (2-100 sec.) Step selection via OSD (Cam A / Cam B / Cam R / AV View).
INSTALLATION OF MONITOR:
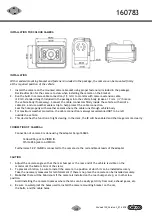
1. Check the package and make sure all parts are included.
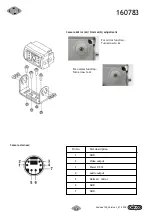
2. Clip the sun-hood on to the monitor and make sure it is installed properly.
3. Install the monitor on to the bracket.
4. Adjust the monitor to an appropriate / comfortable viewing angle before tightening the screws.
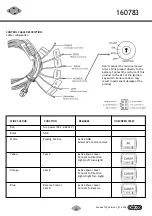
5. Connect the control cable to the power socket which is located at the rear side of the monitor.
6. Monitor installation is now completed. Each control cable wire is attached with a sticker to indicate its signal
function.
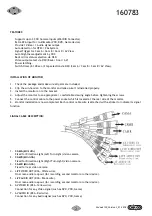
SIGNAL CABLE DESCRIPTION:
1.
CAM A (Mini din)
Fixed for Direction Light (Left Turn Light) vision camera
2.
CAM B (Mini din)
Fixed for Direction Light (Right Turn Light) vision camera
3.
CAM R (Mini din)
Fixed for rear vision camera
4. LIVE VIDEO OUT (RCA - White wire).
On screen audio loop out (for recording, second monitor or other device).
5. LIVE AUDIO OUT (RCA - Black wire).
On screen audio loop out (for recording, second monitor or other device).
6. AV VIDEO IN (RCA - Yellow wire).
Connection for any Video signal (such as DVD, VCD, Game)
7. AV AUDIO IN (RCA - Red wire).
Connection for any Audio signal (such as DVD, VCD, Game)

