© 2002, Hayton Systems
Page 4
3.
Quick Installation
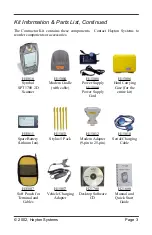
The ATS kit includes all of the parts needed to begin operating. Unpack the kit
and follow these steps:
1. Plug one end of the
phone cord
into the
LINE IN port
on the back of the
cradle
and the other end into a wall jack.
2. Plug the
power supply
into the back of the cradle (plug marked “
9 VDC
”).
Plug one end of the power cord to the power supply and the other end into a
wall outlet.
3. Place the
spare battery
into the charging slot on the top of the cradle
(contacts down and facing the back of the cradle
). Gently push -
DO NOT
FORCE
- the battery down until the charging light illuminates (leftmost light
on the cradle). A red light means the battery is charging and a green light
means it is fully charged.
4. Remove the
terminal
from the yellow carry
pouch
. Place it in the cradle for
approximately 30 minutes to charge the battery fully. The status light for the
battery being charged inside the terminal is the rightmost light on the cradle.
Again, red means charging, green means fully charged.
5. Once the battery in the terminal is fully charged you are ready to start setting
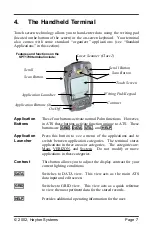
up the terminal. Press the red button on the terminal to turn it on.
6. Remove the yellow
stylus
from the back of the terminal.
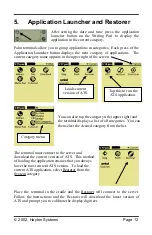
7. Using the stylus, tap the
Application Launcher
icon until the
All
category name shows on the upper right corner of the screen.
8. Using the vertical scroll bar on the screen if necessary, find the
Prefs
icon . Tap on the
Prefs
icon.
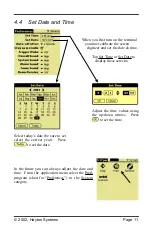
9. Set (if they are not correct) the date and time by tapping the desired
“outlined” item on the screen then selecting the correct settings.


