65
Installation
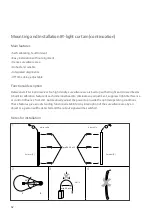
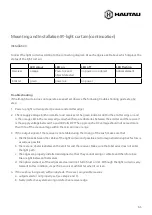
Connect the light curtain according to the connecting diagram� At each edge is a LED above which displays the
status of the light curtain:
Trouble shooting
If the IR-light curtain does not operate as expected, observe the following trouble shooting guide step by
step:
1� Power up light curtain system (receiver and emitter edge)�
2� Check supply voltage both on emitter and receiver� Is the green indicator LED in the emitter edge on and
is the orange LED in the receiver edge on when there are obstacles between the emitter and the receiver?
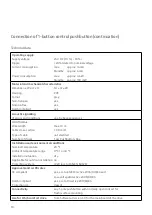
Is the supply voltage between 14 and 30 Volts DC? The ripple on the DC voltage should not exceed more
than 10% of the mean voltage within the min� and max� range�
3� If the output signal of the receiver is not stable during the closing of the sash, make sure that
a� the distance between the cables of the light curtain and possible electromagnetical disruptive factors is
as wide as possible�
b� there are no obstacles between the emitter and the receiver� Make sure that obstacles does not enter
the light path�
c� the edges are properly installed and aligned so that they cannot swing or vibrate and therefore lose
line or sight between themselves�
d� the optical elements of the edges are clean and not full of dust or dirt� Although the light curtain is very
tolerant to this condition, its performance is much better when it is clean�
4. If the sash is closing even with an abstacle, there are two possible reasons:
a� output selector not properly set (see step 2 and 3)�
b� faulty / defective system wiring or defective receiver edge�
LED colour
LED on
LED off
LED flashing
Receiver
orange
Power ok and
object detected
no power or no object
optical element
Emitter
green
power ok
no power
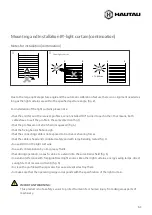
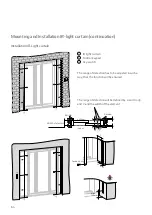
Mounting and Installation IR-light curtain (continuation)
Содержание HS
Страница 9: ...9 ...
Страница 21: ...21 145 4 5 x B 22 115 40 Ø7 B 115 10 17 Positioning of the drive pin Bolts may extend by max 4 mm ...
Страница 27: ...27 2x M4 x 10 Torx T20 2 2x M4 x 10 Torx T20 2 2x M4 x 10 Torx T20 2 Connect drive pin with toothbelt ...
Страница 34: ...34 Mounting of rollers From a sash weight of 200 kg 2 additional 400 kg rollers must be used ...
Страница 71: ...71 Notes ...


