For technical questions, please call 1-888-866-5797
44
TOOL LIBRARY
Additional Tests
THE TOOL LIBRARY
44
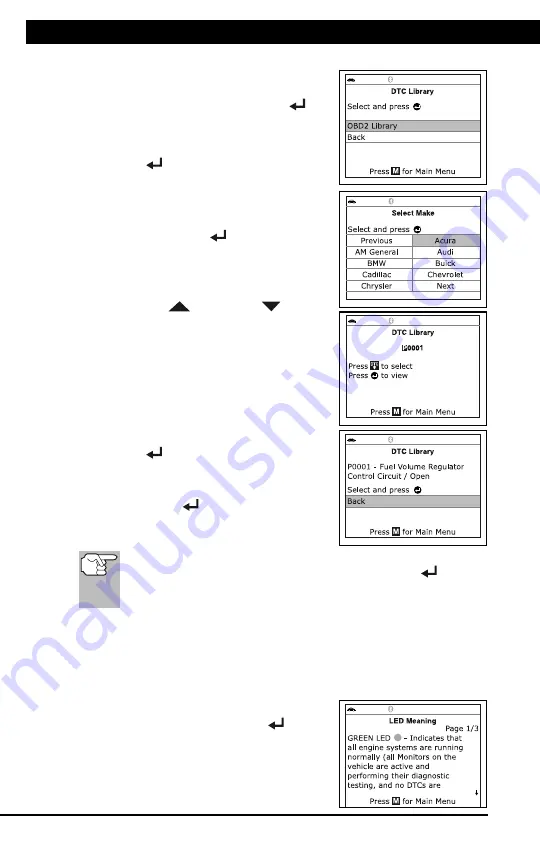
Using the DTC Library
1.
From the Tool Library menu, select
DTC Library
, then press
ENTER
.
The Select Library screen displays.
2.
Select
OBD2 Library
, then press
ENTER
.
The Select Manufacturer screen
displays.
3.
Select the desired vehicle manufacturer,
then press
ENTER
.
The Enter DTC screen displays.
The screen shows the code
“P0001,” with the “P” highlighted.
4.
Use the
UP
and
DOWN
buttons,
as necessary, to scroll to the desired DTC
type (P=Powertrain, U=Network, B=Body,
C=Chassis), then press
DTC/FF
.
The selected character displays solid,
and the next character is highlighted.
5.
Select the remaining digits in the DTC
in the same way. When you have
selected all the DTC digits, press
ENTER
to view the DTC definition.
6.
When you have finished viewing the
DTC definition, highlight
Back
, then
press
ENTER
to return to the Enter
DTC screen and enter additional DTCs;
or, press
M
to return to the Main Menu.
If a definition for the DTC you entered is not available, an advisory
message shows. Highlight
Back
, then press
ENTER
to return
to the Enter DTC screen and enter additional DTCs; or, press
M
to
return to the Main Menu.
Viewing LED Meanings
The
SYSTEM STATUS
LEDs on the Scan Tool provide a visual
indication of the I/M Readiness status of the vehicle under test. The
LED Meanings
function provides a description of the meanings of the
green, yellow and red
SYSTEM STATUS
LEDs.
1.
From the Tool Library menu, select
LED
Meaning
, then press
ENTER
.
The LED Meaning screen displays.
Additional Tests
ADJUSTMENTS AND SETTINGS
45
The screen provides a description of the meanings of the green,
yellow and red
SYSTEM STATUS
LEDs.
2.
When you have finished viewing the LED meanings, press
M
to
return to the Main Menu.
ADJUSTMENTS AND SETTINGS
The Scan Tool lets you make several adjustments and settings to
configure the Scan Tool to your particular needs. The following
adjustments and settings are available:
Adjust Brightness
: Adjusts the brightness of the display screen.
Audible Tone:
Turns the Scan Tool’s audible tone “on” and “off.”
When turned “on,” a tone sounds each time a button is pressed.
Footer Messages
: Turns the navigational “footers” at the bottom of
most display screens “on” and “off.”
Hotkey Legend
: Shows functional descriptions for the Scan Tool’s
hotkeys.
Language Selection
: Sets the display language for the Scan Tool
to English, French or Spanish.
Unit of Measurement
: Sets the Unit of Measurement for the Scan
Tool’s display to USA or metric.
To enter the Tool Settings mode:
1.
While linked to the vehicle, press and
release
M
.
The Main Menu displays.
2.
Select
Tool Settings
, then press
ENTER
.
The Tool Setting menu displays.
3.
Make adjustments and settings as follows.
Adjusting Display Brightness
1.
Select
Adjust Brightness
in the Tool
Settings menu, then press
ENTER
.
The Adjust Brightness screen displays.
2.
Press
UP
and
DOWN
to make
the display lighter or darker, then press
ENTER
to save your changes.
To return to the Tool Settings menu without making changes,
press
M
.


